In the early days of AI image generation, running these powerful applications directly on your hardware was the only option available. However, I always suspected that eventually, someone with the right expertise would develop Docker images to streamline the process. Today, thanks to the incredible work of talented developers, deploying ComfyUI through Docker containers that leverage GPU acceleration for lightning-fast AI image generation has never been easier.
What Makes ComfyUI the Perfect Self-Hosted AI Image Generator?
ComfyUI represents the ultimate solution for creative individuals looking to transform text into stunning visual artwork. This powerful, free, and open-source platform enables you to generate remarkable images from text prompts through an advanced yet intuitive node-based interface that offers unparalleled flexibility and control.


While ComfyUI does have a slight learning curve, the versatility it offers is exceptional. With over 65,000 GitHub stars and more than 3,000 commits, ComfyUI has attracted a vibrant community of developers and artists collaborating to create innovative custom nodes and workflows that continuously expand its capabilities.
Essential Requirements for Running ComfyUI in Docker
Before getting started with your self-hosted AI image generator, make sure you have:
- Linux-based system with Docker installed – Ubuntu works excellently, though PopOS is another excellent choice if you prefer a desktop GUI environment
- NVIDIA GPU with 6GB+ VRAM – I personally use an ASUS ROG STRIX GeForce RTX 2080TI-O11G Overclocked with 11GB VRAM, but any GPU with 6GB or more will work (more VRAM enables larger, more detailed images)
- Latest NVIDIA GPU drivers installed
- Either Game or Studio edition drivers will work fine
- No need to install drivers inside the Docker container – just ensure they’re functioning correctly on your host system
Step-by-Step Guide to Installing ComfyUI with Docker Compose
If you’re new to Docker and need guidance on setting it up, I recommend checking out our Self Hosting 101 – A Beginner’s Guide. These tutorials cover everything you need to know about configuring Docker on your server. While using UID and PID is best practice for security, we’ll use root for this tutorial since we’re working with a local machine that won’t be exposed to the internet.
Here’s the Docker Compose file you’ll need to deploy ComfyUI:
services:
    comfyui-boot:
        stdin_open: true
        tty: true
        container_name: comfyui-cu124
        ports:
            - 8288:8188
        volumes:
            - '/docker/ComfyUIdocker:/root'
        image: yanwk/comfyui-boot:cu124-slim
        deploy:
            resources:
                reservations:
                    devices:
                        - driver: nvidia
                          count: all
                          capabilities:
                              - gpu
This ComfyUI Docker implementation grants the container full access to your NVIDIA GPU, enabling it to handle the intensive computational workload required for image generation. The configuration maps your files to /docker/ComfyUIdocker, creating a centralized location for all your models, checkpoints, LoRAs, and generated images.
Important: Be sure to customize the mounted volume path to your preferred location before deploying ComfyUI.
Acquiring High-Quality AI Models from CivitAI
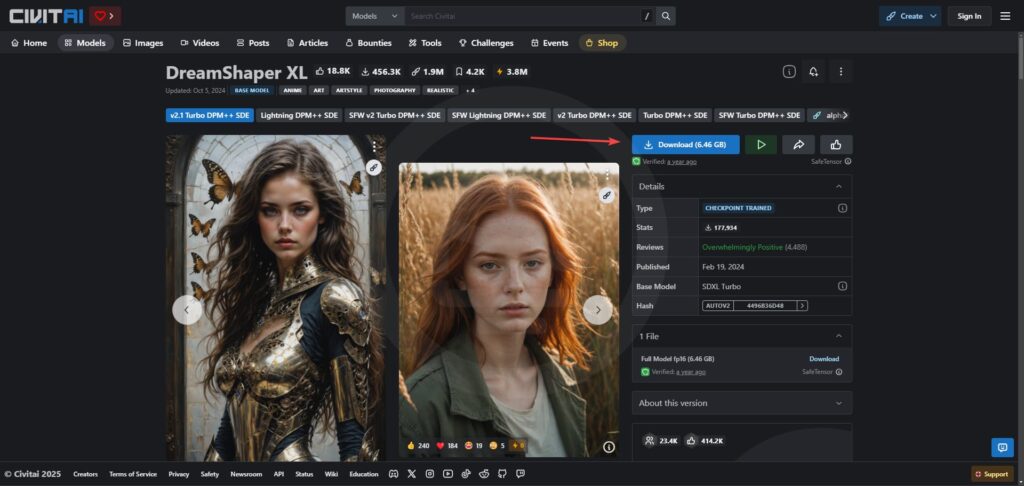
To maximize your image generation capabilities, you’ll want to start with a high-performance model. I recommend beginning with a turbo model that dramatically accelerates the image generation process. Follow these steps:
- Create a free account on CivitAI
- Download the exceptional DreamShaper XL Turbo v2.1 model
- Place the downloaded model in the checkpoints folder established in your Docker Compose setup (
/ComfyUI/models/checkpoints)
ComfyUI Web Interface: Getting Started for Beginners
When you access the ComfyUI web interface for the first time, you’ll see something like this:
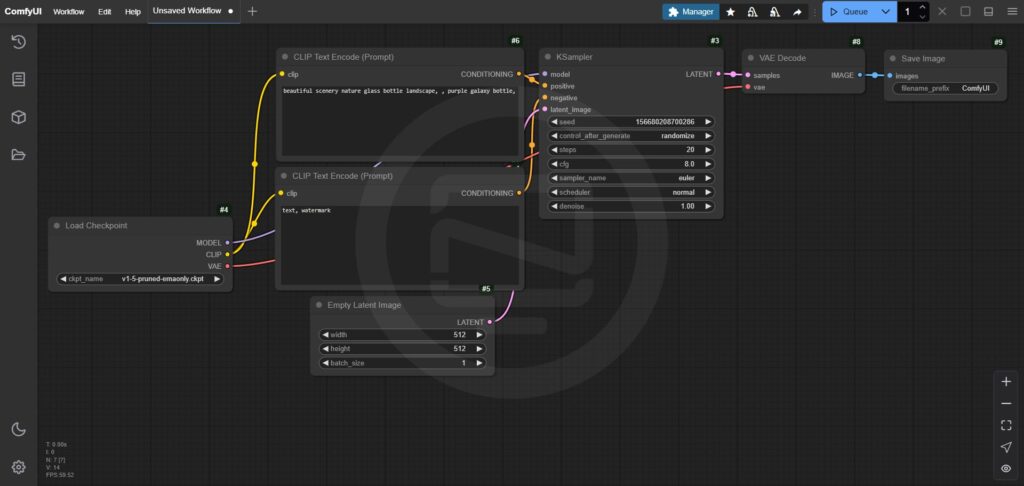
You might notice the blue queue button at the bottom of the canvas, which can be repositioned to the top if you prefer that layout.
Understanding ComfyUI’s Workflow Architecture
ComfyUI’s workflow revolves around two fundamental components:
- Nodes – Think of these as specialized function blocks that perform specific tasks. Each node requires:
- Inputs: Text prompts and data flowing into the node
- Outputs: Generated images or processed data sent to the next node
- Parameters: Customizable settings that control how the node operates
- Links – These connections allow data to flow between nodes, creating a powerful pipeline for generating complex images from text prompts
Quick Start Configuration Guide
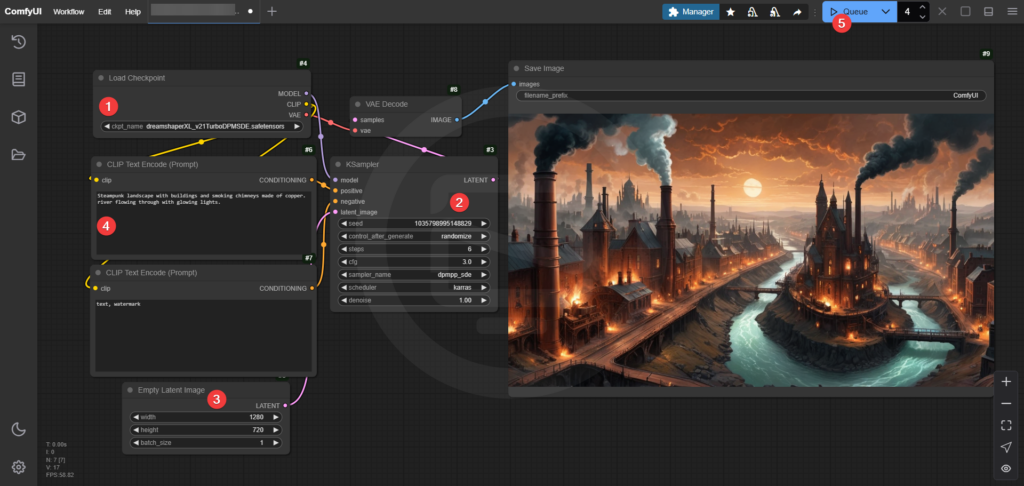
Here’s how to set up ComfyUI with the DreamShaper XL Turbo model (you may need to refresh the UI to see newly added models, or restart the Docker container if they don’t appear):
- In the Load Checkpoint box, select
dreamshaperXL_v21TurboDPMSDE.safetensors - Configure the KSampler box with:
- Steps: 6
- CFG: 3.0
- Sampler_name: dpmpp_sde
- Scheduler: karras
- In the Empty Latent Image box, set dimensions to 1280 x 720 (larger sizes will increase generation time)
- Enter a creative prompt in the CLIP Text Encode (Prompt) box – try:
Steampunk landscape with buildings and smoking chimneys made of copper. river flowing through with glowing lights. - Click the Queue button to generate your first AI image!
Leveraging Workflow Templates for Efficiency
One of ComfyUI’s most powerful features is the ability to save your favorite configurations as reusable templates. This means you can quickly switch between different generation styles without rebuilding everything from scratch. Check out this demonstration video to see workflows in action.
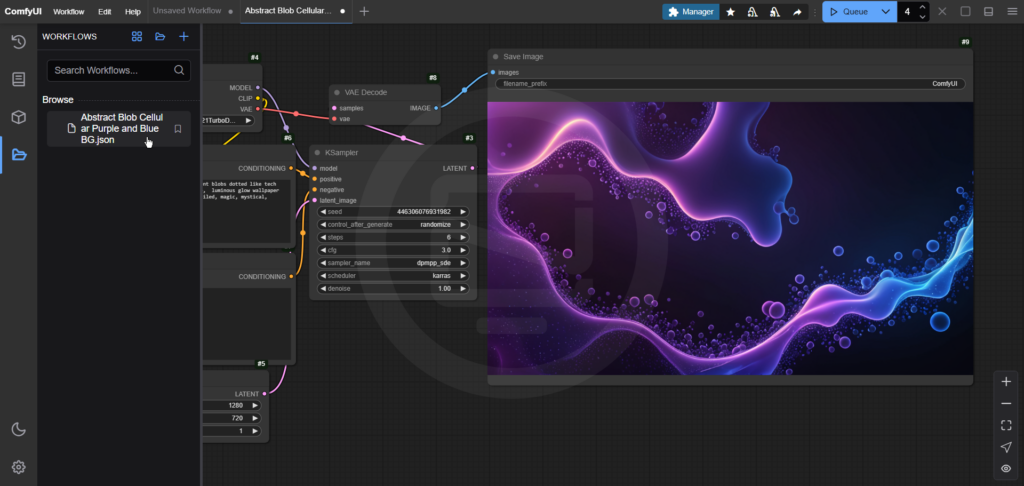
Multiple workflows can run independently in separate tabs, allowing you to seamlessly switch between different projects or generation styles.
Organizing and Optimizing Your ComfyUI Interface
The default node layout can appear cluttered and overwhelming. Here’s how to create a cleaner, more intuitive interface:
- Hold Ctrl on your keyboard to select all nodes except the “Save Image” node
- Right-click on one of the selected nodes and choose “Convert to Group Node”
- Resize the new group node to your preference
I’ve created a short tutorial video demonstrating this process. Your streamlined interface should look like this when complete:
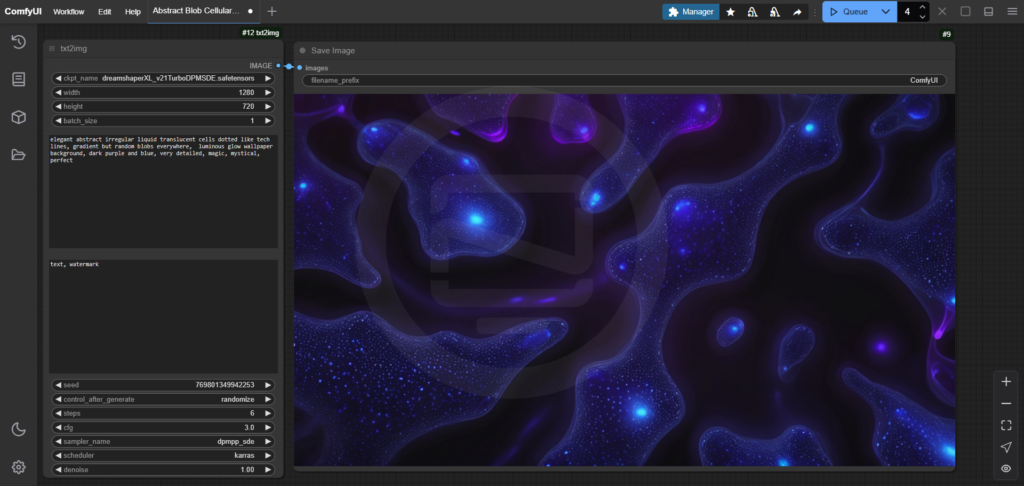
This refined design significantly reduces visual complexity, creating a more organized workspace that enhances both functionality and aesthetics.
Performance Metrics for Technical Users
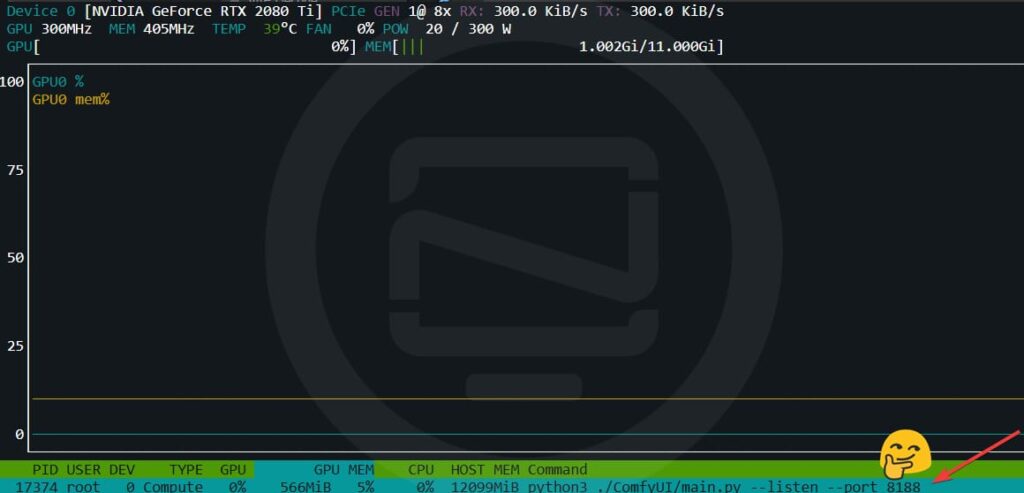
ComfyUI is remarkably efficient with system resources:
- Idle state: Only 566MB of VRAM (approximately half a gigabyte)
- During image generation: Approximately 4GB of VRAM
Conclusion and Next Steps
This guide provides everything you need to get started with ComfyUI in Docker. The combination of powerful AI image generation capabilities, efficient resource usage, and a customizable workflow makes this the perfect self-hosted solution for creative professionals and enthusiasts alike.
Be warned – once you experience the creative freedom of ComfyUI, it’s difficult to go back to more limited alternatives. The rabbit hole of AI image generation runs deep, with endless possibilities to explore.
Shared by Noted

