Create Your Own Self-Hosted Chat AI Server with Ollama and Open WebUI
In this guide, we’ll dive into building a private, self-hosted version of ChatGPT using Ollama and Open WebUI. With these open-source tools, you can ensure your data stays under your control while enjoying the power of advanced AI.
Why Self-Host AI?
Self-hosting provides a major advantage: data privacy. You won’t have to worry about your personal or business information being handled by external servers. Plus, hosting AI yourself is cost-effective and highly customizable to your needs.
For this project, I set up a mid-range AI server using spare hardware, and here are the specs:
- RAM: 32GB
- CPU: i5-10600K
- GPU: NVIDIA GeForce GTX 2080 Ti
- Storage: 2TB SSD
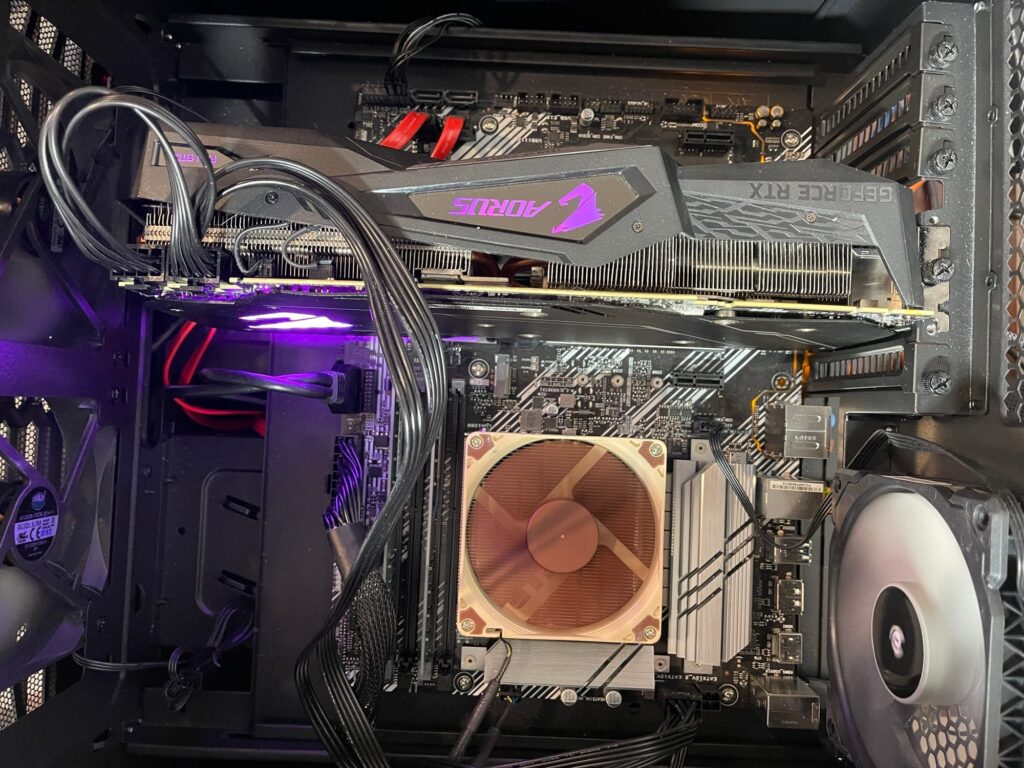
While not cutting-edge, this setup can handle most AI tasks, including 7B and 13B models, with ease.
What is Ollama?
Ollama is a platform for creating custom chat experiences using advanced NLP and ML technologies. It’s perfect for personal or business applications, like a private chatbot or customer service tool.
Key features:
- Intuitive chat experience
- Local hosting for privacy
- Compatibility with various language models

Ollama uses the Linux terminal as its base, making it lightweight and efficient. But with Open WebUI, you can add a friendly, graphical interface for enhanced usability.
What is Open WebUI?
Open WebUI bridges the gap between terminal-based apps and the web. It provides:
- A graphical interface for easier navigation
- Support for multi-user environments
- Tools for managing models and memory features
By pairing Open WebUI with Ollama, you can maximize the functionality and accessibility of your AI server.
Setting Up Your AI Server on Pop!_OS 22.04 LTS (NVIDIA)
I chose Pop!_OS 22.04 LTS for its pre-installed NVIDIA drivers and user-friendly environment.
Why a GPU Matters:
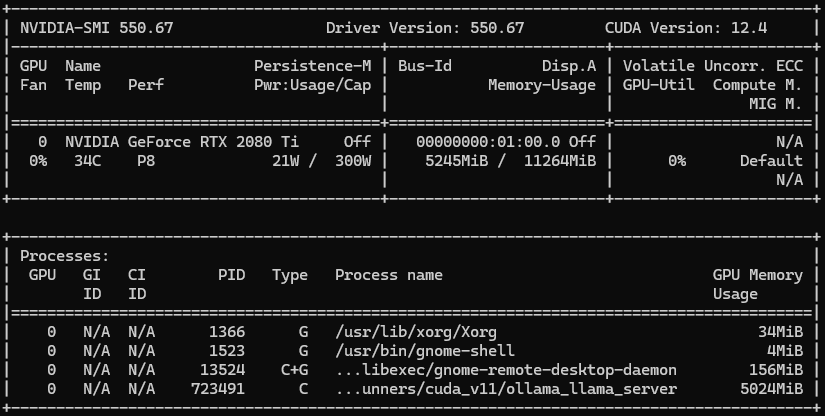
Running large models is resource-intensive. While Ollama can run on CPUs, a GPU like the NVIDIA GTX 2080 Ti significantly boosts performance. Use nvidia-smi to check GPU stats: nvidia-smi
Installing Ollama
1. Update your system:
sudo apt update
sudo apt upgrade -y
2. Install Ollama:
Run the following command from the Ollama website:
curl -fsSL https://ollama.com/install.sh | sh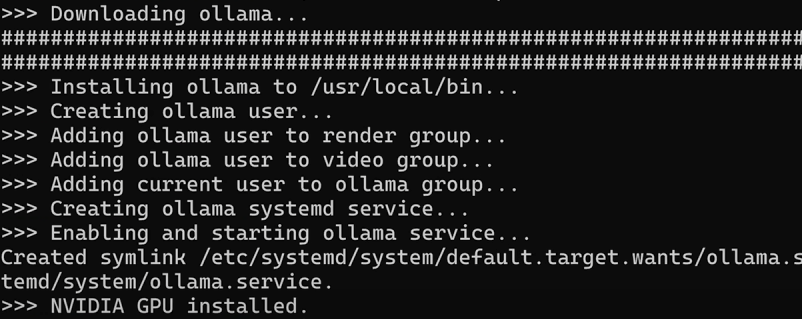
3. Pull a Language Model:
Download your preferred model, such as llama3:
ollama pull llama34. Test Your Setup:
Start a chat session:
ollama run llama3Adding Open WebUI with Docker
Why Open WebUI?
It simplifies managing models, documents, and interactions. Plus, you can enable collaborative features.
Install with Docker:
sudo docker run -d -p 8080:8080 --network=host \
-v /path/to/data:/app/backend/data \
-v /path/to/docs:/data/docs \
-e OLLAMA_BASE_URL=http://127.0.0.1:11434 \
--name open-webui --restart always \
ghcr.io/open-webui/open-webui:main
Or via Docker Compose:
services:
  open-webui:
    image: 'ghcr.io/open-webui/open-webui:main'
    restart: always
    network_mode: "host"
    container_name: open-webui
    environment:
      - 'OLLAMA_BASE_URL=http://127.0.0.1:11434'
    volumes:
      - '/path/to/data:/app/backend/data'
      - '/path/to/docs:/data/docs'
    ports:
      - '8080:8080'
Open WebUI runs locally by default. Navigate to http://localhost:8080 to start using it.
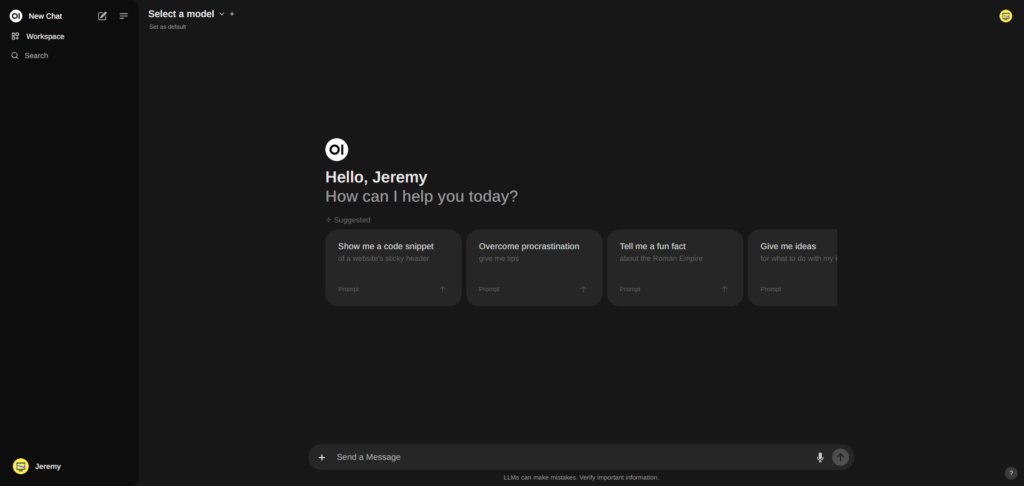
Exploring Open WebUI Features
Memory Management:
Store personal notes, reminders, or even code snippets. Accessible via Settings > Personalization > Memory.
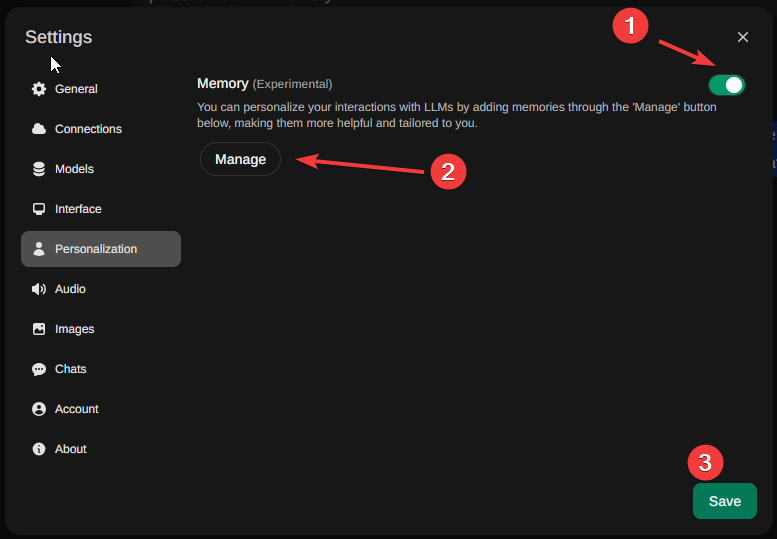
Document Management:
Feed documents directly into the system for AI-powered processing.
Model Customization:
Create and manage your own models with fine-tuning options.
Conclusion
With Ollama and Open WebUI, you can enjoy the power of ChatGPT-like AI, all while keeping your data private. Whether you’re experimenting with AI or building a custom chatbot, this setup provides a robust foundation.


