Your Mac was lightning-fast when you unboxed it. But over time, something happens. Apps accumulate, caches build up, and before you know it, you’re navigating a sluggish system that doesn’t feel like yours anymore. You’ve tried generic cleaning apps, but they only scratch the surface, leaving behind developer tools caches, buried app fragments, and mysterious temp files that no one seems to find.
What if you could dig as deep as a mole burrowing through soil to unearth every hidden space hog on your Mac? That’s exactly what Mole does—and it does it with elegance, safety, and power that’ll surprise you.
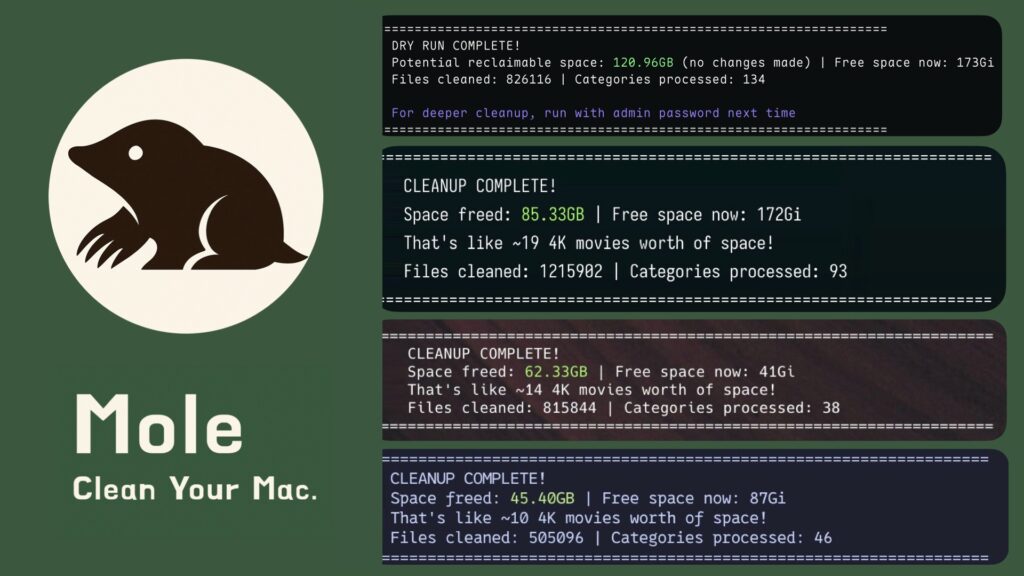
Mole is an open-source, terminal-based tool created by tw93 that transforms Mac optimization from a tedious, risky process into an intuitive, fast experience. Whether you’re a developer drowning in Xcode derived data, a designer plagued by browser caches, or simply someone who wants their Mac to feel new again, Mole is designed for you. Unlike bloated GUI cleaners that claim miracles, Mole leverages the power of the command line to deliver real, measurable results—sometimes freeing up over 95GB of storage.
In this post, we’ll explore what makes Mole special, walk through installation step-by-step, and show you exactly how to reclaim your Mac’s performance. Let’s dig in.
What is Mole? Understanding Your Mac’s New Best Friend
Mole is an intelligent, interactive command-line tool that goes beyond typical Mac cleaners. It doesn’t just delete your Trash—it identifies and removes system junk that most users don’t even know exists, from Xcode derived data and Node.js caches to browser leftovers and app preferences scattered across 22+ hidden system locations.
Key Features That Make Mole Stand Out:
- Deep System Cleanup cleans caches, logs, and temp files more thoroughly than commercial tools like CleanMyMac. It targets user app caches, browser data, developer tool artifacts, and even niche app caches (Dropbox, Spotify, etc.).
- Thorough App Uninstaller scans 22+ locations to completely remove app remnants—not just the .app file. When you uninstall an app with Mole, it finds and deletes preferences, support files, extensions, and system-level configurations that typically remain behind.
- Interactive Disk Analyzer lets you navigate your file system with arrow keys, instantly spotting the largest space consumers. No cryptic terminal outputs—just intuitive visual browsing.
- Lightweight & Fast runs entirely in the terminal with arrow-key navigation, pagination, and even Touch ID support for password-free sudo approvals. It’s designed for speed and security.
- Preview Mode lets you see exactly what Mole will delete before it happens with the
--dry-runflag, so you never delete something you didn’t mean to.
Why should Mac users care? Because developer tools alone can consume tens of gigabytes. Xcode derived data often balloons to 10GB+, Node.js package caches pile up, and browser caches silently steal space. Mole finds all of it and gives you the power to reclaim your storage and performance.
Installing Mole on Your Mac: Getting Started in Minutes
Installing Mole is refreshingly simple. You have two options: the direct installation method or Homebrew. We recommend Homebrew if you already use it; otherwise, the direct method takes seconds.
Option 1: Quick Install (Recommended for Most Users)
Open Terminal and run this single command:
curl -fsSL https://raw.githubusercontent.com/tw93/mole/main/install.sh | bashThis downloads and installs Mole automatically. Once complete, verify the installation:
mo --versionYou should see the installed version number. If you see a command not found error, restart Terminal or source your shell profile:
source ~/.zprofileOption 2: Install via Homebrew
If you prefer using Homebrew:
brew install tw93/tap/moleImportant Safety Note: Mole is actively developed but still in its earlier stages. If your Mac is mission-critical for work, we recommend running preview cleanups with --dry-run first (more on that below) before committing to full cleanups.
Optional: Set Up Touch ID for Sudo
One of Mole’s slick features is Touch ID integration for sudo commands. No more typing passwords for elevated operations:
mo touchidFollow the prompts, and Mole configures your Mac to approve sudo with your fingerprint.
Hands-On Demo: Optimizing Your Mac with Mole
Now for the fun part—putting Mole to work. Let’s walk through the main commands and see what they do.
Command 1: The Interactive Menu
Start by exploring Mole’s main menu:
moThis launches an interactive dashboard where you can navigate options with arrow keys and select actions. It’s the friendly gateway to everything Mole offers.
Command 2: Deep System Cleanup with Preview
The most powerful feature is system cleanup. Always start with a preview to see what you’re about to delete:
mo clean --dry-runThis scans your system and shows a report without deleting anything. You might see something like:
▶ System essentials
  ✓ User app cache (45.2GB)
  ✓ User app logs (2.1GB)
  ✓ Trash (12.3GB)

▶ Browser cleanup
  ✓ Chrome cache (8.4GB)
  ✓ Safari cache (2.1GB)

▶ Developer tools
  ✓ Xcode derived data (9.1GB)
  ✓ Node.js cache (14.2GB)

▶ Others
  ✓ Dropbox cache (5.2GB)
  ✓ Spotify cache (3.1GB)

Space to be freed: 95.50GB
Impressive, right? Once you’re confident with the results, run the actual cleanup:
mo cleanMole will execute the cleanup and report back with the amount of space reclaimed.
Command 3: Smart App Uninstallation
Traditional uninstalling leaves breadcrumbs everywhere. Mole’s app uninstaller is different:
mo uninstallYou’ll see a list of installed applications with their sizes and last-used dates. Select which apps to remove using arrow keys and spacebar. Mole then scans 22+ system locations and removes everything associated with that app—application files, caches, preferences, plugins, extensions, and system files.
Command 4: Interactive Disk Analyzer
Want to visually explore where your storage is going? Launch the disk analyzer:
mo analyzeNavigate through your file system with arrow keys, instantly see folder sizes, and identify the culprits stealing space. It’s like using Finder, but with real-time storage data at a glance:
Analyzing: /Users/You
═══════════════════════════════════════════════════════
Total: 156.8GB

├─ 📁 Library 45.2GB
│ ├─ 📁 Caches 28.4GB
│ └─ 📁 Application Support 16.8GB
├─ 📁 Downloads 32.6GB
├─ 📁 Movies 28.9GB
├─ 📁 Documents 18.4GB
└─ 📁 Desktop 12.7GB
Command 5: Protect Important Caches
For developers, some caches are sacred (like Playwright or HuggingFace models). Protect them with:
mo clean --whitelistMole comes with defaults that protect common developer paths, and you can add your own. This ensures your optimization doesn’t accidentally nuke something you need.
Advanced Tips and Next Steps
Pro Tips for Power Users:
Use mo clean --dry-run regularly to monitor what’s accumulating on your system without committing to cleanup.
Schedule cleanups after major development work—after installing many npm packages or running Xcode builds, Mole’s cleanup will impress you.
Combine mo analyze with mo clean for a complete picture: first understand what’s consuming space, then intelligently remove it.
Keep Mole Updated:
mo updateThe tool is actively maintained, and updates bring new optimization targets and improvements.
Limitations to Know:
Since Mole is still in active development, it’s wise to test thoroughly on non-critical systems first or always use --dry-run before committing.
Some system-level caches require sudo, which Mole handles automatically (or via Touch ID if configured).
Conclusion
Your Mac doesn’t have to slow down over time. With Mole, you can dig deep like a mole burrowing through soil and reclaim massive amounts of storage and performance—sometimes over 95GB in a single cleanup.
Whether you’re a developer tired of Xcode’s bloat, a content creator drowning in browser caches, or simply someone who wants their Mac to feel new again, Mole makes Mac optimization accessible, safe, and surprisingly powerful.
Ready to try it? Head to your Terminal, run curl -fsSL https://raw.githubusercontent.com/tw93/mole/main/install.sh | bash, and experience the difference. Start with mo clean --dry-run to see what Mole finds, then take the plunge.
We’d love to hear about your results—how much storage did Mole free up on your Mac? Share your experience in the comments or star the repository to support the project.
Ready to optimize? Dig deep with Mole and transform your Mac’s performance today.