Free Your Music from the Cloud with Volumio Pi
Imagine transforming your humble Raspberry Pi into a sophisticated, high-fidelity music server. Volumio makes this dream a reality, offering a seamless blend of power, flexibility, and affordability. With Volumio, you can finally free your music from subscription cloud services and enjoy a personalized music experience at home.
What is Volumio?
Volumio is a free, open-source music player designed to unify all your music in one convenient place. It supports various devices, from its own range of streaming boxes to third-party systems like Raspberry Pi. Whether you want to stream music from the cloud or play your local library, Volumio has you covered.
Volumio offers its lineup of official streaming boxes—such as the Volumio Motivo, Primo, and Rivo—but it also allows you to create a custom music server using a Raspberry Pi. This makes it a cost-effective and flexible solution for music lovers. For more details, visit the Volumio website.
Why Run Volumio on Raspberry Pi?
The Raspberry Pi is a versatile, affordable option for DIY enthusiasts. While Volumio’s own streaming boxes offer better sound quality due to superior hardware, building a Volumio server on a Raspberry Pi is much more budget-friendly. A high-end Volumio device can cost up to $1,099, but with a Raspberry Pi and a good USB soundcard, you can set up a decent music server for as little as $35 to $60.
Setting Up Volumio on Raspberry Pi
Here’s how you can easily set up Volumio on your Raspberry Pi.
Step 1: Prepare the SD Card
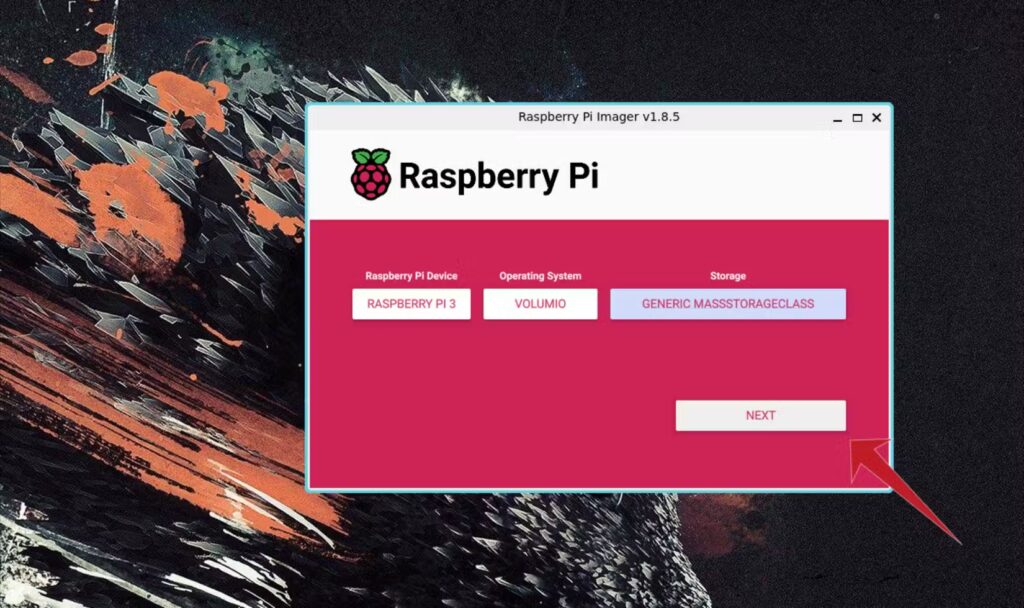
- Download and install the Raspberry Pi Imager tool.
- Insert an SD card into your SD card reader and launch the Imager tool.
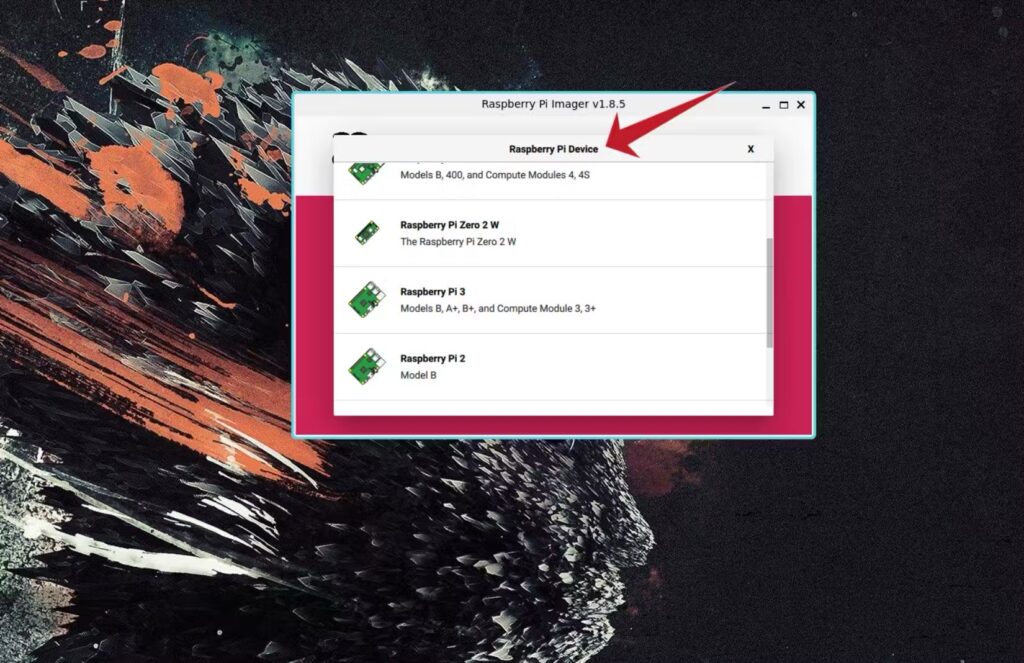
- Choose your Raspberry Pi model (Volumio supports models 2, 3, 4, and 5).
Step 2: Install Volumio OS
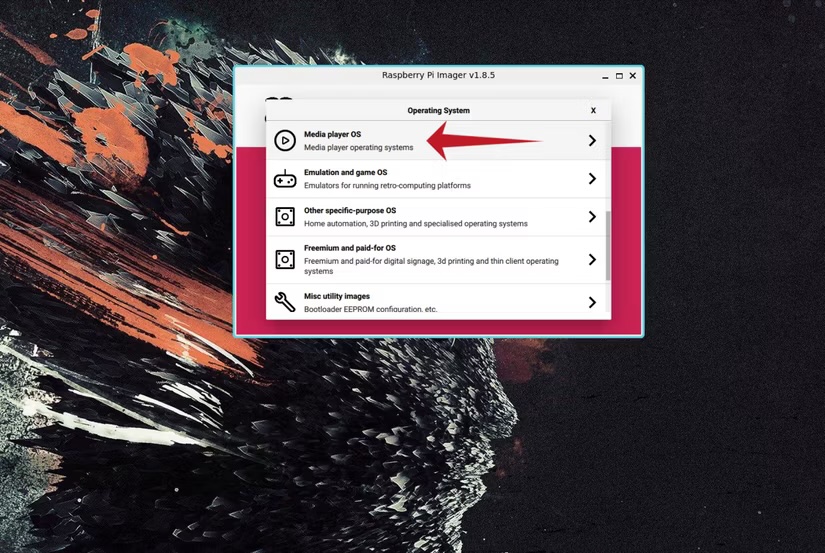
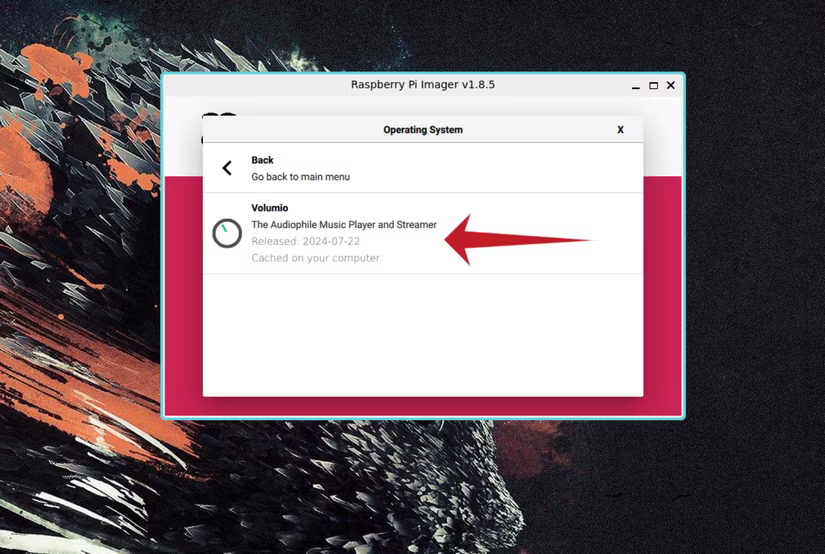
- In the Imager tool, go to the Operating System section, select Media Player OS, and choose Volumio.
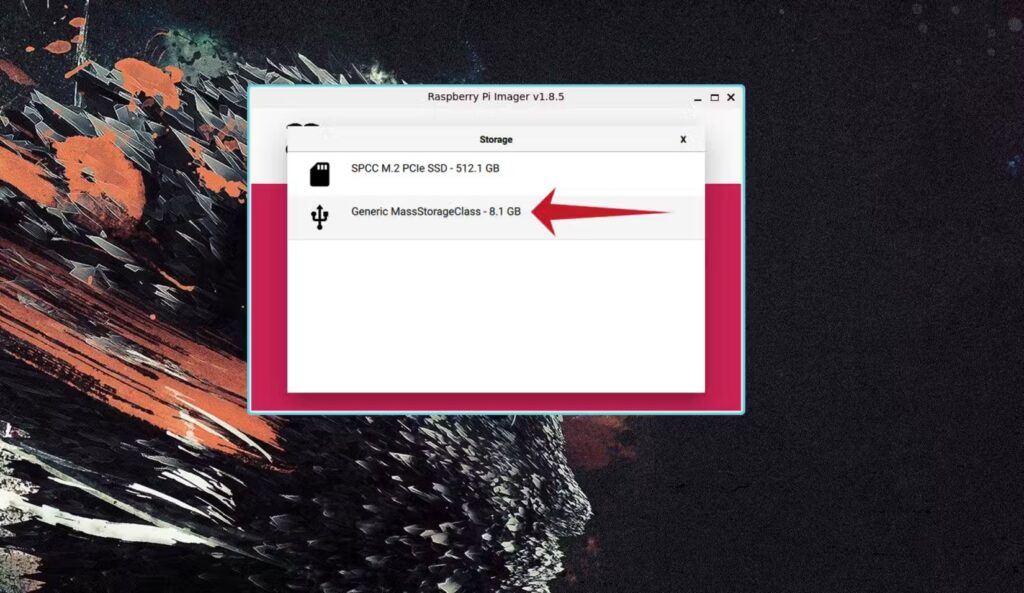
- Select your SD card as storage and click Next to create your Volumio SD card.
Step 3: Boot and Configure Volumio
- Once the process is complete, insert the SD card into your Raspberry Pi.
- Connect the Pi to the internet via Ethernet or access the Volumio Wi-Fi network (SSID: “Volumio“, password: “volumio2“).
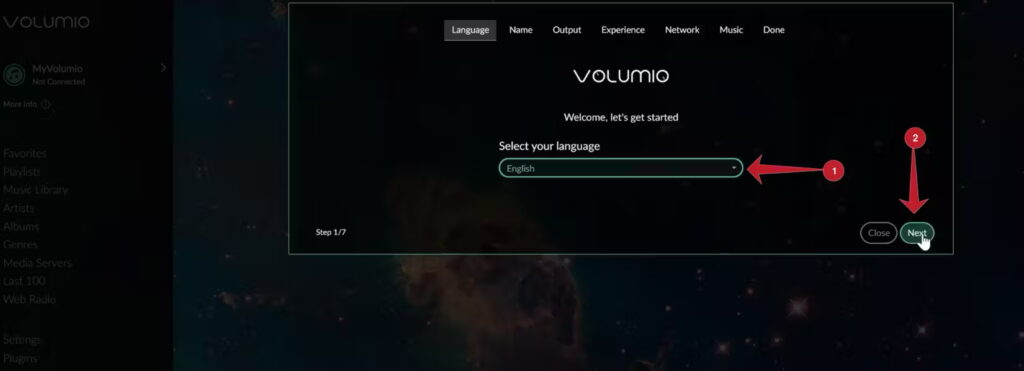
- Access the web interface by going to
http://volumio.localor by using your Pi’s IP address.
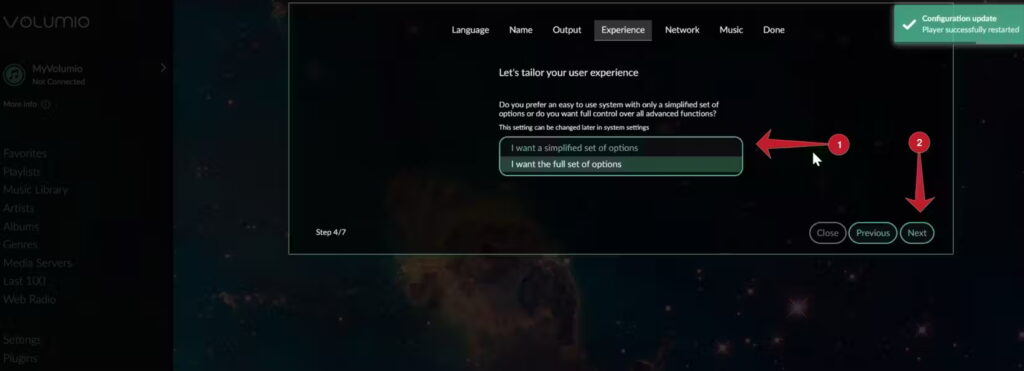
Step 4: Customize Your Setup
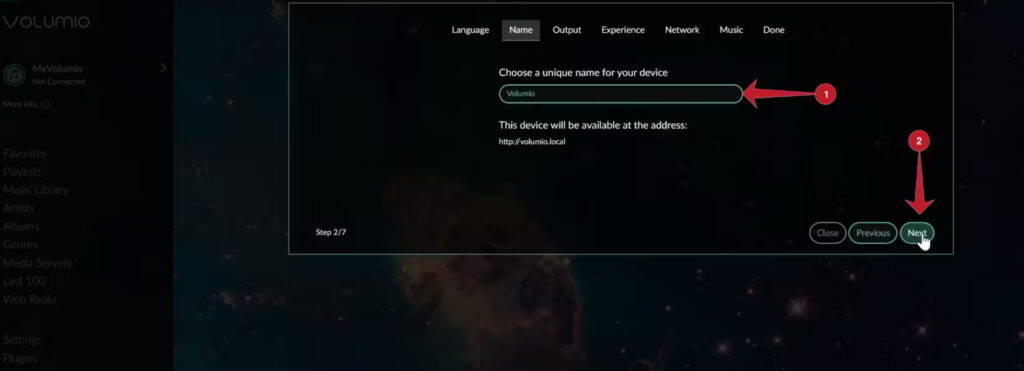
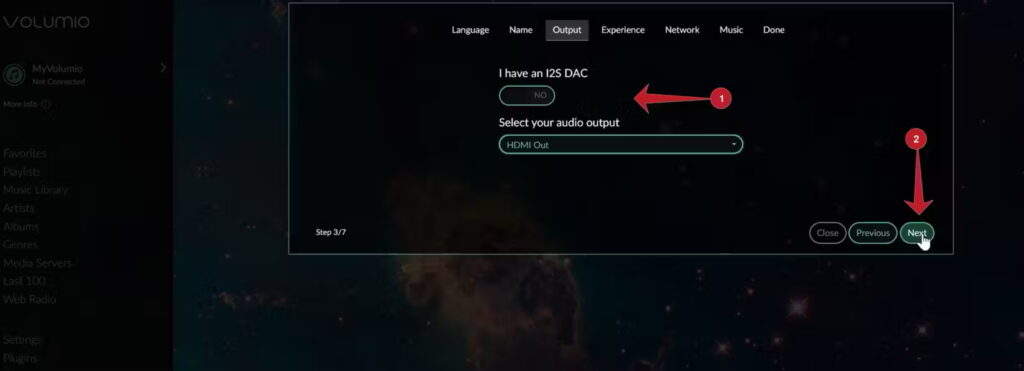
- Follow the setup wizard to name your device, configure your audio output, and connect to your Wi-Fi network.
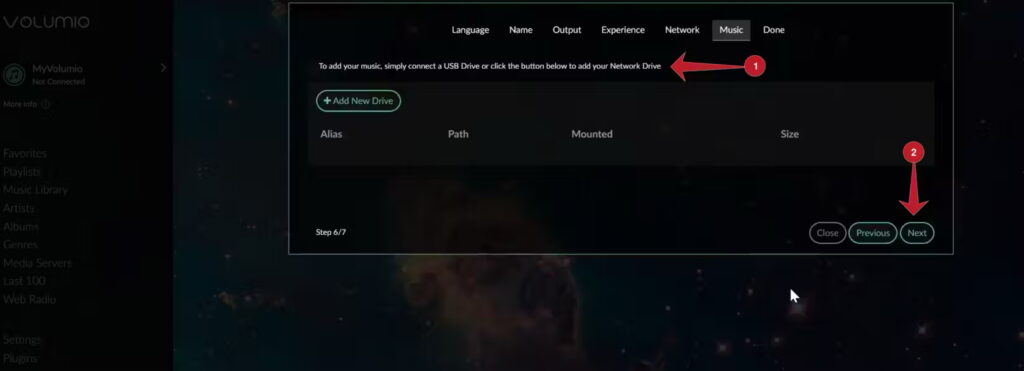
- You can also add your music library by connecting a USB hard drive or a network share.
Soundcard Options for Better Audio Quality
While the Raspberry Pi’s built-in sound output works, upgrading to a high-quality soundcard can significantly improve your audio experience. Consider the following options:
- HifiBerry DAC+: Designed specifically for the Raspberry Pi, offering excellent audio quality.
- IQaudIO Pi-DAC+: A great option for audiophiles.
- Allo Boss DAC: Another top-tier soundcard for the best sound.
Break Free from Cloud Music Limitations
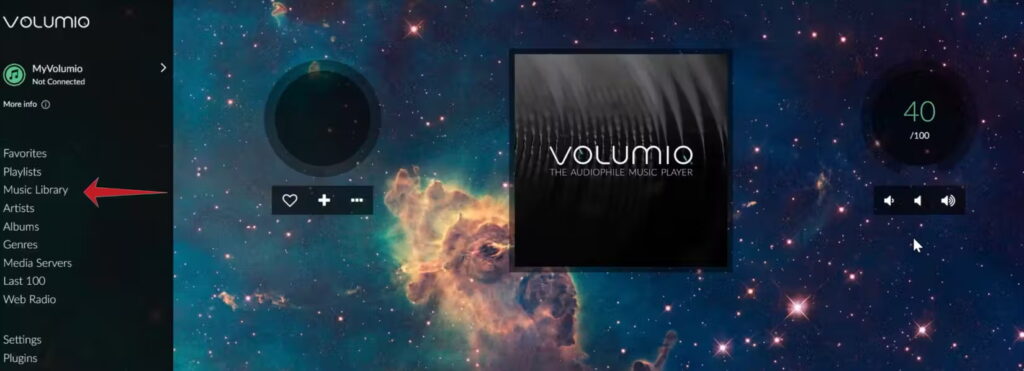
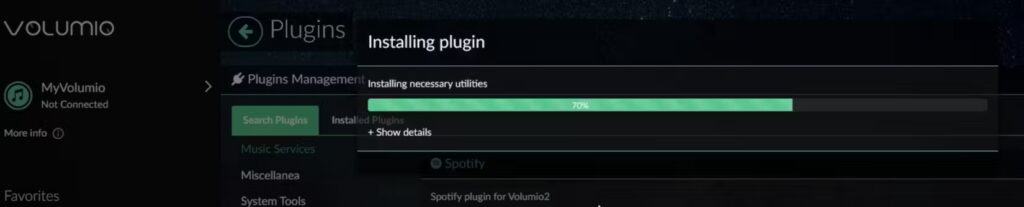
With Volumio, you’re not tied to cloud music services or subscriptions. You can store your entire music library locally and have complete control. However, if you still want access to streaming services, Volumio integrates with platforms like Spotify, Tidal, and Qobuz. It also supports internet radio and podcasts.
Volumio is the perfect solution for anyone who wants to manage and enjoy their music on their terms, blending the best of both local and cloud-based libraries.