
Want to dive deep into the world of AI and deep learning without burning a hole in your wallet on cloud services? Are you curious about how the entire stack works, from bare metal to high-level code? If so, you’ve come to the right place.
This is my detailed walk-through of how I built my own powerful AI server from scratch—on a budget of just $1,300. This guide will show you how to create a cost-effective machine for long-term projects and gain invaluable hands-on experience.
This post may seem long, but I promise, it’s packed with pictures and code snippets to guide you through every step.
Here are the main steps we’ll cover:
- Step 1: Acquire Hardware
- Step 2: Assemble the Server
- Step 3: Install the Operating System
- Step 4: Set Up the AI Software Stack
Why Build Your Own AI Server?
Before we get into the technical nitty-gritty, let’s talk about the rationale. Why invest time and money into an on-premise, DIY server?
- Unrestricted Learning: I’m fascinated by the whole AI stack—from the bare metal to high-level programming abstractions. Having my own server gives me unfettered access to all hardware and software layers, allowing me to follow my curiosity without the limitations of cloud-hosted instances.
- Hands-On Operations Experience: Managing a server can be a hassle, but I do it for the operational experience. I treat my home server as a microcosm of a data center: implementing monitoring, configuring backups, and managing power and temperature. These are the skills we take for granted with the cloud but are incredibly valuable to learn.
- Long-Term Cost Savings: You pay more upfront for hardware, but if your GPU usage is heavy, you save a lot of money in the long run. For low-utilization tasks, the cloud is more cost-effective, but for my constant AI workloads, this investment is justified.
The biggest downside is that you’re confined to small-scale experiments. The main limiting factor is the GPU’s memory (VRAM). But if you’re not trying to host a massive LLM to replace ChatGPT, you can get by with a modest GPU. I can see myself adopting a hybrid approach in the future: using my server for local development and the cloud when I need to scale up.
Okay, now here’s how I built the rig.
Step 1: Acquire Hardware
This is the most critical stage, as your component choices will define the server’s performance and budget.
1.1: Choosing the GPU: The Heart of the AI Server
These are the factors I considered when selecting an AI accelerator:
- Maker: Nvidia was the obvious choice. Its hardware, CUDA software ecosystem, and community support are mature and widely adopted in the industry.
- Price: My target was under $700.
- Memory (VRAM): VRAM capacity determines the size of the models you can run. 12GB is a sweet spot, comfortably letting you load LLMs with up to 14B parameters.
- Power: I wanted a simple setup compatible with a standard residential power outlet. Consumer-grade GPUs (like Nvidia’s RTX series) are perfect for this.
- Resale Value: Nvidia GPUs tend to hold their value well. I plan to resell this card when I upgrade, so retaining some of its original value is a plus.
- Tensor Cores: These are specialized cores optimized for the matrix operations common in AI training and inference. It’s a must-have feature.
- Availability: I wanted a GPU that was in stock and ready to ship immediately.
Decision: Nvidia RTX 4070 (12GB)
- Maker: Nvidia
- Price: $597.60 (incl. tax, bought a used version off eBay)
- Memory: 12GB
- Power Draw: ~200W, which is well within the limits of a standard home outlet, even with all other components.
- Tensor Cores: Yes
- NVLink: No (Not a priority for a single-GPU build)
- Availability: Yes
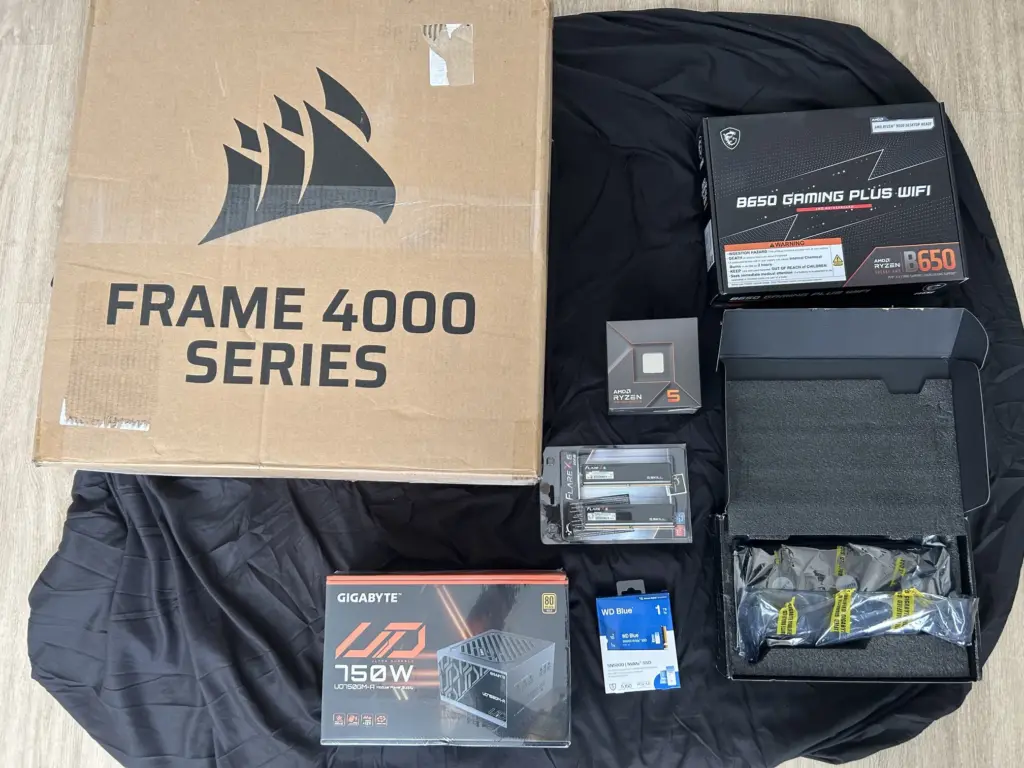
1.2: Buying the Other Components
Next, I needed the ancillary components for a minimum viable server. I used ChatGPT for initial recommendations and then refined the list based on my own research, focusing on a balance of budget, performance, and future-proofing.
| Component | Model | Price (USD) | Why I Chose It |
| Motherboard | MSI B650 Gaming Plus WiFi | $130 | Supports DDR5 & PCIe 4.0. Has extra slots for future GPU, RAM, and storage upgrades. |
| CPU | AMD Ryzen 5 7600 6-Core | $214 | Excellent performance for the price. Powerful enough to prevent bottlenecking the GPU. |
| RAM | G.SKILL Flare X5 32GB DDR5 6000MT/s | $90 | 32GB is plenty for most workloads and it’s easy to upgrade to 64GB later. |
| Storage (SSD) | Western Digital 1TB WD Blue SN5000 NVMe | $65 | A Gen 4.0 NVMe drive offers lightning-fast read/write speeds for data loading and system responsiveness. |
| Power Supply (PSU) | GIGABYTE 750W PSU – 80 Plus Gold | $90 | 750W provides 50% headroom for future upgrades (like a second GPU). Gold certified for efficiency. |
| Case | CORSAIR 4000D RS Mid-Tower | $92 (Used) | Excellent airflow and plenty of physical space for easy installation and future expansion. |
| Total | $708.20 | (incl. tax) |
Before buying, I double-checked compatibility with ChatGPT. All parts were ordered from Amazon and arrived in less than a week.
1.3: Prepare for the Build
You’ll need a few basic tools:
- A pair of scissors to open boxes.
- A Phillips screwdriver.
- A USB drive (at least 8GB) for the OS installer.
- Another computer to download the OS.
- A monitor and keyboard for the initial setup.
Step 2: Assemble the Hardware
This is the fun part! Think of it as adult LEGOs.
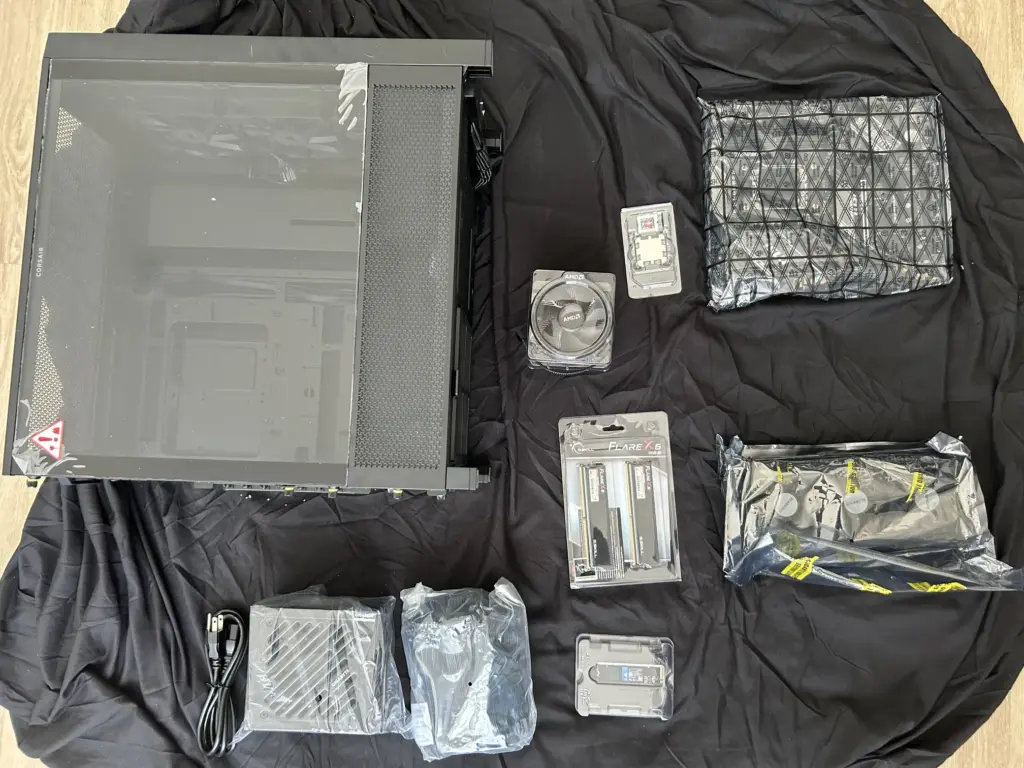
2.1: Unbox Components
I laid out all the unboxed components on a bed sheet to keep small parts and styrofoam bits from getting lost.
I also downloaded the user manuals for the motherboard and case, as they didn’t come with printed copies.
2.2: Install Motherboard Components
It’s much easier to install the CPU, RAM, and SSD onto the motherboard before placing it into the case.


- Install CPU and CPU Fan: Following this video guide, I carefully placed the CPU in its socket and secured it. Then, I mounted the CPU fan on top and plugged its power cord into the
CPU_FAN1header.


- Install RAM: I installed the two RAM DIMMs into the recommended slots on the motherboard (usually slots 2 and 4).
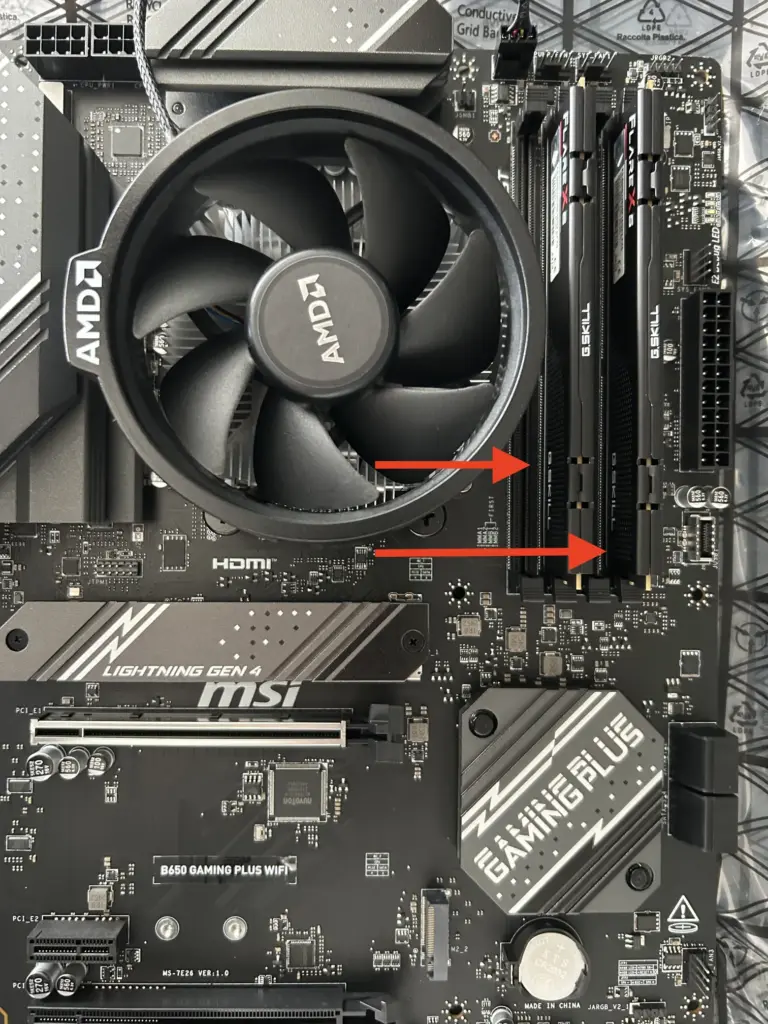
- Install SSD: I removed the SSD heat sink, inserted the NVMe drive into the M.2 slot, and screwed the heat sink back on top.


2.3: Install Components into the Case
- Prepare Case: I removed the side and top panels to make installation easier.
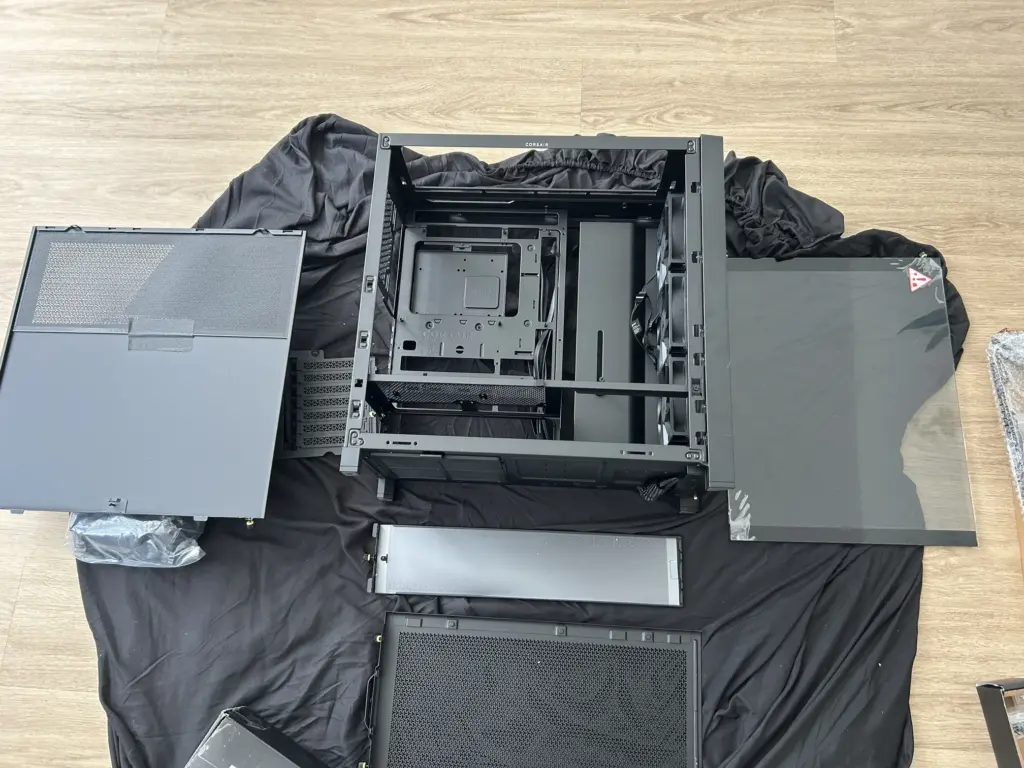
- Install PSU: The power supply unit goes at the bottom of the case.
- Install Motherboard: I first inserted the I/O shield, then carefully mounted the motherboard inside and screwed it into place.


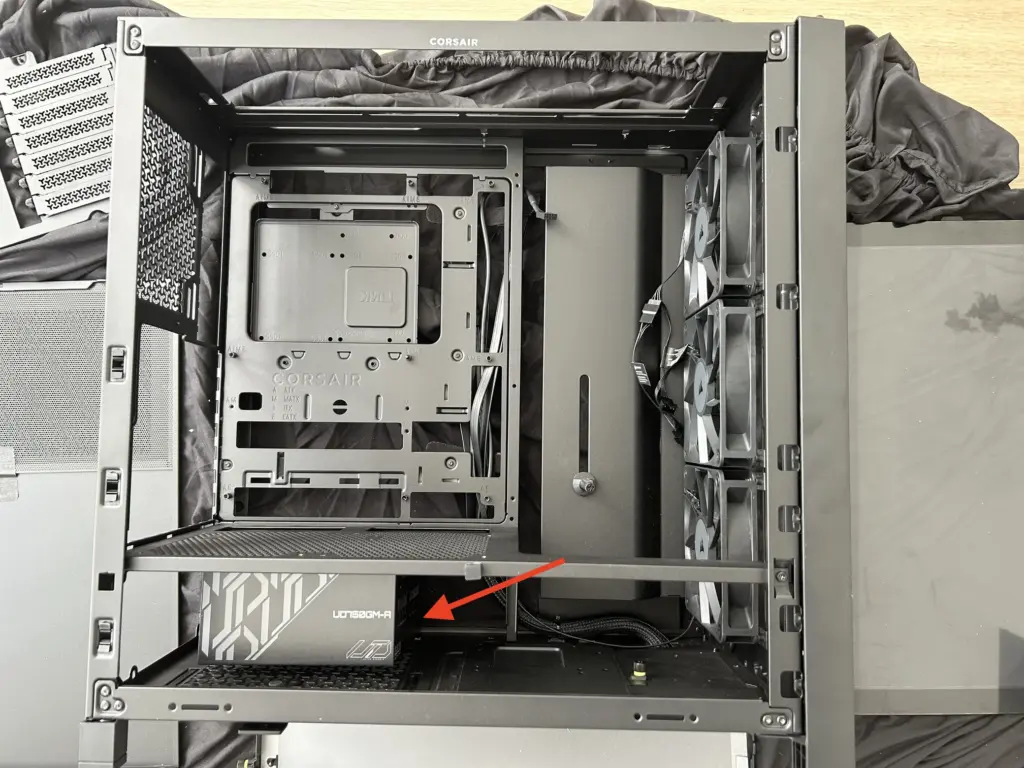
- Install the GPU: I inserted the RTX 4070 into the top PCIe x16 slot and installed an anti-sag bracket to keep it level.


- Power Cables: I connected all the necessary power cables from the PSU to the motherboard, CPU, GPU, and case fans.


2.4: The First Boot
I connected a monitor, plugged the server into a wall outlet, flipped the PSU switch, and pressed the power button. The LED lights turned on, fans started spinning, and the BIOS screen appeared. Success!


2.5: Final Touches
I re-attached the case panels and connected the WiFi antennas to the motherboard’s I/O panel.


Step 3: Install the Operating System
The hardware is assembled. Now it’s time to bring it to life with an OS.
- Download OS ISO: I downloaded the latest stable version of Ubuntu Server (24.04.2 LTS).
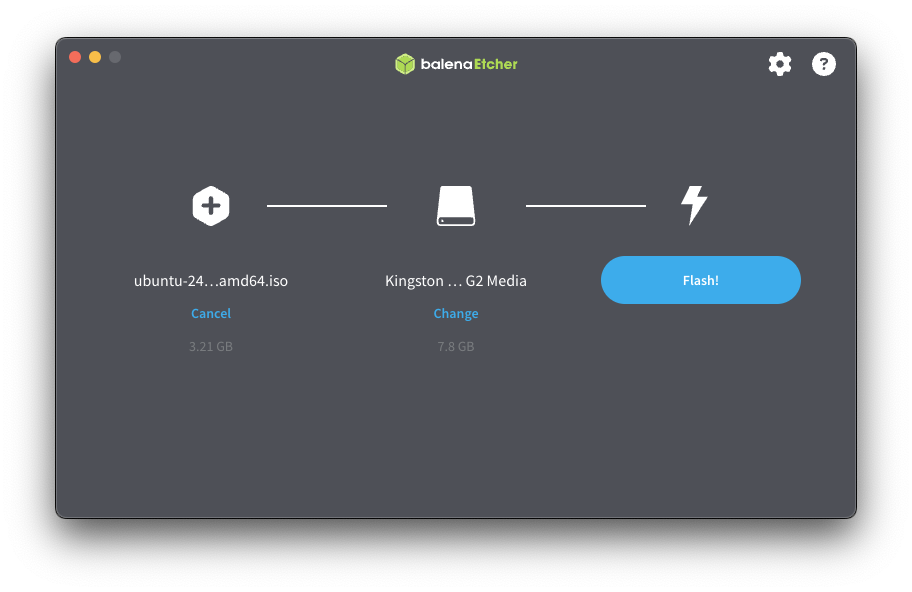
- Create Bootable USB Drive: Using Balena Etcher, I flashed the downloaded ISO file onto an 8GB USB drive.
- Boot Server from USB Drive: With the server off, I inserted the USB drive and powered it on, pressing the
DELkey repeatedly to enter the BIOS setup. I then set the boot priority to the USB drive.
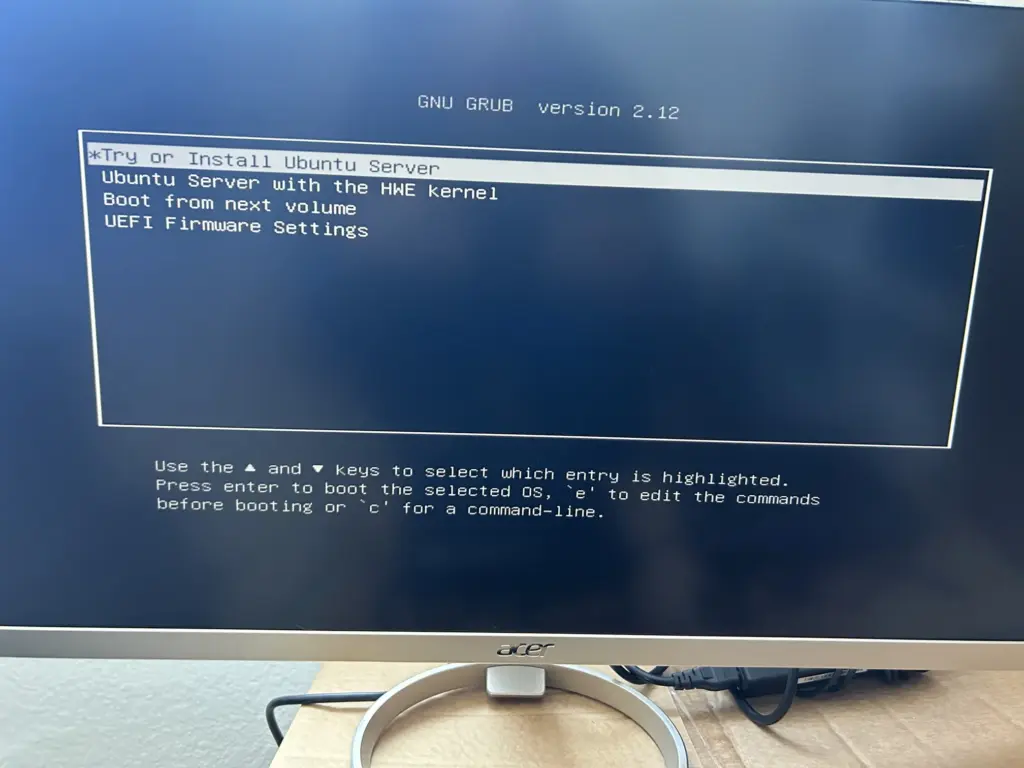
- Install OS: I selected “Try or Install Ubuntu Server” and followed the on-screen prompts.
- Network Configuration: I connected the server to my home WiFi network and took note of the assigned IP address:
192.168.0.34. - Storage Configuration: I used the default settings, which correctly detected the SSD.
- Profile Setup: I set up my username, password, and named the server
scale-1. - Install OpenSSH Server: This is crucial. I checked the box to install the OpenSSH server, which allows for secure remote access.
- Network Configuration: I connected the server to my home WiFi network and took note of the assigned IP address:
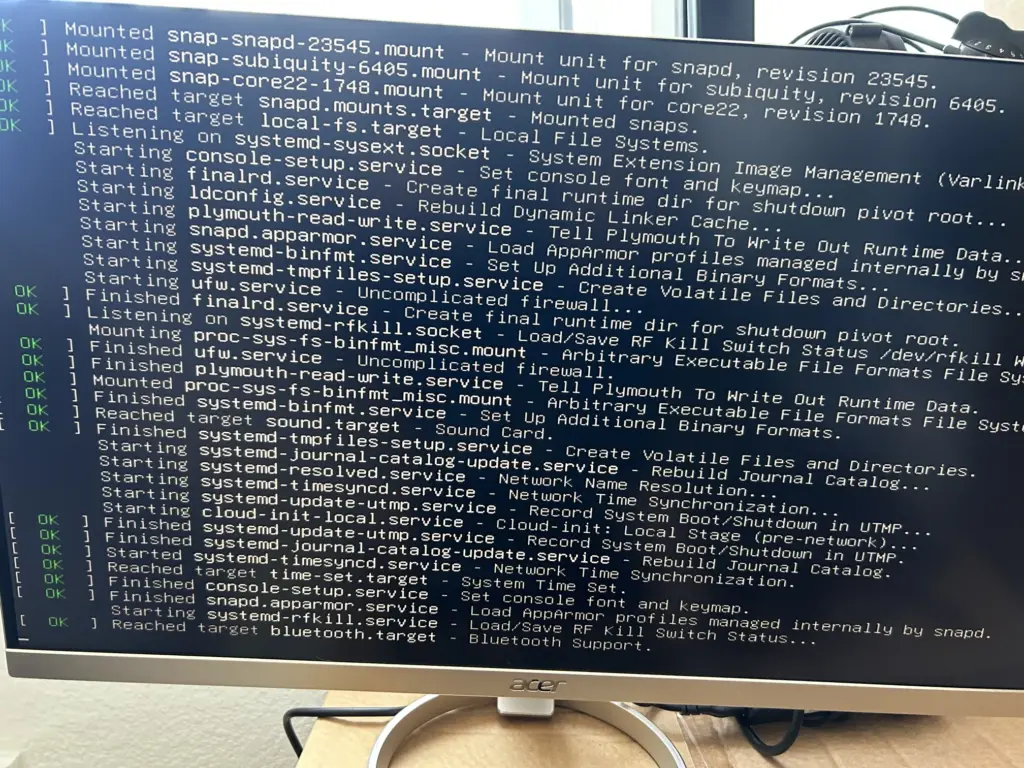
- Reboot Server: Once the installation finished, I removed the USB drive and rebooted. I logged in and was greeted by the terminal.
Step 4: Install Software Tools & Libraries
Now we’ll install the software needed to turn this into a true AI powerhouse.
4.0: Connect to the Server Remotely
From my main computer’s terminal, I connected to the server via SSH. From this point on, I no longer needed a dedicated monitor or keyboard for the server.
4.1: Update the System
First things first, update all system packages.
sudo apt update && sudo apt upgrade -y4.2: Install Nvidia Drivers
I used this resource to find the latest stable drivers.
sudo add-apt-repository ppa:graphics-drivers/ppa
sudo apt update
sudo apt install nvidia-driver-570
After a reboot, I ran nvidia-smi to verify the installation was successful. The command should display details about your RTX 4070.
4.3: Install the CUDA Toolkit
CUDA is Nvidia’s platform for parallel computing, which is essential for deep learning.
sudo apt install nvidia-cuda-toolkitI verified the installation with nvcc --version.
4.4: Install Python and PyTorch
Finally, we set up the programming environment.
# Install Python essentials
sudo apt install python3-pip python3-venv python3-dev build-essential

# Create and activate a virtual environment
python3 -m venv venv
source venv/bin/activate

# Install PyTorch with CUDA support
pip install torch
I then ran a quick test to confirm PyTorch could see the GPU:
python -c "import torch; print(f'CUDA available: {torch.cuda.is_available()}')"
# Expected output: CUDA available: True
4.5: Setup Remote Management with Tailscale
To simplify remote access, I installed Tailscale. It creates a secure private network, allowing me to access my server using a stable hostname (ssh hardik@scale-1) from anywhere, without worrying about changing IP addresses.
Conclusion
And that’s a wrap! For around $1,300 and a few evenings of work, I now have a powerful, custom-built AI server ready for any deep learning project I throw at it. The process was incredibly rewarding, providing a much deeper understanding of how hardware and software work together to power artificial intelligence.
I hope this guide has inspired you and provided a clear roadmap to build your own AI machine. Happy building!
Share by Hardik Vala


Nice