How to clear scratch disk in Photoshop on Mac
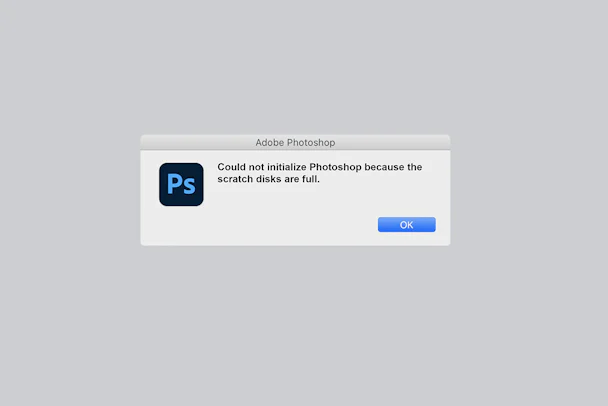
If you regularly work in programs like Adobe Premiere Pro, Final Cut Pro, and Adobe Photoshop, you’ve probably encountered Photoshop scratch disk errors. The most common error is Photoshop’s refusal to open, along with the message stating either “Could not complete your request because the scratch disks are full” or “Could not initialize Photoshop because scratch disks are full.”
If you’ve stumbled on this page because you’ve experienced the full scratch disk issue, you’re in luck: we’re going to show you how to resolve your scratch disk problem easily and, as a bonus, keep your computer clean and performing at its best.
What are scratch disks in Photoshop?
Before we highlight some solutions, it would be a good idea to have at least a general sense of what a scratch disk actually is. When you use programs like Photoshop or Final Cut Pro, they require a working space called virtual memory or cache memory. This is where temporary files are stored and accessed from.
For this guide, we are focusing our laser sights on Photoshop. After all, it is the most common application. But rest assured that the info we cover will apply to most programs that rely on using a scratch disk.
Scratch disk in Photoshop is your hard drive space used by the app as virtual memory when there is not enough RAM to complete a task. Photoshop allows you to assign several scratch disks: that way, it has more space for storing temporary files at its disposal.
When working with large images and lots of layers, Photoshop is secretly chewing up your drive space by rapidly creating a mountain of project temp and cache files.
It’s important to note that when you set up Photoshop, you will have the option to assign the scratch disk to the drive of your choice. We highly recommend not using your system drive unless you have no other alternatives.
Why scratch disks are full?
Photoshop’s temporary files are the most significant reason behind the “scratch disks are full” error. They usually mass up in your drive without leaving single evidence of their presence. If you have a habit of force-quitting Photoshop, you may have a lot of temporary files stored in your system. As Photoshop can’t fully close all projects after you quit it so rapidly, it keeps such files on your computer.
Here are some other reasons that may cause the mentioned message:
| Lack of space | Little space left in the drive where Photoshop’s scratch disk is located |
| Full disk partition | The partition of the disk being used by Photoshop is full |
| Limited RAM | Not enough memory allowed for Photoshop |
How to clear scratch disk on Mac?
Next, we’ll explain how to clear Photoshop scratch disk and fix the scratch disk full issue on a Mac.
1. Clear your Photoshop cache
Photoshop has an in-built solution for deleting specific Photoshop caches. When these pesky caches aren’t removed automatically by the program, they can grow and take up a lot of your disk space.
To use this tool, simply launch Photoshop on your Mac and follow these steps with an image open:
- Click the Edit menu button from the menu bar.
- Hover your mouse over “Purge” to reveal 4 different cache categories: Undo, Clipboard, Histories, and All. Here’s what they mean:
- Photoshop records all commands you use while working on a project. Purging Undo sweeps away records about the most recently applied command.
- The Clipboard is a small part of memory that stores everything you copy. You can’t insert copied data after you purge the Clipboard.
- Histories contain the previous versions of your project. Purging it will remove all history states saved previously, and you won’t be able to undo your latest actions.
- Clicking All will purge all your Photoshop cache files.
- Video Cache stores changes you’ve previously made to the video project. You won’t be able to restore changes after you purge video cache.
To clear Photoshop cache and possibly fix the scratch disks problem, choose the specific item you want to delete or select “All” to delete all of your cache files. If an item is greyed out, that means it has already been deleted.
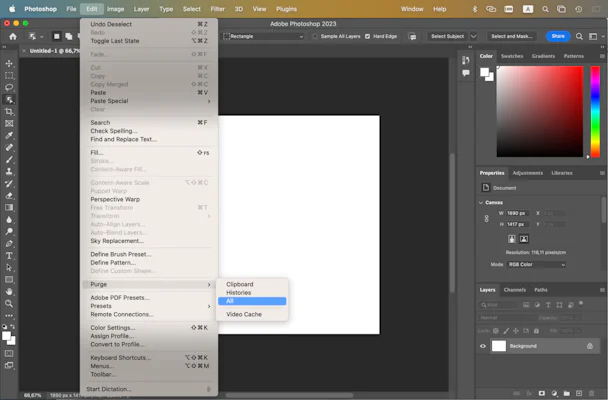
You will be warned that the purge cannot be undone, so make sure you don’t need a previous version of one of your projects and then click OK.
2. Delete your temp files
When it comes to your scratch disk space waste, Photoshop’s own temp files are often the worst culprit. So, why store temporary files? Deleting these files may help you forget about the scratch disk full error message. Note that you may need to do it if you can’t delete Photoshop’s cache files, which is a rare occasion.
Before deleting temporary files, make sure to save your progress and close Photoshop. Now, you’re ready to move on.
To find temporary Photoshop files:
- Go to Finder and click Go from the menu bar.
- Here, choose Go to Folder.
- Type /tmp in the field and press Enter.
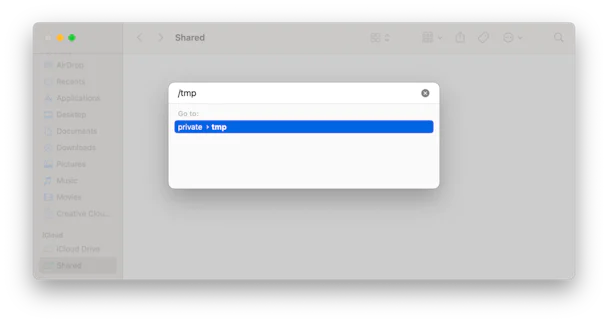
This will open a new folder window that contains Photoshop files and folders. Now, as you see the list, carefully go through all of the folders and delete files that eat up the space of Photoshop scratch disks. Make sure you select only temporary files — those with the .tmp extension.
Alternatively, you could also search “Photoshop Temp” with a space between the two words right in your Finder search. Following the same logic as described above, you can safely delete files and watch as your scratch disk space is reclaimed. Get rid of as many files as you can.
Now, launch Photoshop once again. Hopefully, the scratch disk full errors are gone; if not, keep on reading to learn more tips.

