Excel is a powerhouse for organizing data, whether you’re managing a business, tracking personal finances, or planning a project. One of its most useful features is the drop-down list, which can simplify data entry, reduce errors, and maintain consistency across your spreadsheets. In this guide, we’ll walk you through the steps to create a drop-down list in Excel, along with tips to make the most of this feature.
Why Use Drop-Down Lists in Excel?
Drop-down lists are a game-changer for anyone who frequently enters repetitive data. Instead of typing the same values over and over, you can simply select an option from a predefined list. This not only saves time but also ensures accuracy and uniformity in your data.
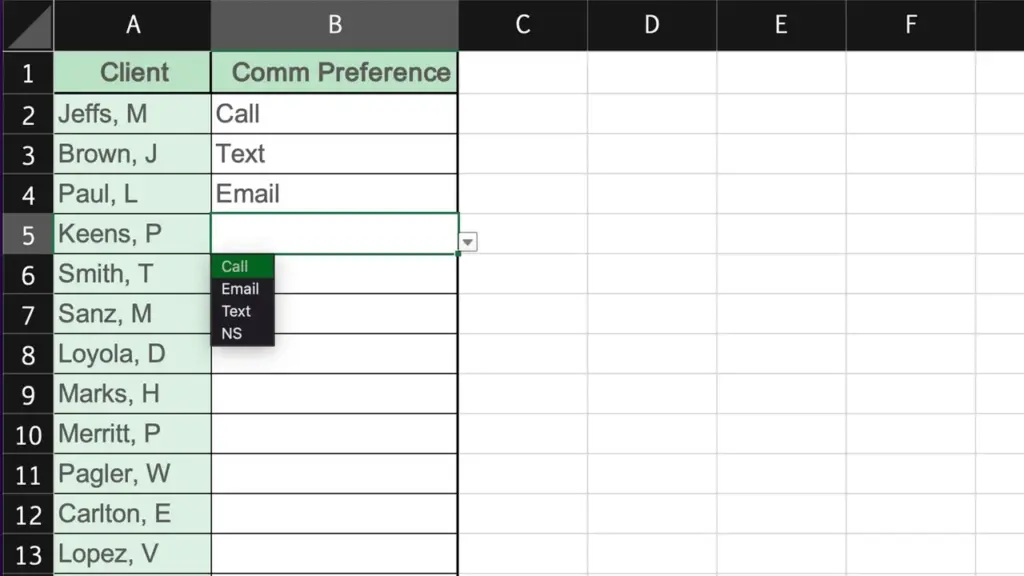
For example, if you’re managing a client database and want to track their preferred communication method (email, phone call, or text), a drop-down list makes it easy to standardize and update this information.
What You’ll Need
Before you start, ensure you have the following:
- A Microsoft Office subscription (Excel is available both online and as a desktop application).
- A spreadsheet ready for data entry (we’ll use a simple example to demonstrate).
Step-by-Step Guide to Creatinzg a Drop-Down List
Here’s how to add a drop-down list to your Excel spreadsheet:
Step 1: Start with Your Data
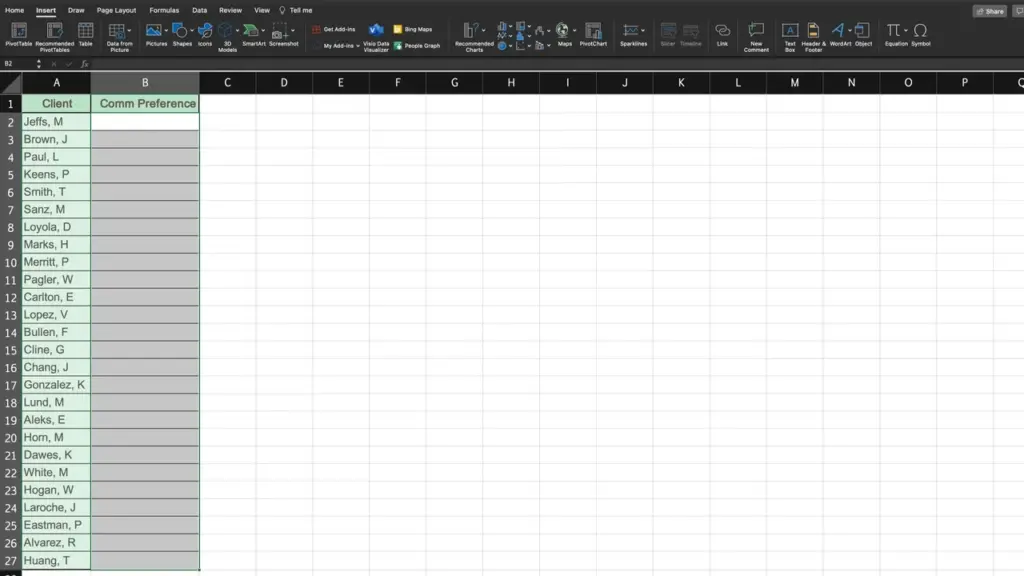
Open your Excel spreadsheet and identify the cells where you want to add the drop-down list. For instance, if you’re tracking client communication preferences, you might have client names in Column A and preferences in Column B.
Step 2: Select the Cells
Highlight the cells in Column B (or wherever you want the drop-down list to appear).
Step 3: Open Data Validation
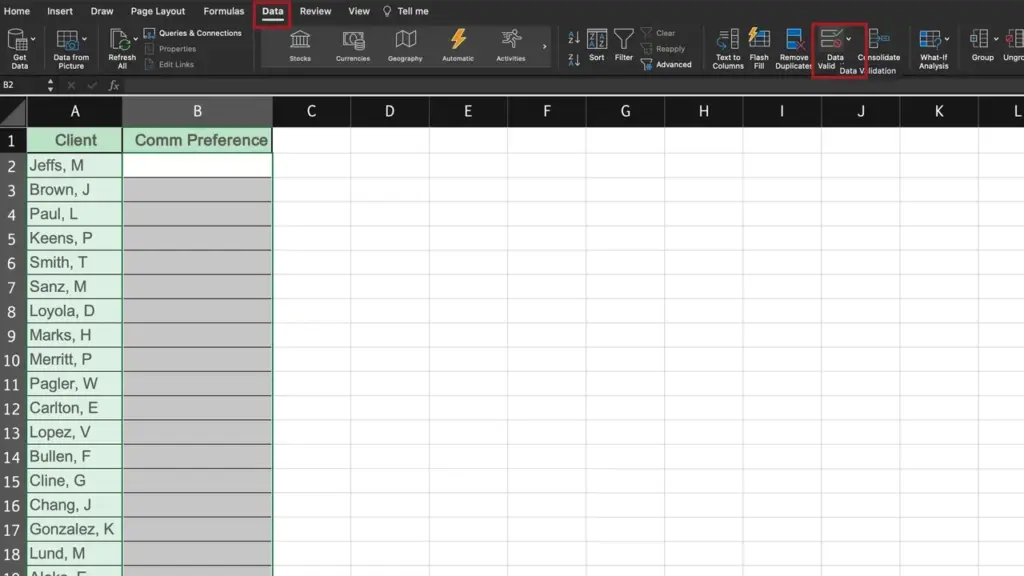
- Go to the Data tab in the menu bar.
- Click on Data Validation (or Validation if you’re using Excel on Mac or the web).
Step 4: Set Up the Drop-Down List
In the Data Validation pop-up:
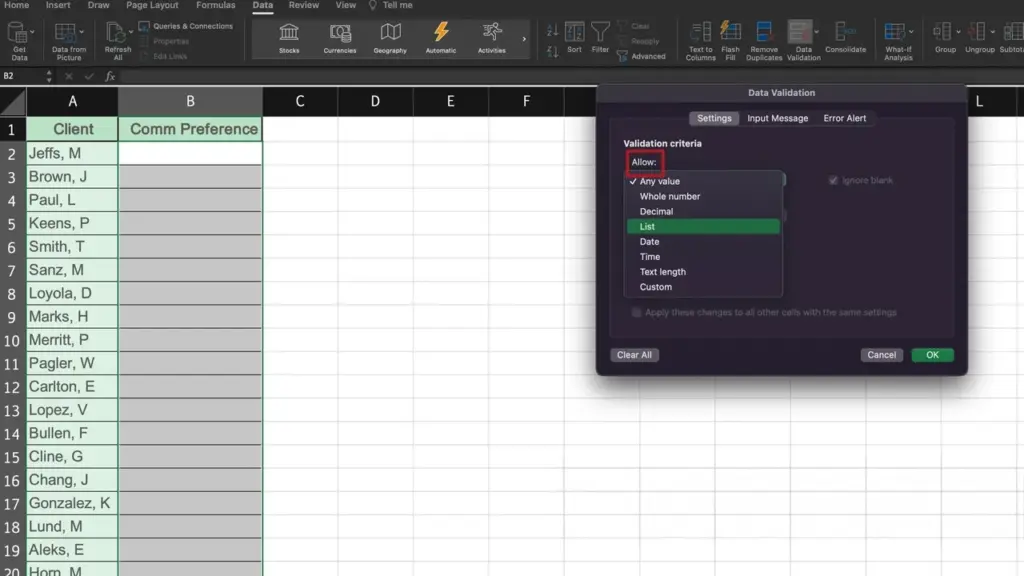
- Under the Settings tab, find the Allow drop-down menu.
- Select List from the options.
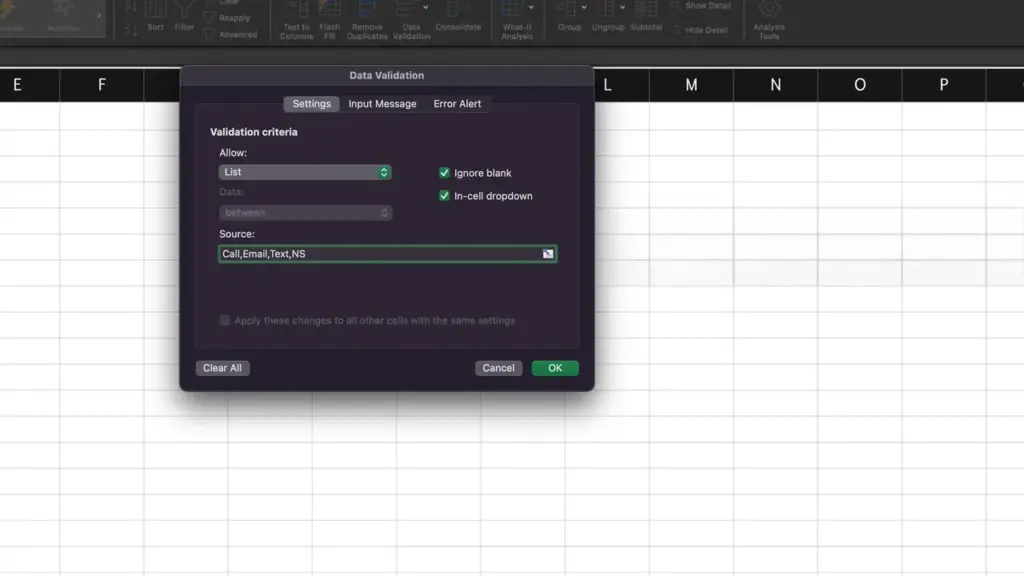
- In the Source field, enter the values you want in your list, separated by commas (no spaces). For example:
Call,Email,Text,NS.
Step 5: Save and Test
Click OK to save your changes. Now, when you click on any of the selected cells, a drop-down arrow will appear. Click it to view and select your options.
Advanced Tips for Drop-Down Lists
Once you’ve mastered the basics, here are some additional features to explore:
1. Editing a Drop-Down List
To modify your list:
- Select the cells with the drop-down.
- Go to Data > Data Validation.
- Update the values in the Source field.
2. Adding Colors to Drop-Down Options
Use Conditional Formatting to make your drop-down list visually appealing:
- Select the cells with the drop-down.
- Go to Home > Conditional Formatting > New Rule.
- Choose Format only cells that contain, set your criteria, and assign a color.
3. Creating Yes/No Drop-Downs
For binary options, simply enter Yes,No in the Source field during the Data Validation process.
Common Questions About Drop-Down Lists
Can I Have More Than One Drop-Down List in a Single Cell?
No, Excel allows only one drop-down list per cell. However, you can create dependent drop-downs by linking multiple lists across different cells.
Is There a Limit to the Number of Items in a Drop-Down List?
Excel technically allows over 30,000 items in a drop-down list, but large lists can become unwieldy. Break them into smaller, categorized lists for better usability.
Do I Need Formulas to Create Drop-Down Lists?
No, formulas are not required. The Data Validation tool handles everything.
Drop-Down Lists vs. Data Filtering
While both features involve selecting options, they serve different purposes:
- Drop-Down Lists: Let you choose a value to fill a cell.
- Data Filtering: Lets you filter and view specific data within a column based on criteria.
Conclusion
Drop-down lists are a simple yet powerful tool in Excel that can streamline your data entry process, reduce errors, and keep your spreadsheets organized. By following this guide, you’ll be able to create and customize drop-down lists with ease. Whether you’re managing a large dataset or just keeping track of personal tasks, this feature is a must-have for maximizing your Excel efficiency.
Ready to transform your Excel experience? Start adding drop-down lists today!


