Traditionally, the Android Debug Bridge (ADB) requires a wired connection to issue commands from a computer to an Android device. However, you can also use ADB wirelessly, eliminating the need for cables and making debugging more convenient.
Step 1: Enable Developer Options on Android
To use wireless ADB, you must first enable Developer Options on your Android phone. This menu is hidden by default but can be accessed with a few simple steps.
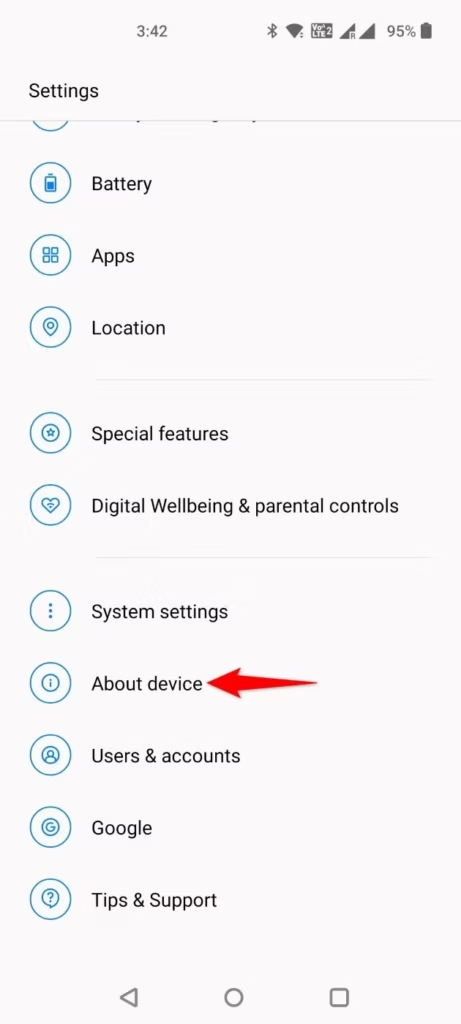
- Open the Settings app on your Android device.
- Scroll down and select About Device (or About Phone, depending on your device).
- Tap Version (or Software Information)
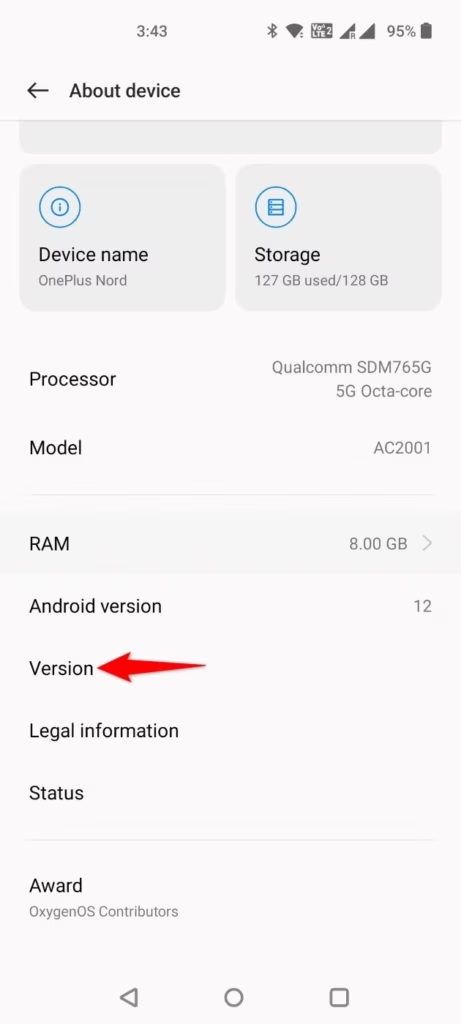
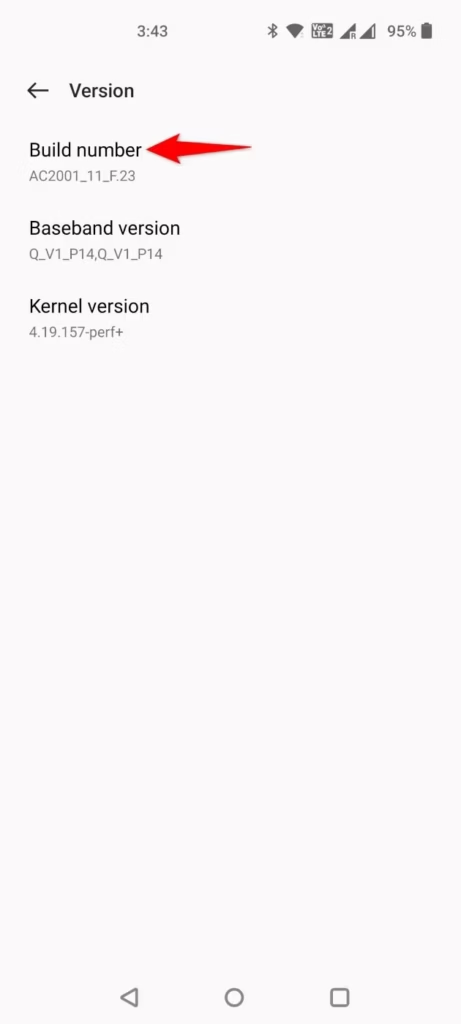
- And locate Build Number, tap Build Number seven times. You’ll see a toast message confirming you’re now a developer.
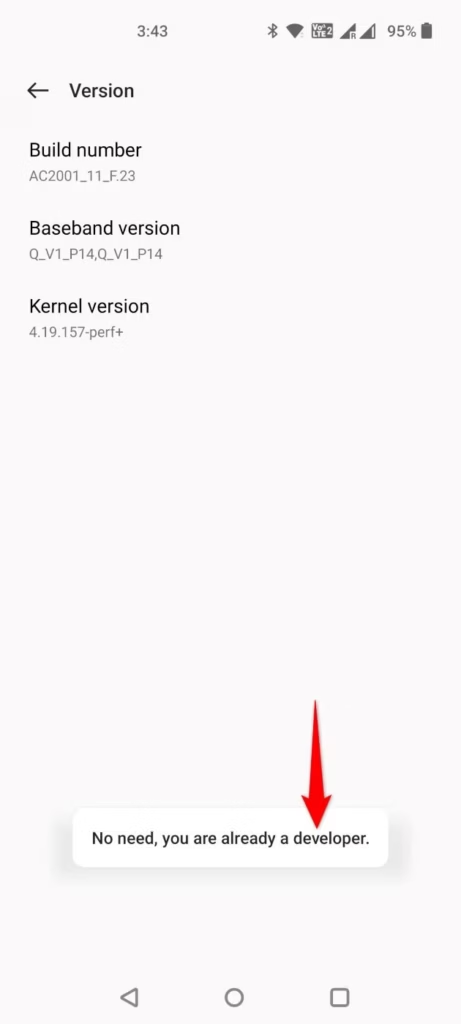
NOTE:
If you already have Developer Options enabled, you’ll see a message like “No need, you’re already a developer.”
Step 2: Turn On Wireless Debugging
Now that you’ve enabled Developer Options, you can activate wireless debugging.
- Go to Settings > System Settings > Developer Options.
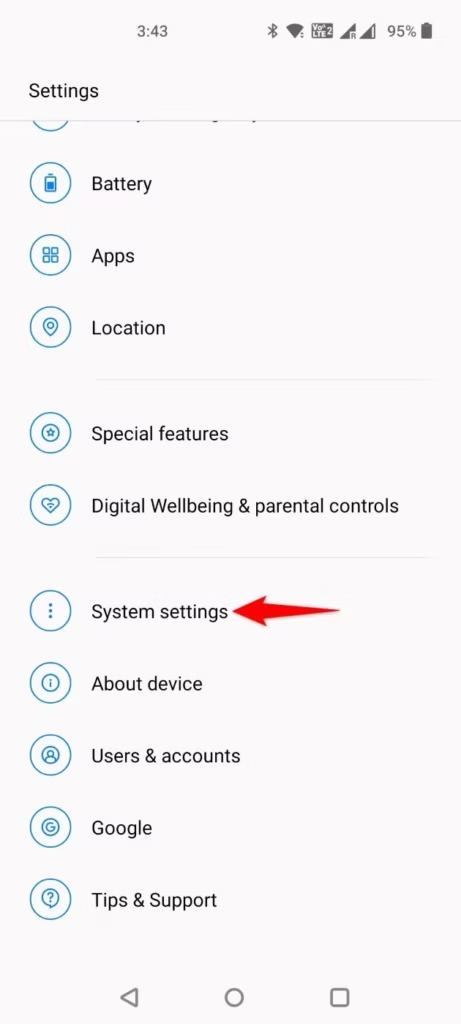
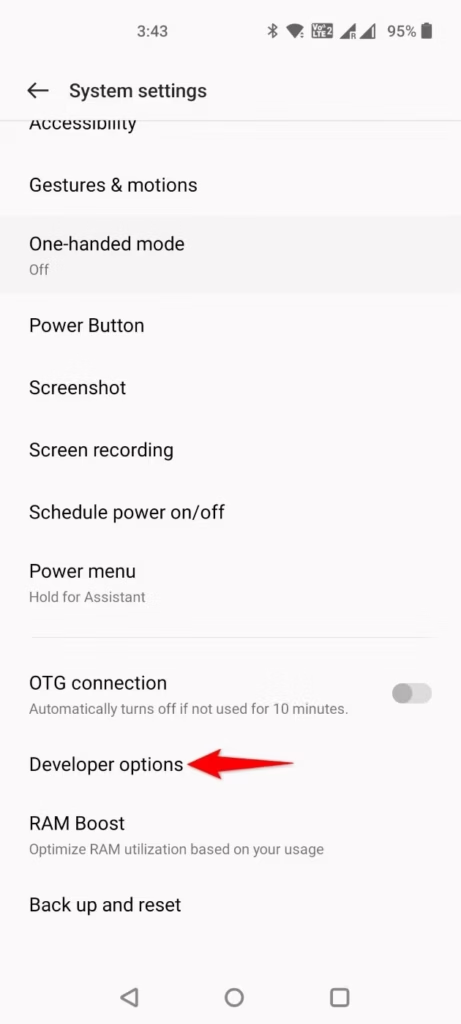
- Scroll down and enable Wireless Debugging.
- In the prompt that appears, tap Allow to permit debugging over the current Wi-Fi network.
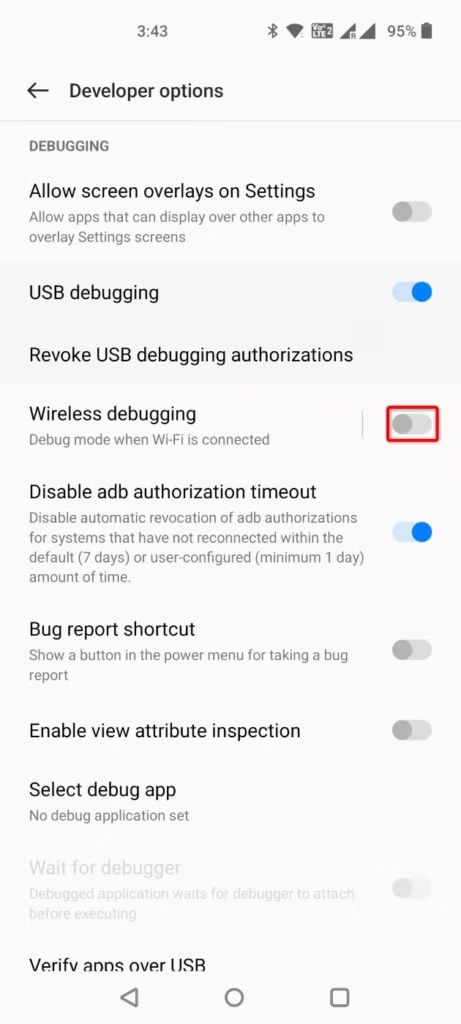
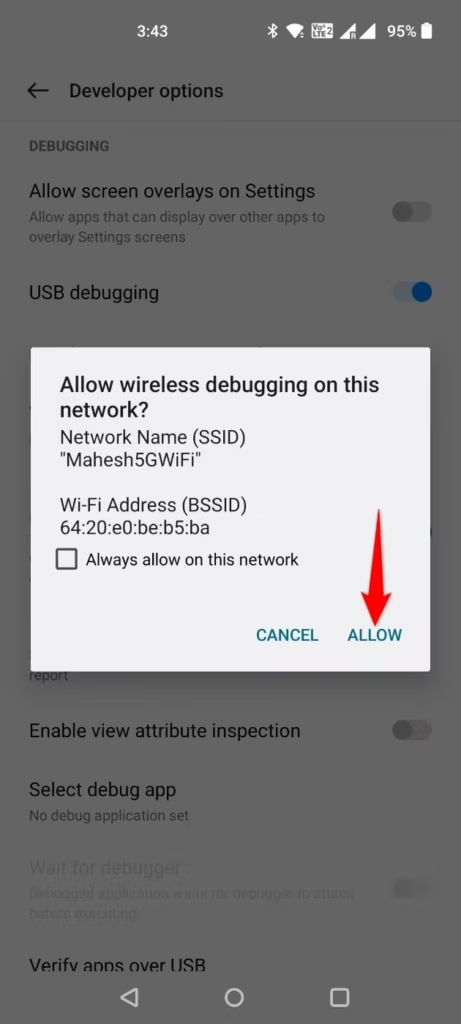
Your device is now ready for wireless ADB pairing.
Step 3: Pair Your Computer With Your Android Phone
To pair your computer and Android phone:
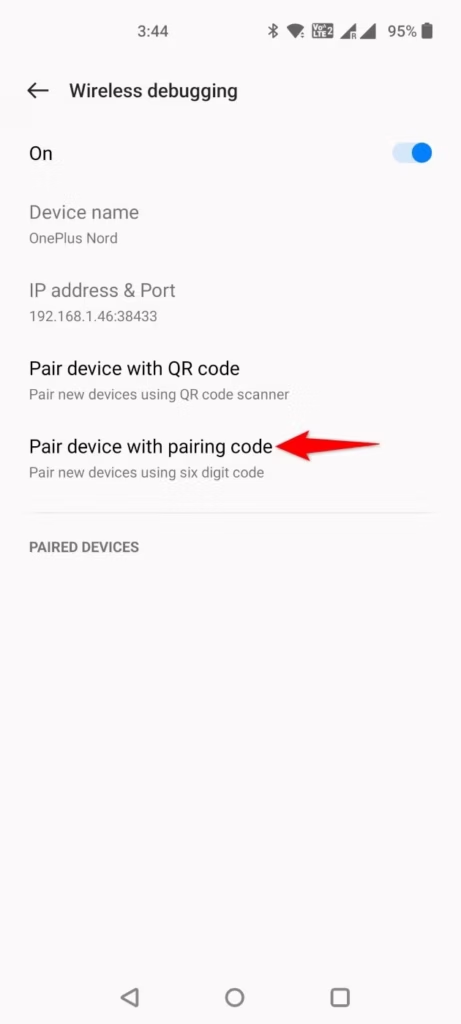
- On your phone, navigate to Settings > System Settings > Developer Options > Wireless Debugging.
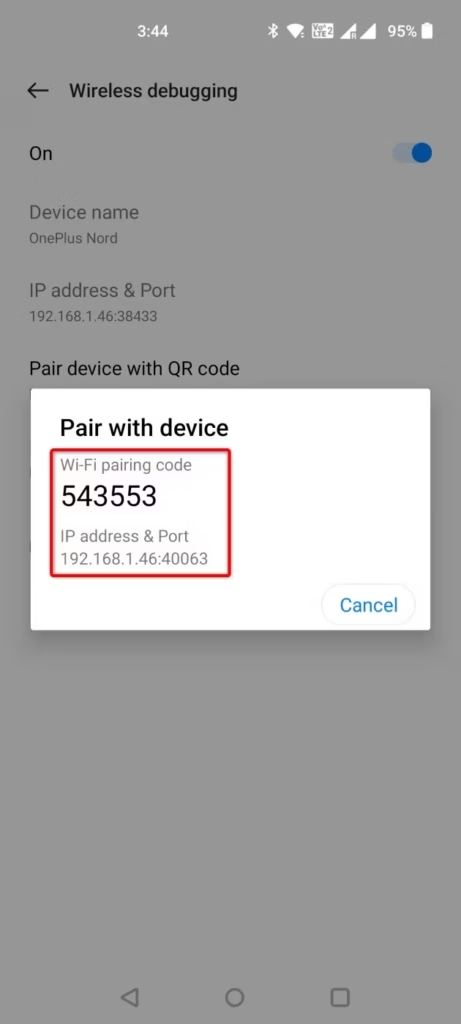
- Tap Pair Device With Pairing Code to view the pairing code, IP address, and port number.
NOTE:
The following steps are for a Windows PC. If you're on Mac or Linux, download the package for your respective operating system.
Set Up ADB on Your Computer
- On your computer, visit Google’s Platform Tools webpage and download the appropriate package for your operating system.
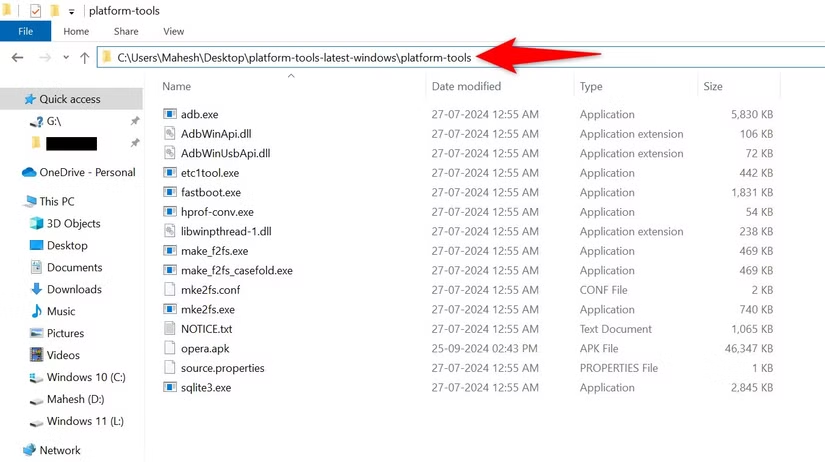
- Extract the downloaded package and note the path to the platform-tools folder.
- Open Command Prompt (Windows) or Terminal (Mac/Linux).
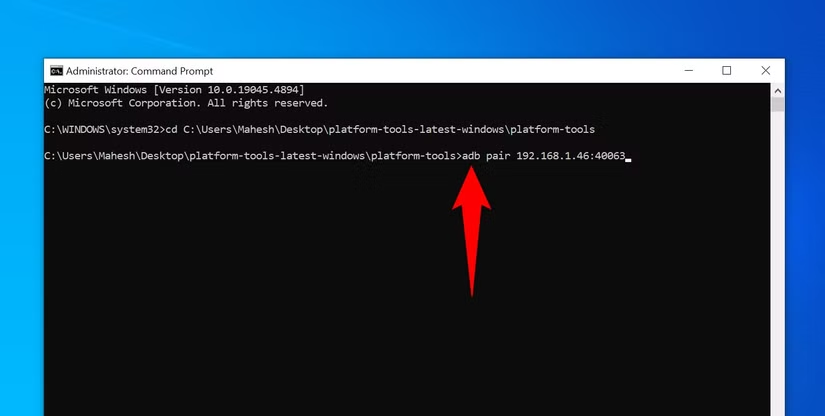
- Use the cd command to navigate to the extracted folder:
cd PATHReplace PATH with the path to the platform-tools directory.
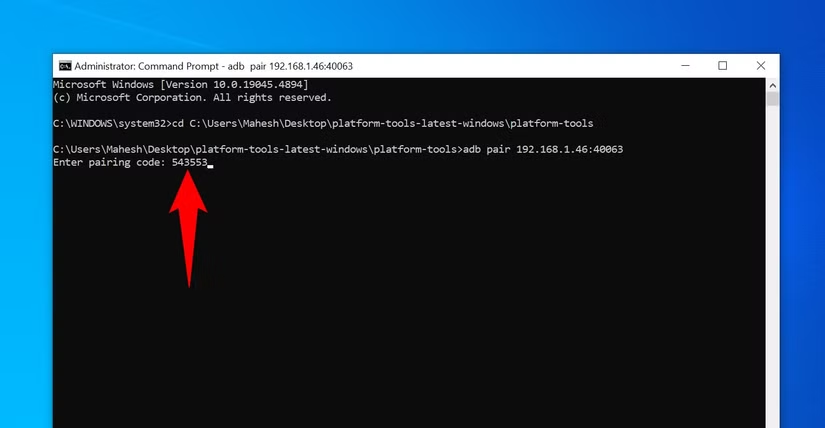
- Pair your phone by running this command:
adb pair IP:PORTReplace IP:PORT with the IP address and port displayed on your phone.
NOTE:
If you get an error running the "adb pair" command, ensure you’re using the latest version of Google’s platform tools.
- When prompted, enter the pairing code displayed on your phone and press Enter.
Step 4: Connect Your Computer to Your Phone
Once paired, connect your computer to your phone for issuing commands:
- Run the following command:
adb connect IP:PORTReplace IP:PORT with the IP address and port shown in the Wireless Debugging settings.
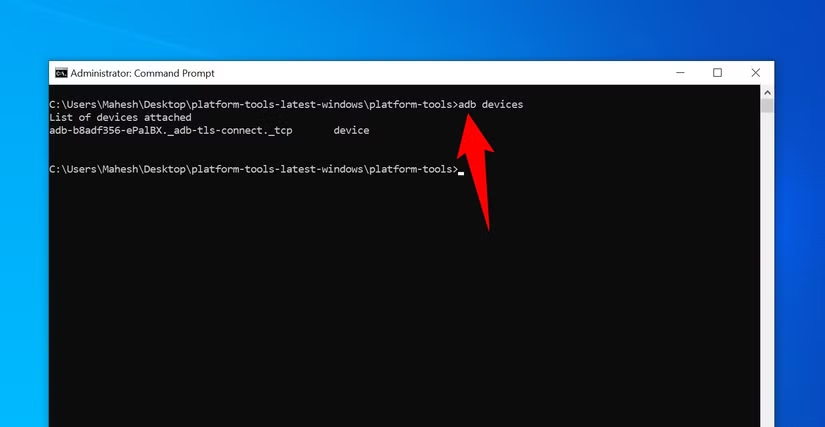
- Verify the connection by running:
adb devicesYour phone should appear in the list of connected devices.
Step 5: Run ADB Commands Wirelessly
You can now use ADB commands to control your Android phone wirelessly. Some examples include:
- View connected devices:
adb devices - Install an app:
adb install myapp.apk - Uninstall an app:
adb uninstall packagename - Take a screenshot:
adb shell screencap -p /sdcard/screenshot.pngadb pull /sdcard/screenshot.png
- Push a file to your phone:
adb push myfile.ext /sdcard/ - Pull a file from your phone:
adb pull /sdcard/myfile.ext
Optional: Add ADB to System Path (Windows)
To simplify using ADB commands from any directory:
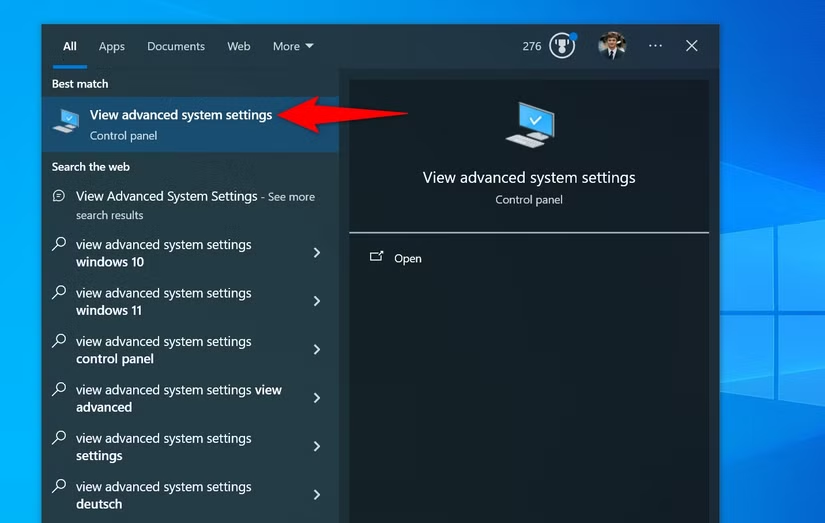
Open View Advanced System Settings in Windows.
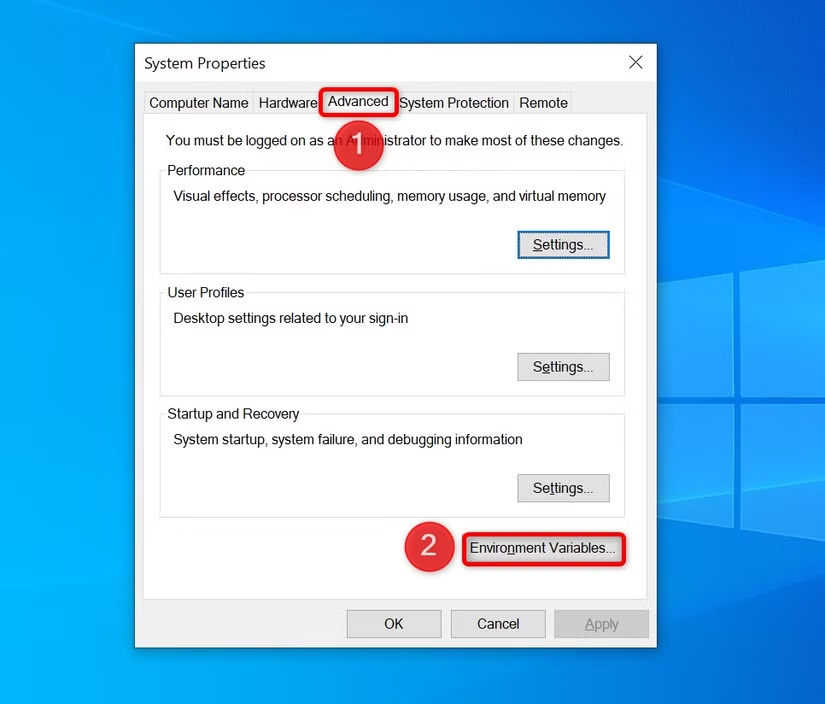
In the System Properties window, go to the Advanced tab and click Environment Variables.
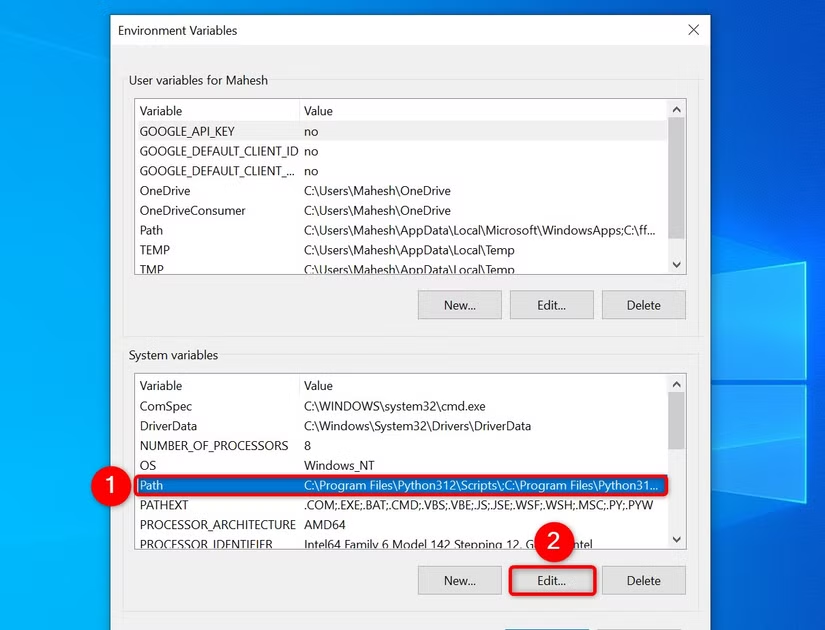
Under System Variables, find and select Path, then click Edit.
Click New and add the full path to the platform-tools folder (where adb.exe is located).
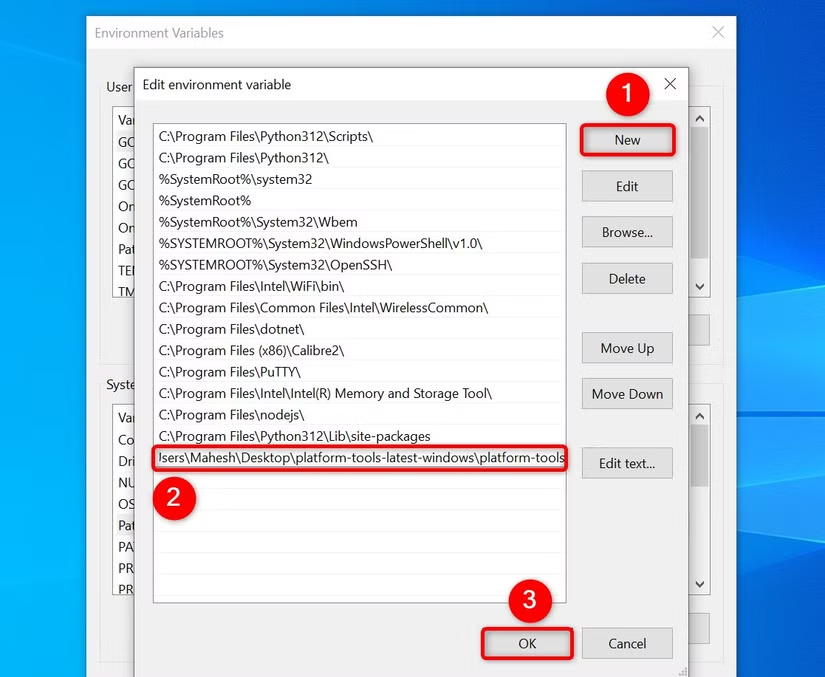
Click OK to save changes.
You can now run ADB commands from any location in Command Prompt.
Conclusion
With wireless ADB, you can easily communicate with your Android phone without the clutter of cables. Whether you’re installing apps, debugging, or taking screenshots, this setup makes the process seamless and efficient. Enjoy the freedom of wireless debugging!

