Pangolin, the self-hosted tunneled reverse proxy, is a game-changer for securely exposing private resources through encrypted WireGuard tunnels. While many users rely on third-party cloud hosting, running Pangolin on your own server offers greater control and customization. In this guide, we’ll walk you through the process of installing and running Pangolin locally, ensuring you can manage your reverse proxy with ease.
Why Run Pangolin Locally?
Running Pangolin on your own server eliminates the need for third-party cloud hosting, giving you full control over your setup. This method is ideal for tech enthusiasts who want to leverage their home server’s capabilities while maintaining security and privacy.
Prerequisites for Installing Pangolin
Before diving into the installation, ensure you have the following:
- A dedicated computer or server: This will host Pangolin.
- Static IP address: While not mandatory, a static IP ensures consistency.
- Open ports: Ports 80, 443, and 51820 must be open on your router and forwarded to the Pangolin server.
- Hardware requirements: At least 1GB of RAM and 25GB of storage.
- Domain name: You’ll need access to DNS records for your domain.
Step 1: Forward Ports on Your Router
To allow external access to Pangolin, you’ll need to forward the necessary ports on your router:
- Log into your router’s admin panel.
- Forward ports 80, 443, and 51820 to the IP address of your Pangolin server.
Step 2: Create an A Record for Your Domain
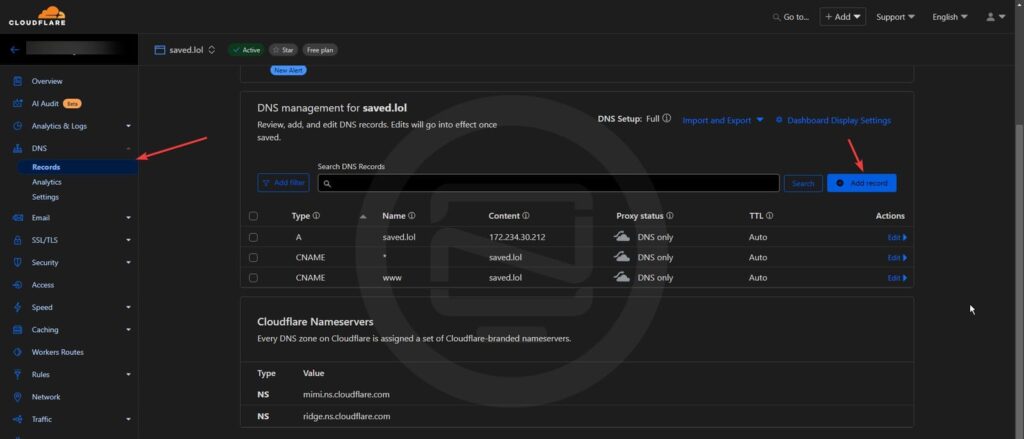
Next, configure your domain to point to your home IP address:
- Log into your DNS provider (e.g., Cloudflare).
- Add an A record with the following details:
- Type: A
- Name: Your domain (e.g., example.com)
- IPv4 address: Your home IP address.
- You can find your public IP by going here or if you’re feeling geeky you can pop open a terminal on your network and use this command
curl https://ipinfo.io/ipto show your IP.
- You can find your public IP by going here or if you’re feeling geeky you can pop open a terminal on your network and use this command
- Proxy status: DNS only (disable Cloudflare proxy for Let’s Encrypt to work)
- Save the record and wait a few minutes for the changes to propagate.
Step 3: Install Pangolin on Your Home Server
Now, let’s install Pangolin on your server:
- SSH into your server.
- Download the latest Pangolin installer using the following command:
wget -O installer "https://github.com/fosrl/pangolin/releases/download/1.0.0-beta.12/installer_linux_amd64" && chmod +x ./installer- Run the installer:
/installer- Follow the on-screen prompts to complete the installation. You’ll need to provide:
- Your base domain (e.g., example.com)
- A subdomain for the Pangolin dashboard (e.g., pangolin.example.com)
- An email address for Let’s Encrypt certificates
- Admin user credentials
Step 4: Explore the Pangolin Dashboard
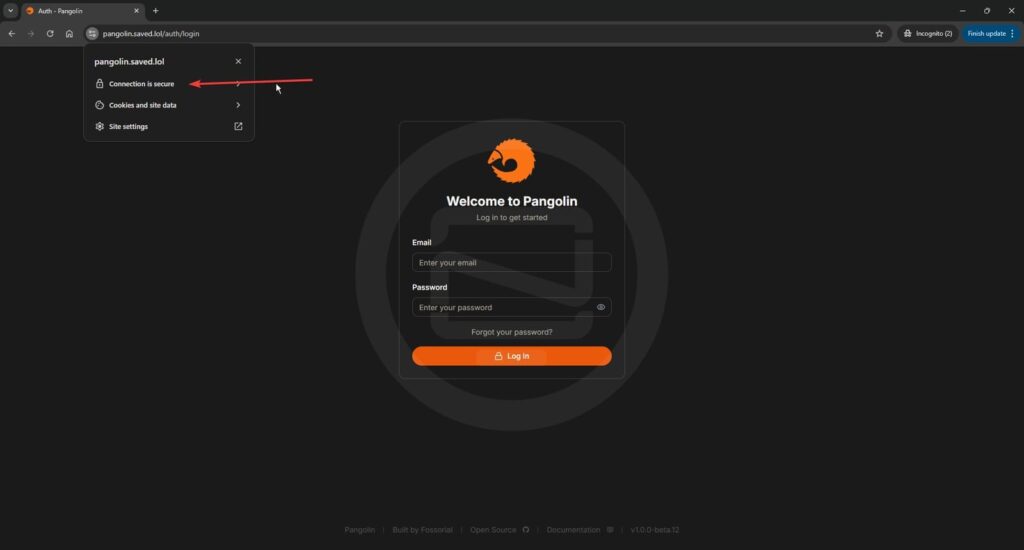
Once the installation is complete, access the Pangolin dashboard using the subdomain you configured. Here’s what you can do:
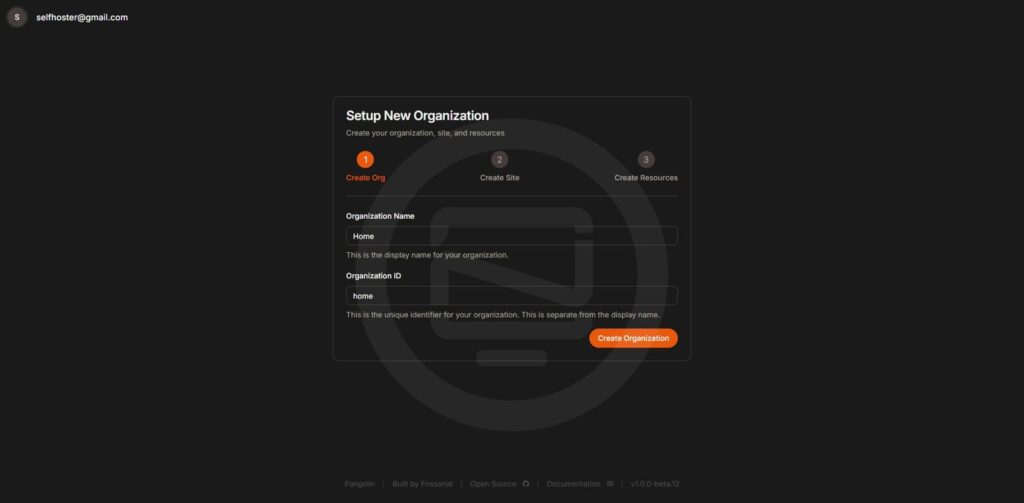
Create an Organization
- Log in to the dashboard.
- Create an organization (e.g., “Home”) to manage your resources.
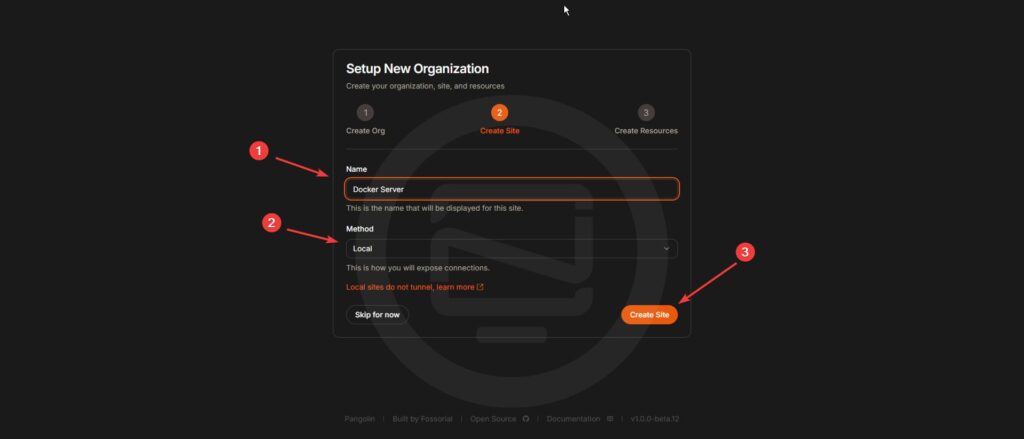
Create a Site
- Add a site to represent your server (e.g., “Docker Server”).
- Choose “Local” as the connection method.
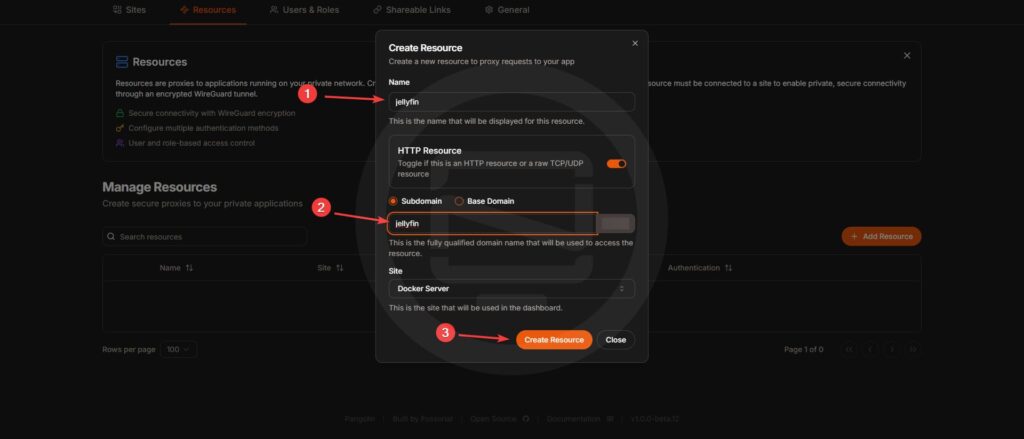
Add a Resource
- Create a resource for each application you want to expose (e.g., Jellyfin).
- Specify the local IP and port of the application.
- Save the configuration and wait for Let’s Encrypt to issue an SSL certificate.
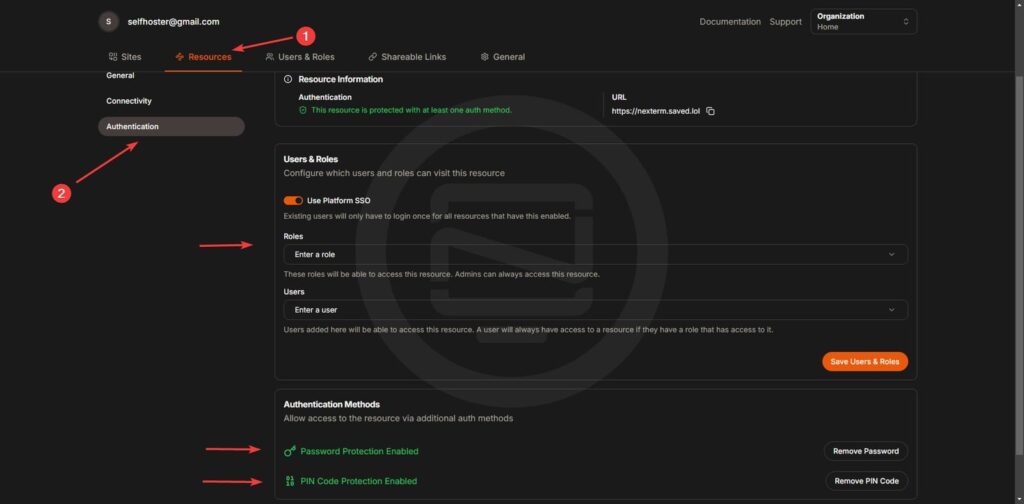
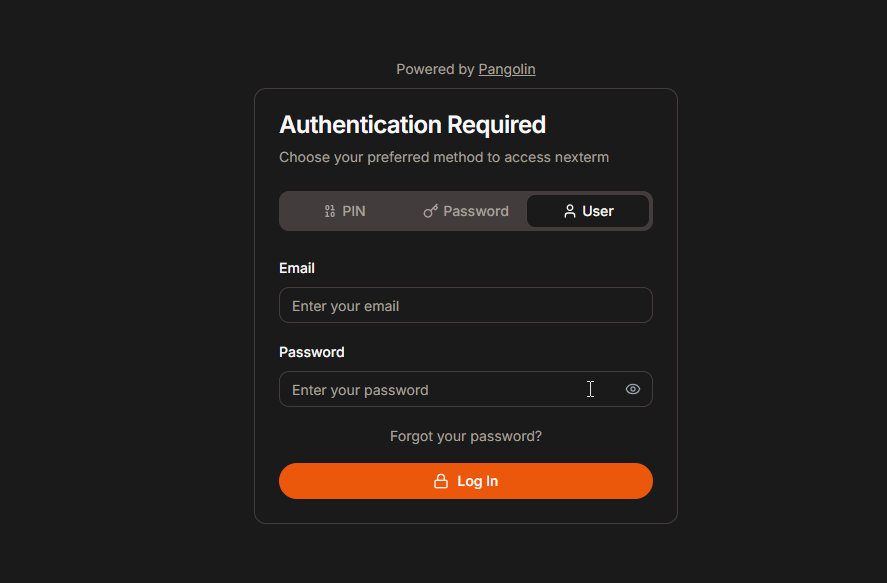
Step 5: Secure Your Resources with Pangolin Authentication
Pangolin offers multiple authentication methods to secure your resources:
- Username and password: Standard login credentials.
- Single password: A shared password for quick access.
- 6-digit PIN: A short code for added convenience.
- Two-factor authentication (2FA): Extra security for sensitive resources.
What’s Next for Pangolin?
The Pangolin team is continuously improving the platform. Here’s what’s on the horizon:
- Multi-domain support: Seamless SSO across multiple domains.
- Crowdsec integration: Automated installation for enhanced security.
- IP and path-based rules: Bypass authentication for specific routes or IPs.
Final Thoughts
Running Pangolin locally on your own server is a powerful way to manage your reverse proxy while maintaining full control over your setup. While this method exposes your home IP, it’s a trade-off for the flexibility and customization it offers.
If you encounter any issues, don’t hesitate to reach out to the Pangolin community via their GitHub issue tracker, Discussions page, or Discord server.
Support the Pangolin Project
Pangolin is a free, open-source project developed by a passionate team. If you find it useful, consider sponsoring the project on GitHub Sponsors or giving it a star on GitHub.
By following this guide, you’ve taken a significant step toward mastering self-hosted reverse proxies. Happy hosting!
Shared by Noted