How to Install Immich on Ubuntu 22.04 LTS
In today’s digital era, safeguarding your precious memories against data loss is paramount. Immich, a widely acclaimed self-hosted photo and video backup solution, offers robust features comparable to Google Photos. This article will guide you through installing Immich on Ubuntu 22.04 LTS, targeting readers with a basic understanding of Linux and command shell usage.
Prerequisites
Before diving into the installation process, ensure you meet the following prerequisites:
- A server running Ubuntu 22.04 LTS or any other Debian-based distribution such as Linux Mint.
- SSH access or an open Terminal on a desktop system.
- Basic knowledge of executing commands in the Linux CLI (Command-line Interface).
- An uninterrupted internet connection for downloading necessary packages.
- A user account with root or privileges for executing administrative commands.
sudo
Step-by-Step Installation
Step 1: Updating Software Package List
Before installing new software, it’s a good practice to update your package list, ensuring you get the latest versions of software and dependencies:
sudo apt update
sudo apt upgrade
Step 2: Checking Snap Support on Ubuntu
Snap is included by default on Ubuntu 22.04 LTS. Confirm the installation and version with:
snap --versionThis should display something like:
snap 2.54.4
snapd 2.54.4
series 16
ubuntu 22.04
kernel 5.15.0-58-generic
If is missing, install it along with the prerequisites:
sudo apt update
sudo apt install snapd
Finally, ensure is up-to-date before proceeding:
sudo snap refreshStep 3: Installing Immich on Ubuntu 22.04 LTS
Immich offers a dedicated Snap package encapsulating the entire application stack within a neatly bundled snap. Install the latest stable Immich version with:
sudo snap install immich-distributionThe snap will pull the most up-to-date images and set up the entire backend, requiring no manual configuration. The initial install may take a few minutes depending on your internet speed.
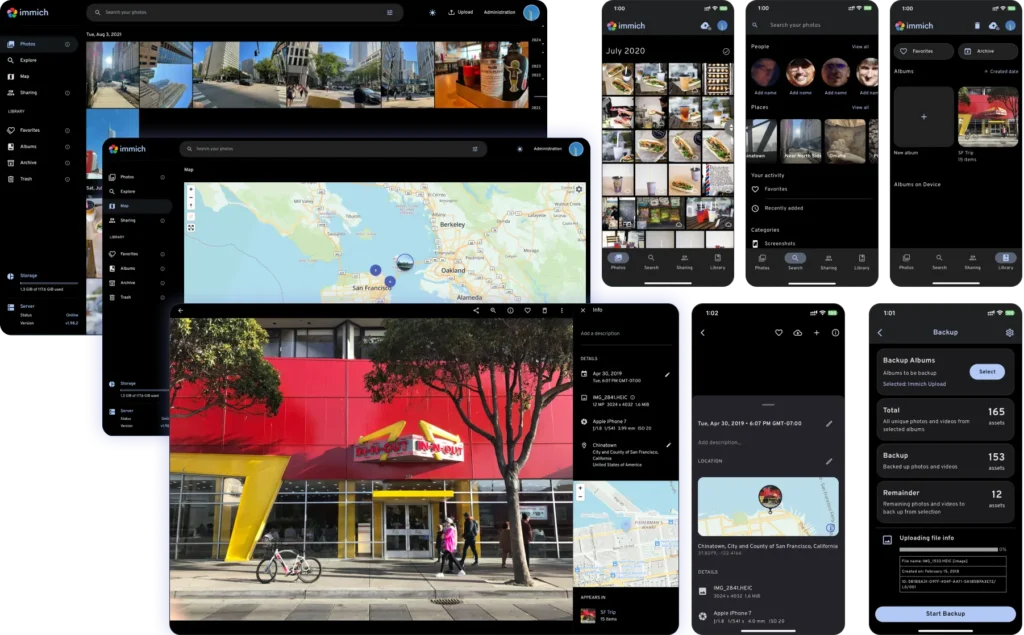
Step 4: Accessing the Immich UI
With the installation completed, access the web UI at: http://your-server-ip:3000
(Replace with your actual server IP address. You will be greeted with the getting started page to create your first admin user)