How to Install macOS on Linux in a VM
Getting macOS to work on a non-Apple machine requires very selective hardware and countless hours configuring EFI, disks, and more. Using virtual machines can help overcome hardware nitpicking and focus on the experience.
If enough system resources are allocated for the VM, you might get a smooth experience out of macOS.
With the Quickemu project, virtualising macOS in Linux has never been easier. It uses Qemu/KVM under the hood to run virtual machines. MacOS versions from Mojave to Sonoma are supported.
Hardware Requirements
To virtualise macOS in your system, your system must satisfy the minimum configuration required:
- Processor: Intel Core i5/AMD Ryzen 5 or above with 4 cores minimum (with virtualisation support)
- RAM: 8 GB or more (macOS needs at least 4 gigs of memory)
- Disk Space: at least 40 GB of free space
Quickemu installation
I am utilising the Quickemu project to install macOS. Based on qemu and KVM, it manages the downloading and execution of virtual machines within the command line.
You can find installation instructions on their GitHub repo. I am sharing the steps for Ubuntu, the distro I used in this tutorial.
Installing via PPA
The PPA method can be used for Ubuntu versions, including and above 22.04. Run the following commands in the terminal:
sudo apt-add-repository ppa:flexiondotorg/quickemu
sudo apt update
sudo apt install quickemu
Manual Installation from the repository
To install quickemu manually, obtain the dependencies (Debian-based distribution):
sudo apt install git qemu jq mesa-utils pciutils procps python3 genisoimage usbutils util-linux sed socat spice-client-gtk libtss2-tcti-swtpm0 xdg-user-dirs zsync unzipYou could get a specific version of the project from the releases page, or obtain the latest one by cloning the official repository:
git clone https://github.com/quickemu-project/quickemu/Installing macOS
Within this project, a tool called quickget is used to download installation disc files from the official sources, which will be used to obtain a bootable configuration of macOS.
I am installing the BigSur version to demonstrate. Here are the steps:
Get the installation files via quickget
Change the directory to the repository, and run the following command:
cd quickemu
./quickget macos big-sur
Launch the virtual machine
Now the virtual machine can be spun up, where the following will be the boot screen:
./quickemu --vm macos-big-sur.conf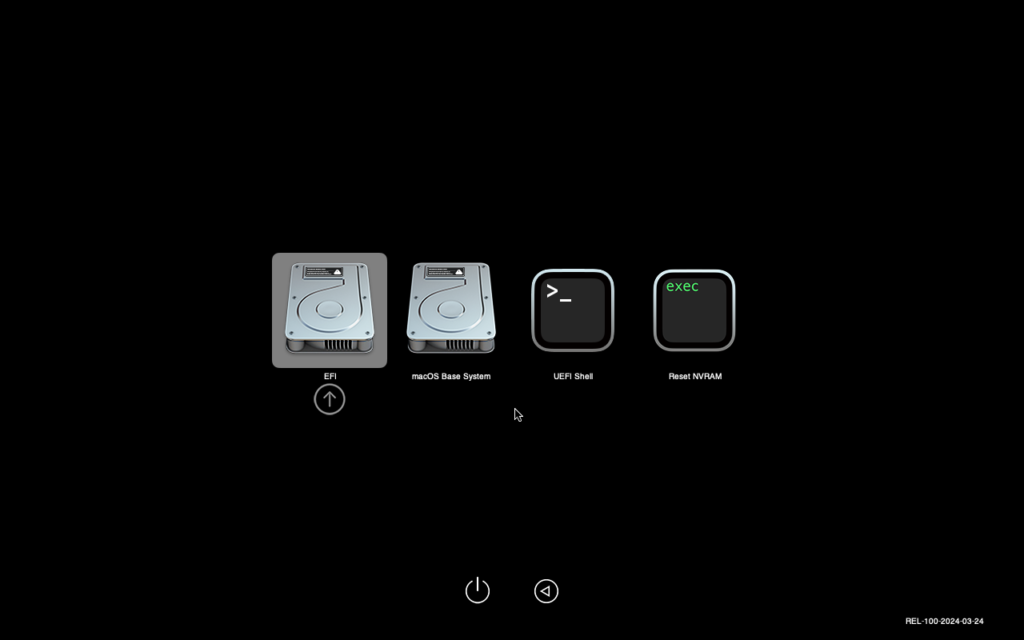
Select ‘macOS Base system‘ to get into the installation medium.
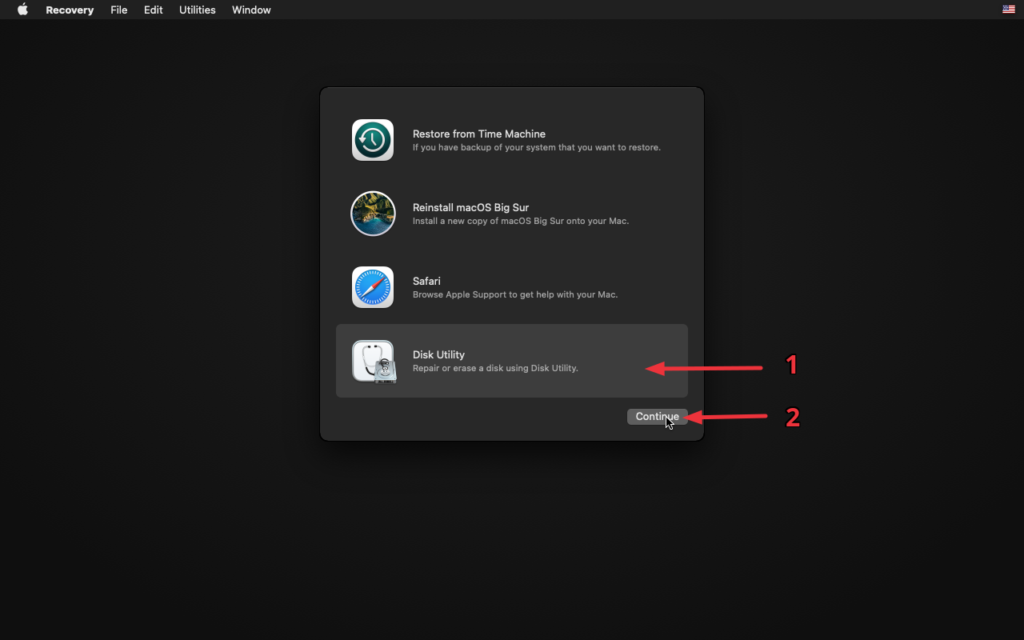
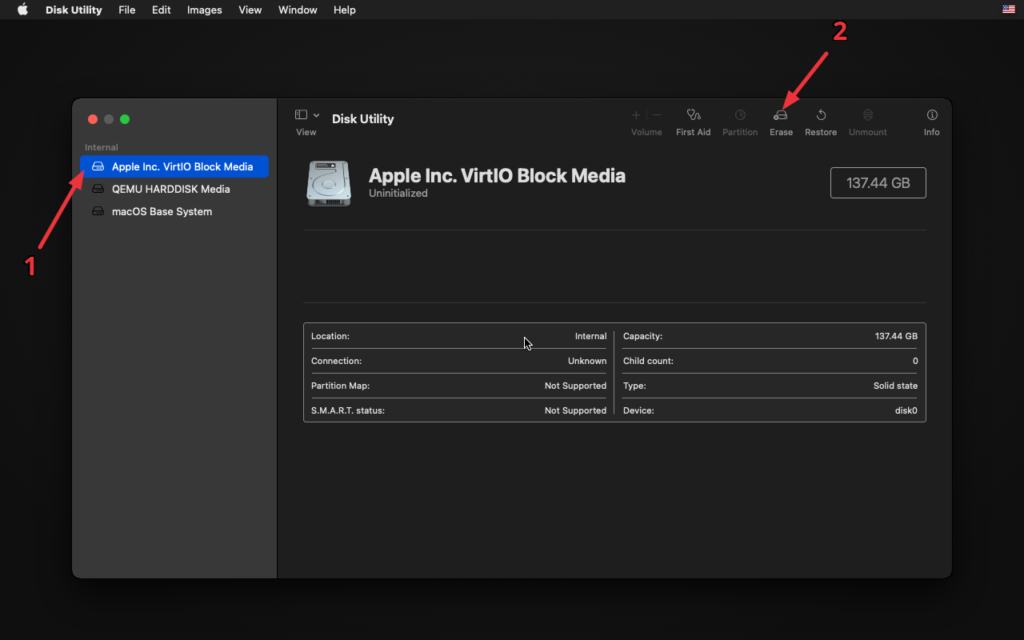
Create a partition from Disk Utility
The disk has to be partitioned in order to start with the installation. Hence, start with opening the Disk Utility from the menus:
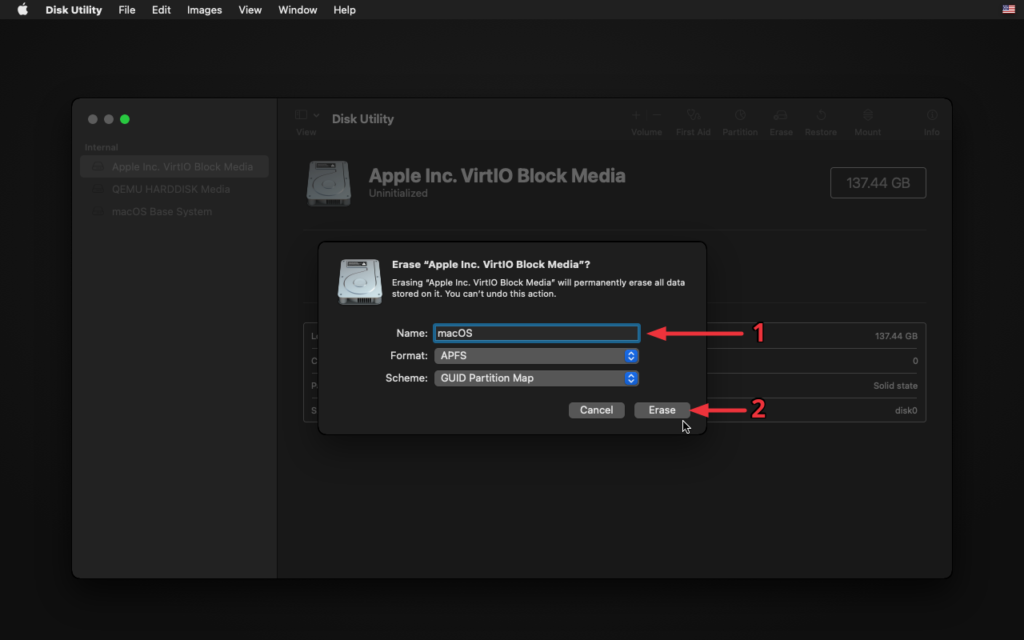
Format the drive “VirtIO Block Media” by selecting and erasing it. Enter a preferred name for your filesystem (for which I conveniently chose “macOS” 😛)
and choose the filesystem as APFS.
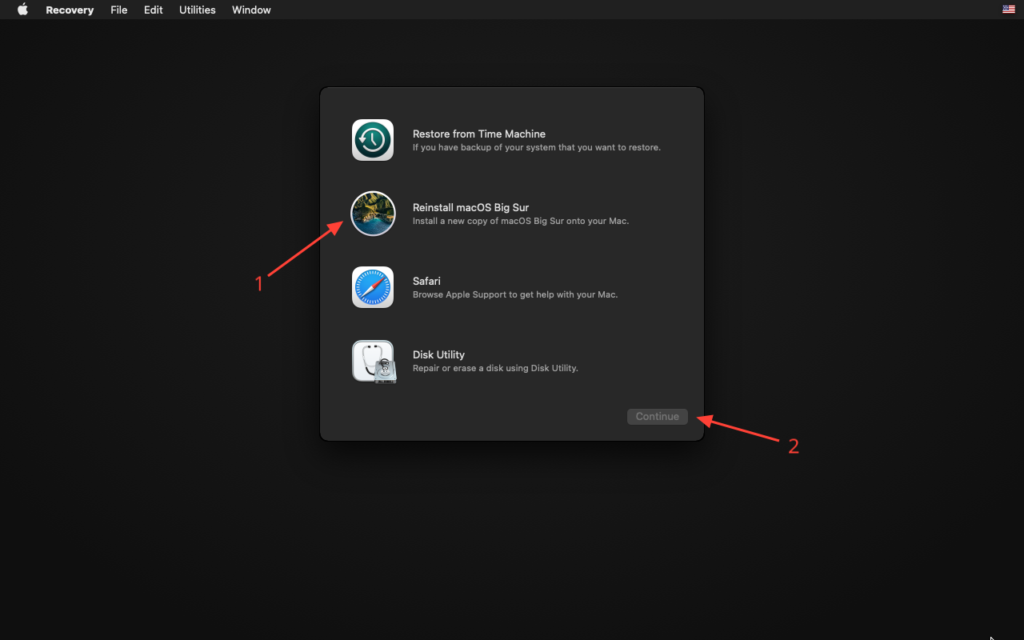
Start the installer
Quit the disk utility and get to the second option: Reinstall macOS BigSur
Installation Welcome screen
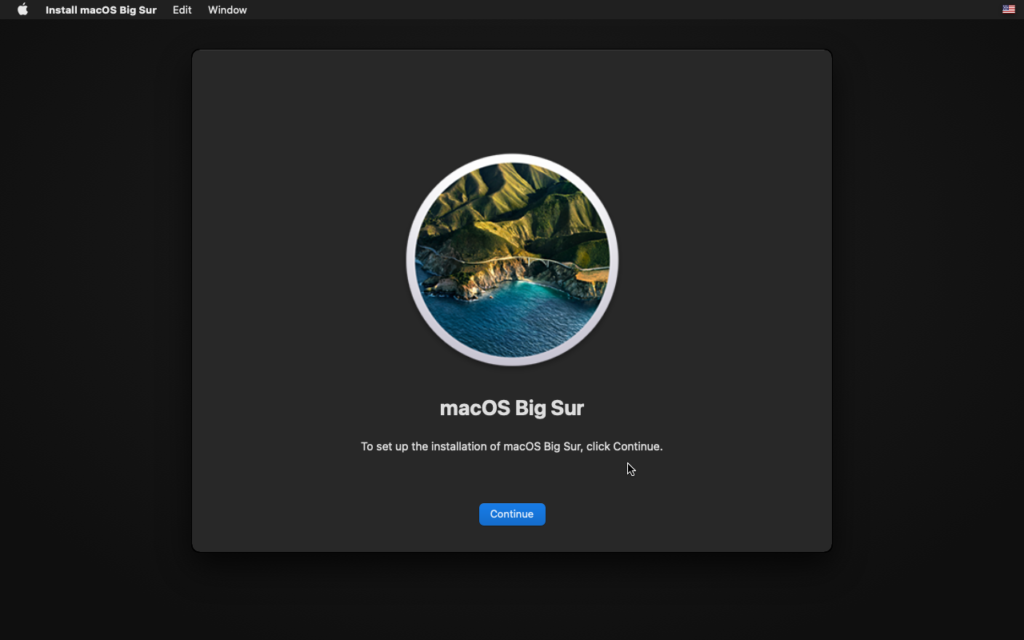
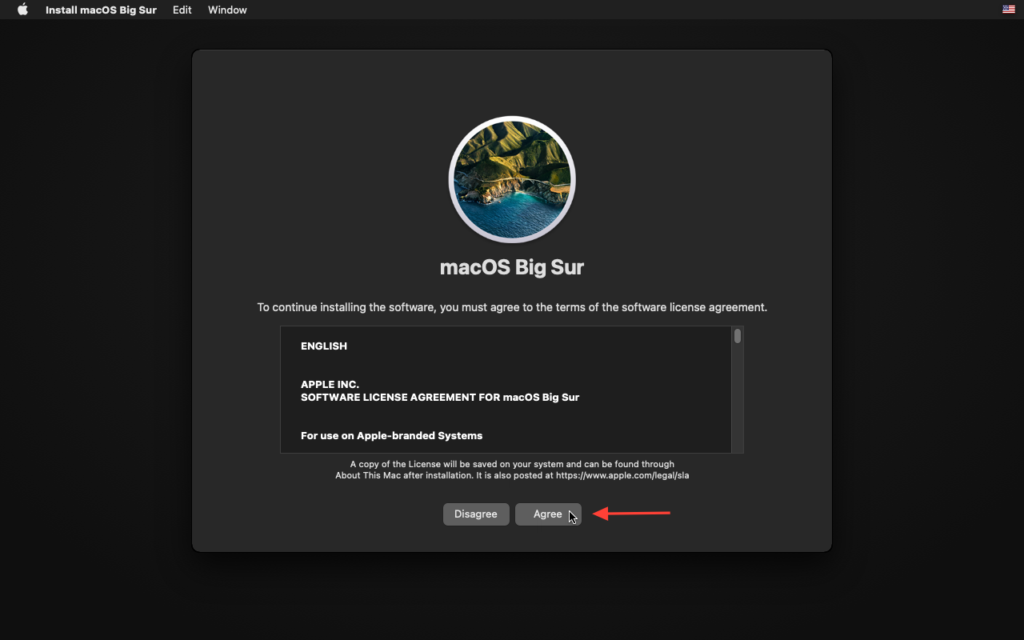
Agree to the license terms and proceed further.
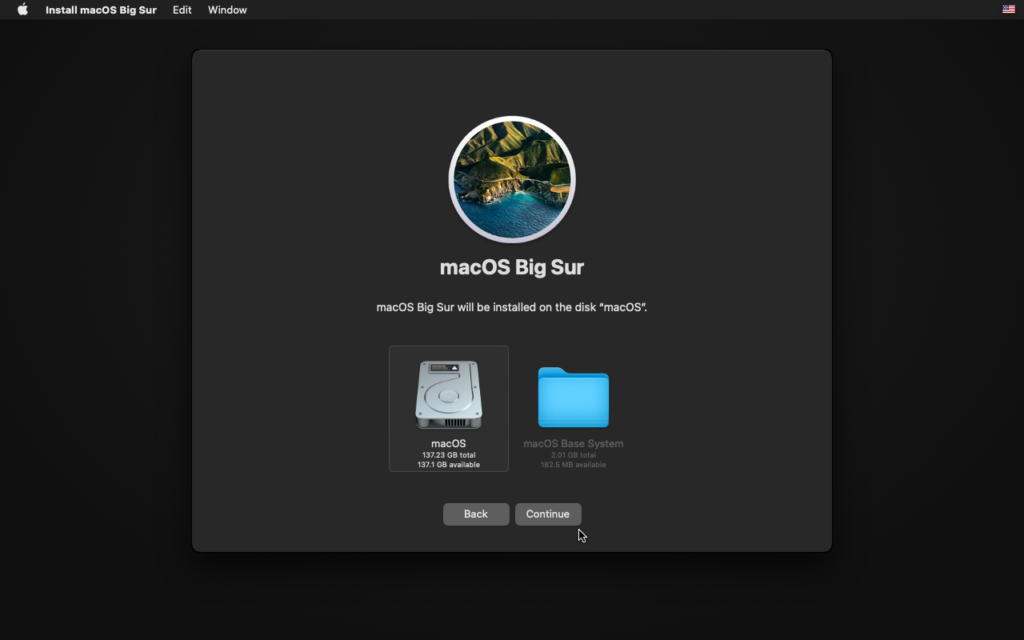
After the license agreement, select the disk that you had already formatted. If you don’t see the disk, quit the installer and check with the disk utility.
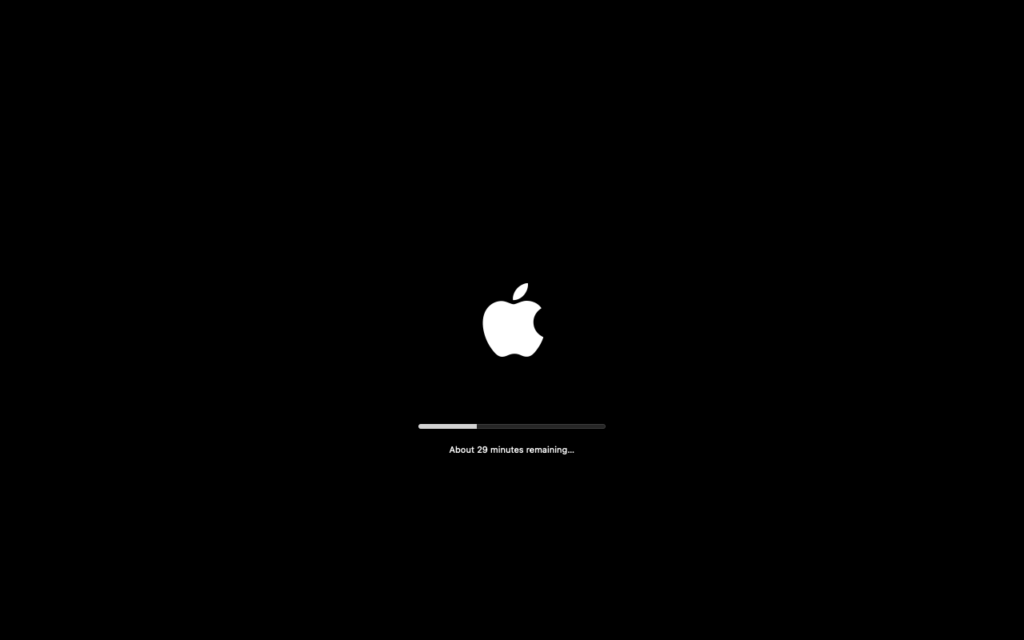
And so the installation begins!

This page took around half an hour to complete (do not get confused by the ETA here). After a reboot, the installation continued for yet another half an hour:
Once the installation is complete, you will be greeted with a welcome page. You can start configuring your system from there.
Setting up your macOS instance
The setup screen greets you after a successful installation. Here is what I followed throughout the setup, which you can follow too:
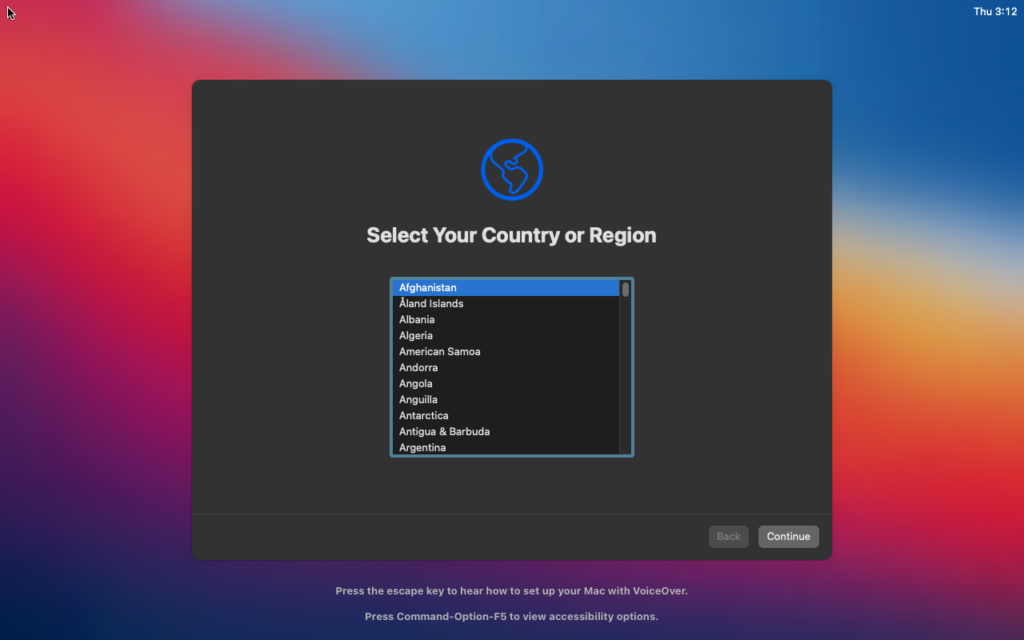
Choose the country
Selecting the country of residence when the VM boots up:
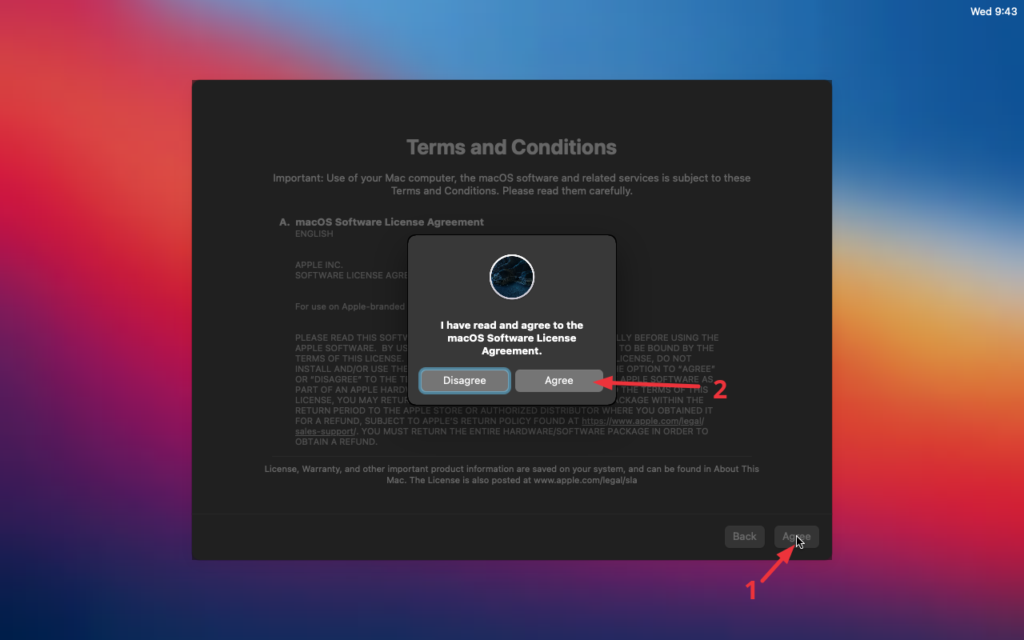
License agreement
Apart from the setup, the license has to be agreed to even in the setup.
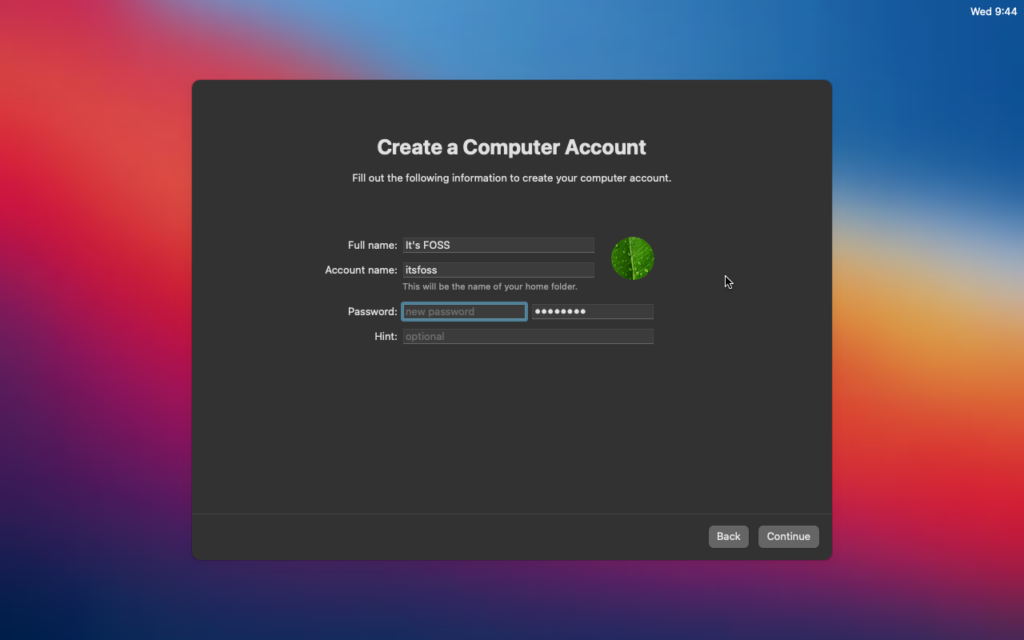
User account creation
Create a user account by specifying a username and password.
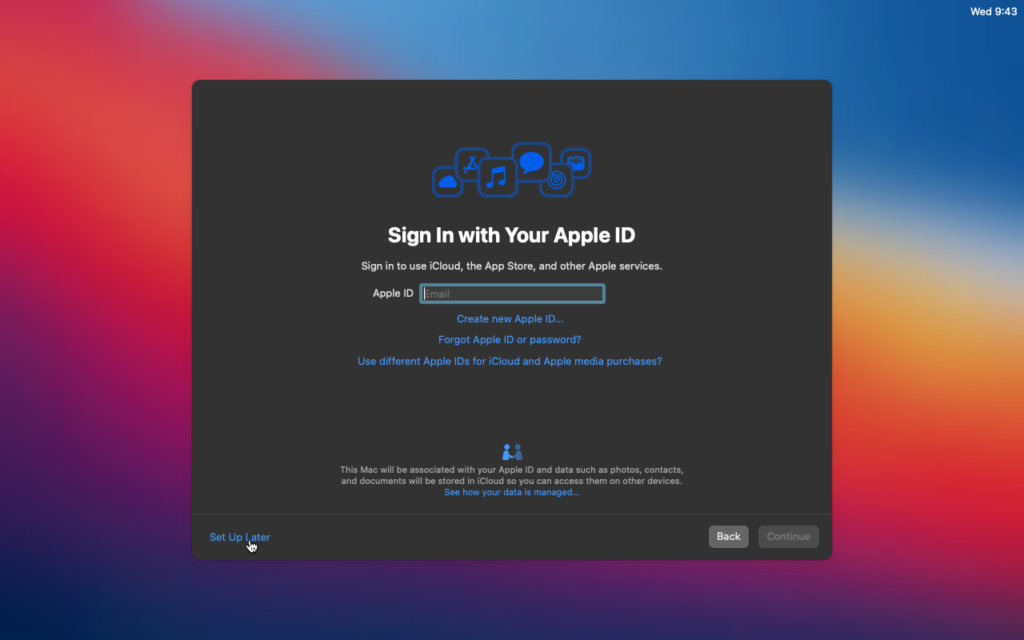
An Apple ID is required to use Apple services such as the store. Apple can suspend your ID for running macOS on non-recognised hardware, so beware.
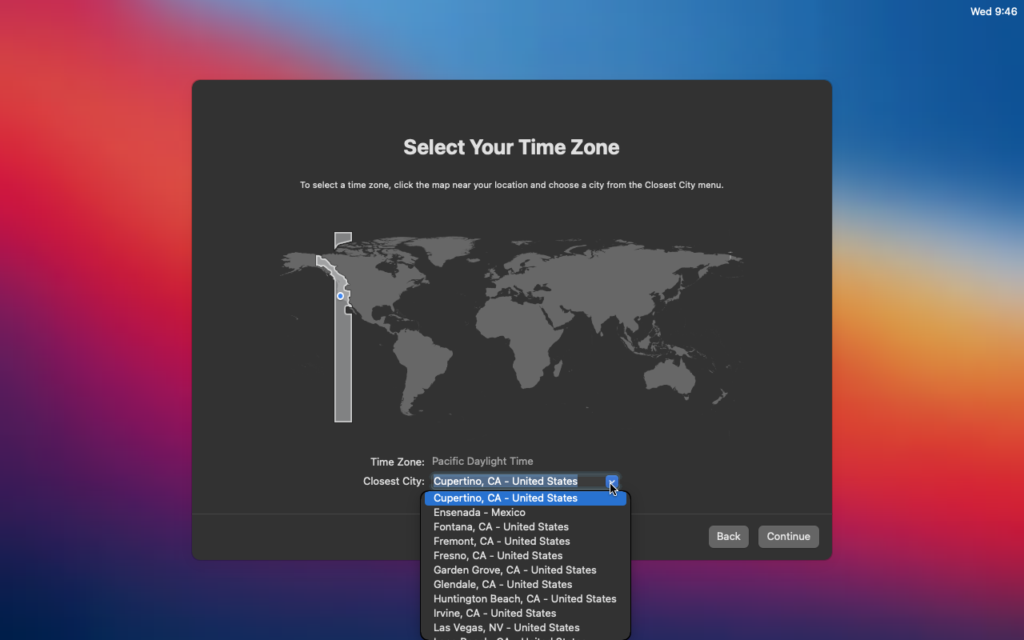
Timezone
Choose the appropriate timezone for the system by entering your nearest city of residence.
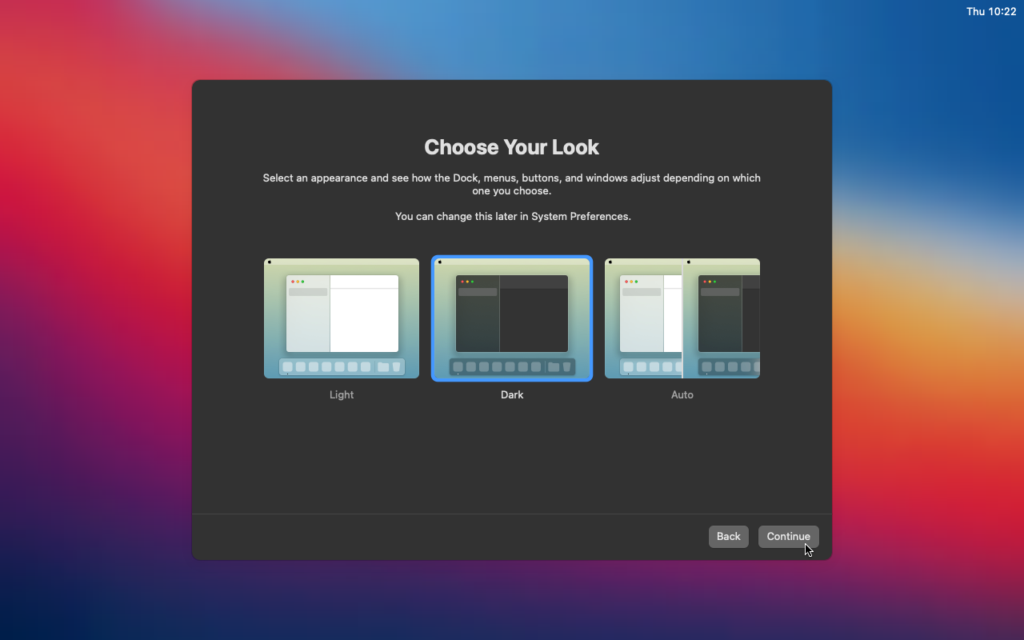
Appearance
Here, choose either a constant light/dark mode or let the system choose for you:
And voila! You just successfully installed a fresh copy of macOS in your Linux system.
Tips for a seamless experience
Now that you have macOS installed in a VM, let me share a few tips and tweaks to enhance your experience.
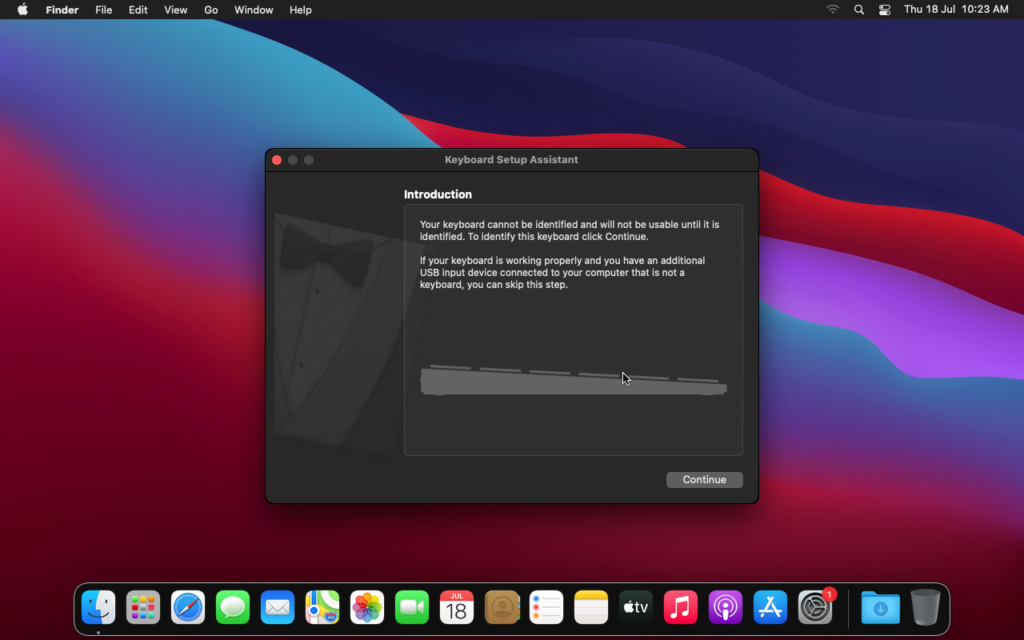
Keyboard tweaks
If you are already used to macOS keyboard shortcuts, this is a tip to remap the command key near the spacebar:
Navigate to System Preferences ➡️ Keyboard ➡️ Modifier Keys, and swap the mapping of command and option keys.
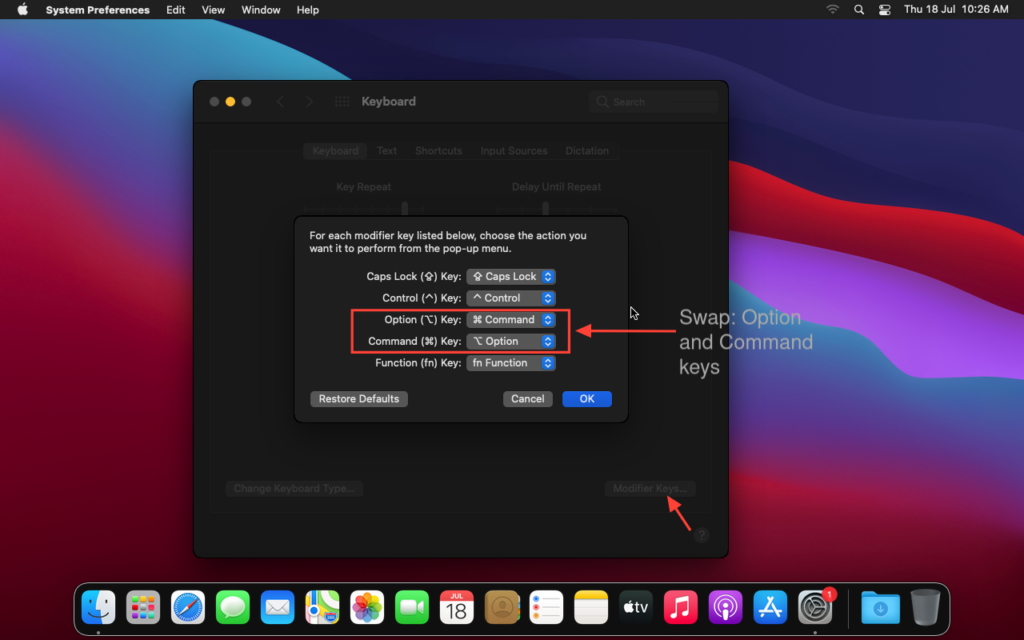
This helps to emulate the macOS-like keybindings since the alt key now functions as the command key.
Editing the quickemu configuration
Quickemu supports a default conf file to accommodate configuration changes (the same file used for launching).
For instance, to change the amount of RAM allocated, add the following line to macos-big-sur.conf:
ram="4G"Here’s a demonstration of how the configuration is changed:
Quickemu supports more such tweaks. You may check their official documentation for more such tweaks.
Change display resolution
For macOS Catalina, the resolution set at boot will be taken as the default. It is done by passing width and height tags to the command. Here’s a sample:
quickemu --vm macos-catalina.conf --width 1920 --height 1080For BigSur and above, you need tools like SwitchResX (freemium application) to set a resolution manually.
Create a desktop shortcut
Creating the desktop shortcut might be the best option if you won’t actively work in the terminal debugging the virtual machine. Here’s the template that I used for the shortcut:
[Desktop Entry]
Name=macOS BigSur # change name according to the version
Exec=/home/username/quickemu/macos-big-sur.conf # change your config path
Type=Application
Terminal=false # to open only the VM window
Comment="Shortcut to run a macOS VM by Quickemu"
StartupNotify=true
Icon=
Save this as macos-big-sur.desktop in your desktop folder. Double-clicking it should automatically launch the VM.
Alternatively, you can create an application icon in your app drawer with the --shortcut tag, like:
./quickemu --vm ./macos-big-sur.conf --shortcutConclusion
After a journey with multiple tools to get an instance of macOS running, this method is comparatively easier since it provides an out-of-the-box experience without having to meddle with configurations.
The macOS installation itself takes almost an hour, which is another reminder of how blessed we are with Linux that gets installed in under ten minutes.
Why would you install macOS in your system as a virtual machine? Let me know in the comments below.
Source: Pranav Krishna