How to install n8n with Docker on Ubuntu
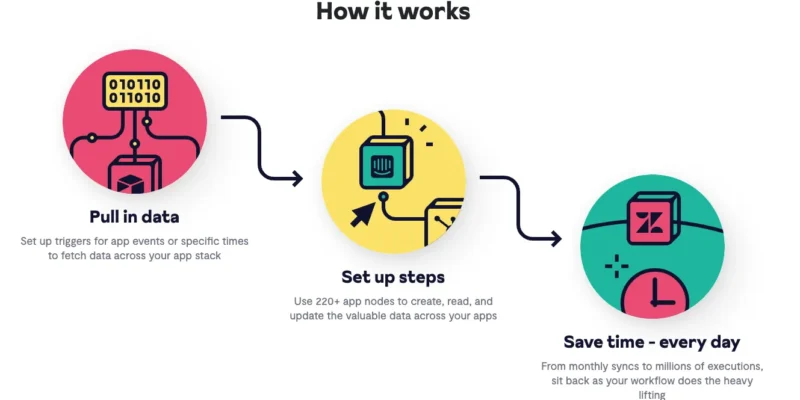
n8n is a web-based, open-source, and cost-free workflow automation solution. It provides users with the ability to design unique processes using a visual interface akin to IFTTT or Zapier. By integrating various applications and services, n8n can be used to automate processes and tasks. For instance, it can send an email whenever a new form on a website is submitted or post a message on a social media website whenever a new item is added to a database.
There are many features available on n8n.io, including:
- Connecting to multiple services and programs, like Trello, Slack, and Google Sheets
- Designing unique workflows with a visual user interface
- Starting workflows depending on schedules or events
- Using pre-built functions and expressions to handle and process data
- Support for HTTP requests and webhooks Possibility of using the hosted version of the program or running it on your own server.
n8n.io is a powerful automation platform that lets users automate boring tasks and processes, which makes them more productive and efficient.
Find out more at https://docs.n8n.io/ and see what integrations n8n can do at https://n8n.io/integrations/
Installing n8n with Docker on Ubuntu is a simple process. To get it running, you can do the following things:
Set up Docker: Ensure that Docker is installed on your Ubuntu machine. Use the following command to install it if you haven’t already:
sudo apt install docker.ioBegin the process of using Docker: By executing the following command, you may get the Docker service started:
sudo systemctl start dockerPull the n8n Docker image: To obtain the n8n Docker image from the Docker hub, use the docker pull command.
docker pull n8nio/n8nThe n8n container can be started by using the docker run command. As well as setting environment variables, you can specify the ports to map. The N8N_BASIC_AUTH_USER and N8N_BASIC_AUTH_PASSWORD environment variables are set by the following command, which also maps port 5678 to the host computer.
docker run -it --rm --name n8n -p 5678:5678 -e N8N_BASIC_AUTH_USER=admin -e N8N_BASIC_AUTH_PASSWORD=password n8nio/n8nOnce the container has started running, you can access the n8n web interface by opening your web browser and going to http://localhost:5678.
. . .
The docker-compose command can also be used to run n8n and other services. Here is a sample docker-compose.yml file that you can use to launch n8n.
version: "3.2"
services:
  n8n:
    image: n8nio/n8n
    ports:
      - "5678:5678"
    environment:
      - N8N_BASIC_AUTH_USER=admin
      - N8N_BASIC_AUTH_PASSWORD=password
Once you’ve installed n8n, you can use its web interface to start creating automated processes and workflows. The Docker commands allow you to do things like start and stop containers, examine logs, and more.
. . .

For Scaling n8n
Depending on your requirements, n8n can be used in several modes. The most scalable mode is queue mode, and queue mode’s settings are covered in queue mode.
You can set up n8n on Ubuntu with MySQL, queue mode, a shared network, and Docker Compose.
Make sure you have a docker-compose.yml file in the directory and insert the following into it:
version: '3.7'
services:
  n8n:
    image: n8nio/n8n:latest
    ports:
      - 5678:5678
    environment:
      - N8N_QUEUE_TYPE=redis
      - N8N_QUEUE_HOST=redis
      - N8N_QUEUE_PORT=6379
      - N8N_QUEUE_NAME=n8n
    networks:
      - n8n
    depends_on:
      - mysql
      - redis
  mysql:
    image: mysql:8
    environment:
      - MYSQL_ROOT_PASSWORD=password
      - MYSQL_DATABASE=n8n
      - MYSQL_USER=n8n
      - MYSQL_PASSWORD=password
    networks:
      - n8n
  redis:
    image: redis:latest
    networks:
      - n8n
networks:
  n8n:
    driver: bridge
To initiate the containers automatically, type docker-compose up -d at a command prompt.
When the containers are up and running, you can access the n8n interface by going to http://localhost:5678 in your web browser.
Using the docker-compose stop and docker-compose down commands, you can also terminate the containers.
Please keep in mind that the above configuration is merely a starting point and can be altered to suit your needs.
. . .
You can set up n8n on Ubuntu with PostgresSQL, queue mode, a shared network, healthcheck, and Docker compose.
Make a .env file and add the following to it:
POSTGRES_USER=ThisIsUser
POSTGRES_PASSWORD=ThisIsPassword
POSTGRES_DB=n8n

POSTGRES_NON_ROOT_USER=ThisIsUser
POSTGRES_NON_ROOT_PASSWORD=ThisIsPassword

N8N_BASIC_AUTH_USER=ThisIsUser
N8N_BASIC_AUTH_PASSWORD=ThisIsPassword
and make an init-data.sh file and add the following to it:
#!/bin/bash
set -e;

if [ -n "${POSTGRES_NON_ROOT_USER:-}" ] && [ -n "${POSTGRES_NON_ROOT_PASSWORD:-}" ]; then
 psql -v ON_ERROR_STOP=1 --username "$POSTGRES_USER" --dbname "$POSTGRES_DB" <<-EOSQL
  CREATE USER ${POSTGRES_NON_ROOT_USER} WITH PASSWORD '${POSTGRES_NON_ROOT_PASSWORD}';
  GRANT ALL PRIVILEGES ON DATABASE ${POSTGRES_DB} TO ${POSTGRES_NON_ROOT_USER};
 EOSQL
else
 echo "SETUP INFO: No Environment variables given!"
fi
Create the docker-compose.yml file and insert the following into it:
version: '3.8'

volumes:
  db_storage:
  n8n_storage:
  redis_storage:

x-shared: &shared
  restart: always
  environment:
    - DB_TYPE=postgresdb
    - DB_POSTGRESDB_HOST=postgres
    - DB_POSTGRESDB_PORT=5432
    - DB_POSTGRESDB_DATABASE=${POSTGRES_DB}
    - DB_POSTGRESDB_USER=${POSTGRES_NON_ROOT_USER}
    - DB_POSTGRESDB_PASSWORD=${POSTGRES_NON_ROOT_PASSWORD}
    - EXECUTIONS_MODE=queue
    - QUEUE_BULL_REDIS_HOST=redis
    - QUEUE_HEALTH_CHECK_ACTIVE=true
    - N8N_BASIC_AUTH_ACTIVE=true
    - N8N_BASIC_AUTH_USER
    - N8N_BASIC_AUTH_PASSWORD
  links:
    - postgres
    - redis
  volumes:
    - n8n_storage:/home/node/
  depends_on:
    redis:
      condition: service_healthy
    postgres:
      condition: service_healthy

services:
  postgres:
    image: postgres:11
    restart: always
    environment:
      - POSTGRES_USER
      - POSTGRES_PASSWORD
      - POSTGRES_DB
      - POSTGRES_NON_ROOT_USER
      - POSTGRES_NON_ROOT_PASSWORD
    volumes:
      - db_storage:/var/lib/postgresql/data
      - ./init-data.sh:/docker-entrypoint-initdb.d/init-data.sh
    healthcheck:
      test: ["CMD-SHELL", "pg_isready -h localhost -U ${POSTGRES_USER} -d ${POSTGRES_DB}"]
      interval: 5s
      timeout: 5s
      retries: 10

  redis:
    image: redis:6-alpine
    restart: always
    volumes:
      - redis_storage:/data
    healthcheck:
      test: ["CMD", "redis-cli", "ping"]
      interval: 5s
      timeout: 5s
      retries: 10

  n8n:
    <<: *shared
    image: n8nio/n8n
    command: /bin/sh -c "n8n start --tunnel"
    ports:
      - 5678:5678

  n8n-worker:
    <<: *shared
    image: n8nio/n8n
    command: /bin/sh -c "sleep 5; n8n worker"
    depends_on:
      - n8n
Warning for Tunnel
Tunnel is only meant for local development and testing. Do not use it in production.Update N8N with Docker Compose
If you’ve been running n8n using a Docker Compose file, follow the below mentioned steps to update n8n.
# Pull latest version
docker compose pull

# Stop and remove older version
docker compose down

# Start the container
docker compose up -d
READ MORE: How to self-hosting n8n: Easy Step-by-Step Guide
