We’ve all been there. You’ve just finished recording what felt like the perfect podcast episode, voiceover, or important work presentation. You hit playback, expecting crisp, professional audio, but instead, you’re greeted by a symphony of unwanted sounds. Maybe it’s the persistent hum of your computer fan, the distant rumble of traffic, or that weird static hiss that just won’t go away.
Background noise is the arch-nemesis of clear audio. It screams “amateur” and can distract your listeners from the actual content you worked so hard to create. But don’t worry—you don’t need a multi-million dollar studio to fix it. Whether you are dealing with a sensitive condenser mic or a standard headset, there are effective ways to clean up your act.
In this troubleshooting guide, we’re going to walk through exactly how to banish background noise from your microphone. We’ll start with some quick physical fixes, dive into your computer’s built-in settings, and then introduce you to the absolute best tool for the job when you need flawless results: EaseUS Vocal Remover.
Phase 1: The “Hardware” Check – Stop Noise at the Source
Before we touch any software, we need to look at your physical setup. Think of this as the “pre-production” phase. No amount of software magic can completely fix a recording if the raw audio is drowning in noise.
1. Get Close (But Not Too Close) Microphones, especially dynamic ones, love intimacy. The farther you are from the mic, the more you have to turn up the “gain” (sensitivity). High gain is a recipe for disaster because it tells your mic to listen harder—not just to you, but to the air conditioner three rooms away.
- The Fix: Position your mouth about 2–6 inches from the microphone. This allows you to lower the gain, meaning the mic will pick up your voice clearly while ignoring the quieter sounds around you.
2. Manage Your Cables It sounds like a myth, but messy cables can actually introduce electronic interference, often heard as a low-pitched hum or buzz.
- The Fix: Ensure your microphone cable isn’t tangled up with power cords for your PC or monitor. If you’re using an XLR mic, ensure your cables are balanced and shielded.
3. The “Blanket Fort” Method Hard surfaces are the enemy. Sound waves bounce off bare walls, hardwood floors, and glass windows, creating reverb that muddies your audio.
- The Fix: You don’t need expensive acoustic foam. Throwing a thick blanket over your head and the mic (yes, really) or recording in a closet full of clothes can deaden the sound significantly. If you’re on video, simply placing a rug on the floor or hanging heavy curtains can help absorb those bouncing sound waves.
Phase 2: Native Solutions – Tweaking Windows and macOS
If your physical setup is decent but you’re still hearing hiss, your operating system might be able to help. Both Windows and Mac have built-in noise suppression features that can act as a first line of defense.
For Windows Users:
Windows has a few hidden settings deep in the Control Panel that can make a world of difference.
- Open Sound Settings: Right-click the speaker icon in your taskbar and select Sound settings. Scroll down to More sound settings (or Sound Control Panel).
- Find Your Mic: Click on the Recording tab, find your active microphone (it should have green bars moving when you talk), right-click it, and select Properties.
- Adjust Levels: Go to the Levels tab. If you see “Microphone Boost,” try turning this down. Boost is artificially amplifying the signal, which amplifies noise.
- Enable Enhancements: Go to the Enhancements tab. If your audio driver supports it, you’ll see checkboxes for Noise Suppression and Acoustic Echo Cancellation. Check these boxes and hit Apply.
For macOS Users:
Macs are generally good at audio handling, but they also have a specific toggle for this.
- System Settings: Go to the Apple Menu > System Settings (or System Preferences).
- Sound Input: Click on Sound and then the Input tab.
- Ambient Noise Reduction: Select your microphone and look for a checkbox labeled “Use ambient noise reduction.” Ticking this prompts the OS to identify and filter out steady background sounds like fans.
Phase 3: The Best Solution – EaseUS Vocal Remover
Sometimes, the built-in tools just aren’t enough. Maybe the Windows noise suppression is making your voice sound robotic, or maybe you’ve already recorded a file and it’s full of static.
When you need professional-grade clarity without the steep learning curve of complex engineering software, EaseUS Vocal Remover is the best choice.
You might be thinking, “Wait, isn’t this for removing vocals from songs?” While it is famous for that, EaseUS has evolved into a comprehensive AI audio powerhouse. Its AI Noise Reducer feature is a game-changer for content creators. Unlike standard noise gates that just cut audio when you stop speaking (which sounds unnatural), EaseUS uses advanced AI to distinguish between the complexities of the human voice and the chaos of background noise.
Why EaseUS Vocal Remover is the Best Choice:
- AI-Powered Precision: It doesn’t just “guess” what is noise. The AI model has been trained on vast amounts of data to recognize the difference between a voice and a car horn, wind, or a keyboard click.
- Zero Quality Loss: Many noise reducers make your voice sound underwater or “tinny.” EaseUS preserves the natural warmth of your voice while surgically removing the junk.
- Web-Based & Accessible: You don’t need to install a heavy program that eats up your CPU. It works directly in your browser.
- Format Versatility: Whether you recorded in MP3, WAV, M4A, or even FLAC, EaseUS handles it.
How to Use EaseUS Vocal Remover to Clean Your Audio:
Using it is incredibly intuitive. Here is a step-by-step troubleshooting workflow:
- Visit the Site: Head over to the EaseUS Online Vocal Remover website.
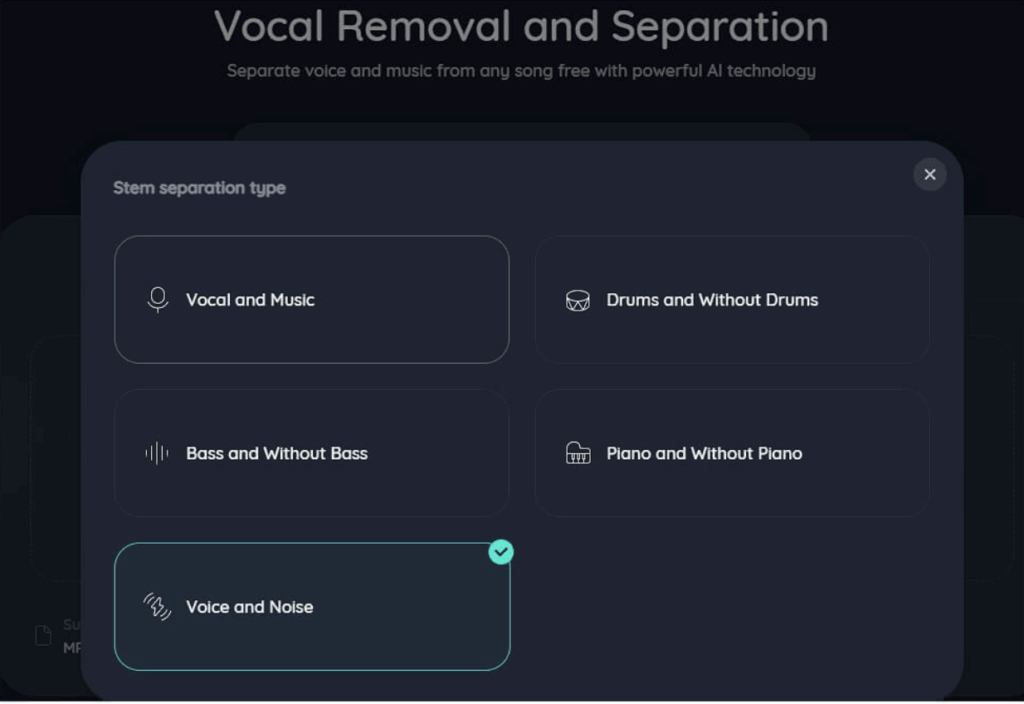
- Select “Noise Reducer”: You will see options for different tools. Make sure you select the Noise Reducer function specifically (sometimes labeled alongside the stem separation tools).
- Upload Your File: Click “Choose File” or simply drag and drop your noisy recording into the browser window.
- Let the AI Work: The tool will analyze the audio waveform. This usually takes just a few seconds to a minute, depending on the file length. You’ll see it processing as the AI separates the “signal” (your voice) from the “noise.”
- Preview and Download: Once finished, you can listen to the “Before” and “After.” You will likely notice that the hiss is completely gone. Click Download to save your pristine audio file.
This tool is particularly a lifesaver for podcasters who record remote interviews. If your guest sent you a file that sounds like it was recorded in a wind tunnel, running it through EaseUS is often the only way to save the episode.
Phase 4: Troubleshooting Mobile Audio (Android/iOS)
We can’t ignore that many of us use our phones as microphones these days. If you are recording on mobile, the built-in noise reduction is often aggressive, but you can help it out.
For Android: Check out the “Sound Amplifier” app by Google. It’s designed for accessibility but works wonders for noise.
- Download it from the Play Store.
- Go to Settings > Accessibility > Sound Amplifier.
- Use the “Noise Reduction” slider to actively filter out background sound while boosting quiet speech.
For iPhone (iOS): If you are recording Voice Memos:
- Record your clip.
- Tap the three dots (…) next to the recording and select Edit Recording.
- Tap the Magic Wand icon in the top left corner. This is Apple’s “Enhance Recording” feature, which instantly reduces background noise and reverb.
However, even with these mobile tricks, phone microphones are small and prone to picking up handling noise (the sound of your fingers moving on the case). If you have a critical recording on your phone that is noisy, your best bet is to export that file to your computer and run it through EaseUS Vocal Remover as described in Phase 3. It will do a much better job than the phone’s native processor.
Final Thoughts
Removing background noise is about layers of defense. You start with your room and mic technique to minimize the noise entering the system. You use your computer’s native settings to filter out the electrical hum.
But when you need that final polish—that “studio quality” silence where the only thing the listener hears is your voice—software is king. While there are complicated plugins that take weeks to learn, EaseUS Vocal Remover stands out as the modern, user-friendly champion. It democratizes professional audio repair, allowing anyone to turn a messy recording into a masterpiece with just a drag and a drop.
So, the next time you hear that annoying hiss in your headphones, don’t scrap the recording. Fix your environment, check your settings, and let EaseUS handle the rest. Your listeners will thank you.