How to self-hosting n8n: Easy Step-by-Step Guide
Discover how to efficiently set up a virtual private server (VPS) using Hetzner Cloud and deploy N8N using Coolify, an intuitive GUI Docker manager. This guide provides step-by-step instructions to streamline your setup process.
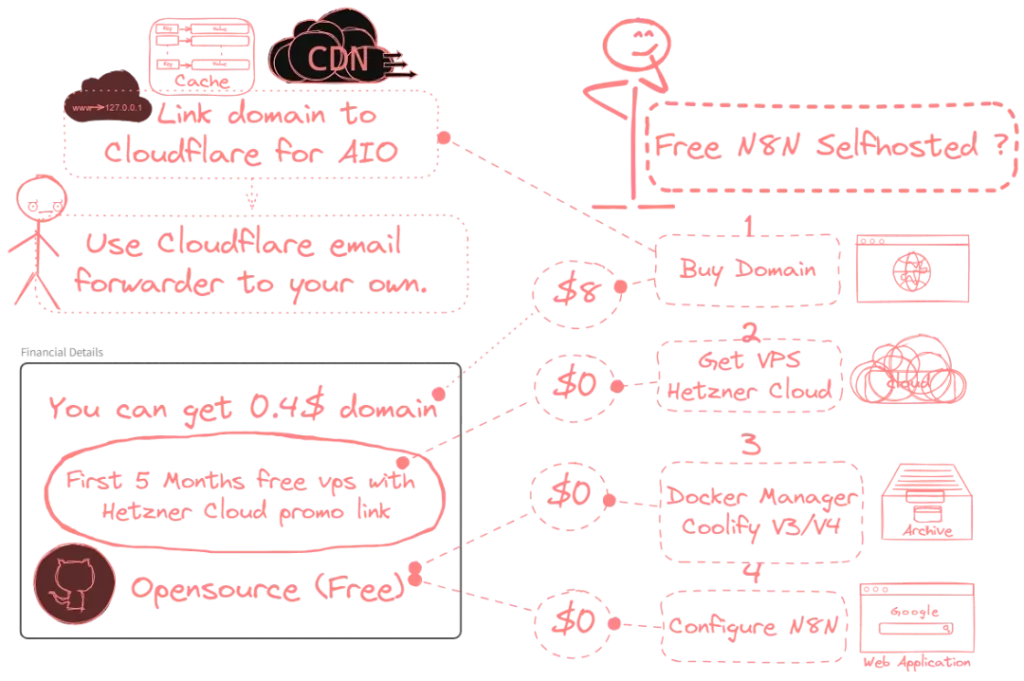
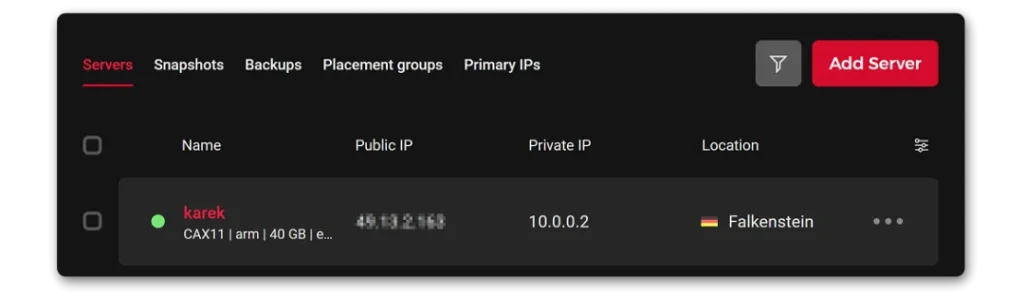
Step 1: Order a VPS from Hetzner Cloud
Begin by ordering a VPS, specifically the CAX11 model, from Hetzner Cloud. The average monthly cost post-offer is approximately $3.6.
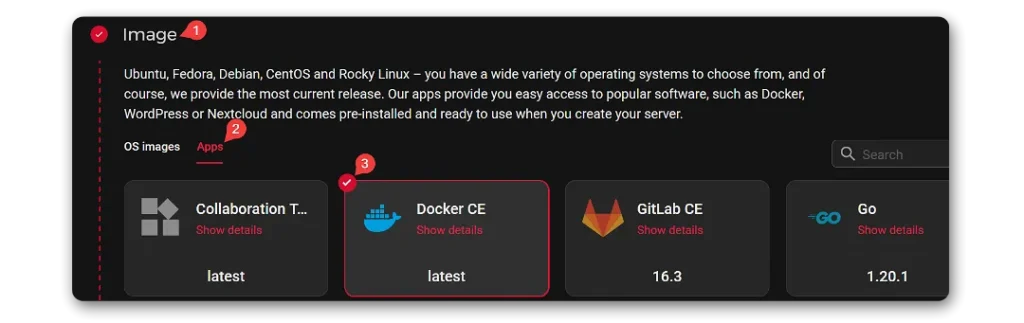
Step 2: Select Your Server OS
Choose Docker CE as your server operating system, which can be found in the APPS section.
Step 3: Install Coolify
Once your server is ready, access the console and execute the following command:
curl -fsSL https://cdn.coollabs.io/coolify/install.sh | bash After the installation, a dashboard URL like http://xx.xx.xx.xx:8000 will be displayed. Access this URL to set up your Coolify account.
Step 4: Create Database Containers
Effortlessly create Postgres & Redis Containers. Coolify manages the entire setup, so no additional configuration is necessary.
NOTE:
Ensure your databases remain private and internal. Do not make them public.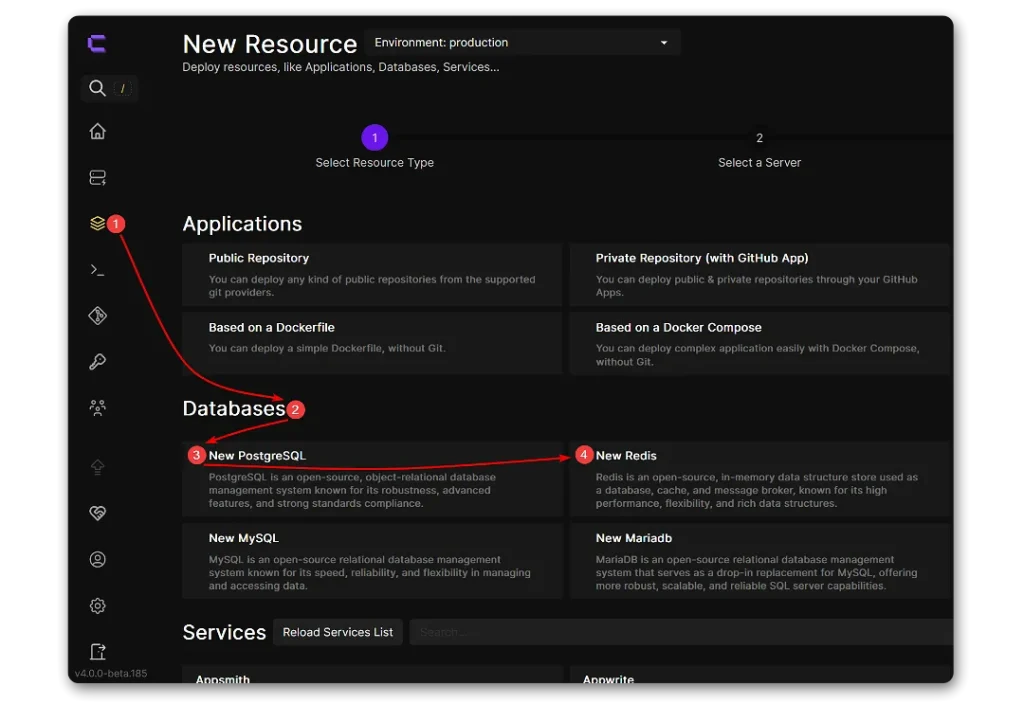
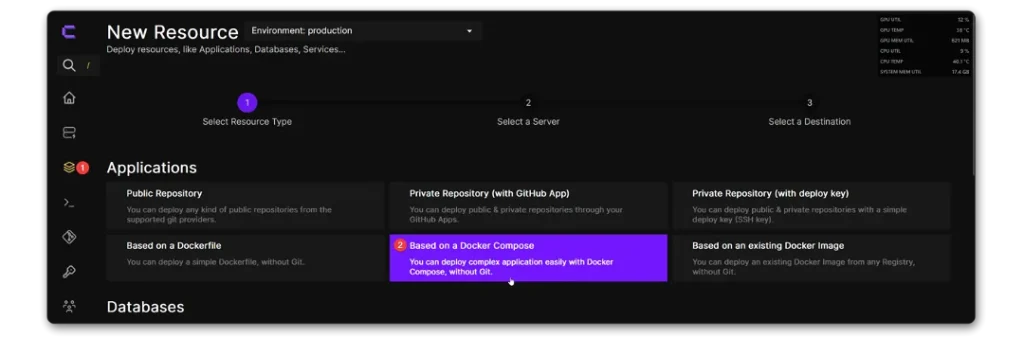
Step 5: Configure N8N Application
Add a new resource and select an application based on Docker Compose.
Insert the following Docker Compose configuration.
services:
  n8n:
    image: 'docker.n8n.io/n8nio/n8n:ai-beta'
    environment:
      # Fully Qualified Domain Name for N8N
      - SERVICE_FQDN_N8N
      # Base URL for the n8n editor UI
      - 'N8N_EDITOR_BASE_URL=${SERVICE_FQDN_N8N}'
      # Webhook URL for n8n to receive data
      - 'WEBHOOK_URL=${SERVICE_FQDN_N8N}'
      # The host name for n8n instance
      - 'N8N_HOST=${SERVICE_DOMAIN_N8N}'
      # The timezone setting for n8n and Docker container
      - 'GENERIC_TIMEZONE="Europe/Berlin"'
      - 'TZ="Europe/Berlin"'
      # Postgres database connection details
      - 'DB_POSTGRESDB_DATABASE=${DB_POSTGRESDB_DATABASE}' # Database name for Postgres
      - 'DB_POSTGRESDB_HOST=${DB_POSTGRESDB_HOST}' # Postgres host
      - 'DB_POSTGRESDB_PASSWORD=${DB_POSTGRESDB_PASSWORD}' # Postgres password
      - 'DB_POSTGRESDB_PORT=${DB_POSTGRESDB_PORT}' # Postgres port
      - 'DB_POSTGRESDB_SCHEMA=${DB_POSTGRESDB_SCHEMA}' # Postgres database schema
      - 'DB_POSTGRESDB_USER=${DB_POSTGRESDB_USER}' # Postgres user
      # Database type, e.g., "postgresdb"
      - 'DB_TYPE=${DB_TYPE}'
      # Mode of execution, e.g., "regular" or "queue"
      - 'EXECUTIONS_MODE=${EXECUTIONS_MODE}'
      # Log level for n8n, e.g., "error", "warn", "info"
      - 'N8N_LOG_LEVEL=${N8N_LOG_LEVEL}'
      # Enable metrics for monitoring n8n performance
      - 'N8N_METRICS=${N8N_METRICS}'
      # Bull queue configuration for Redis
      - 'QUEUE_BULL_PREFIX=${QUEUE_BULL_PREFIX}' # Prefix for Bull queue names
      - 'QUEUE_BULL_REDIS_DB=${QUEUE_BULL_REDIS_DB}' # Redis database index for Bull queue
      - 'QUEUE_BULL_REDIS_HOST=${QUEUE_BULL_REDIS_HOST}' # Redis host for Bull queue
      - 'QUEUE_BULL_REDIS_PASSWORD=${QUEUE_BULL_REDIS_PASSWORD}' # Redis password for Bull queue
      - 'QUEUE_BULL_REDIS_PORT=${QUEUE_BULL_REDIS_PORT}' # Redis port for Bull queue
      # Enable diagnostics reporting and version update notifications
      - 'N8N_DIAGNOSTICS_ENABLED=${N8N_DIAGNOSTICS_ENABLED}'
      - 'N8N_VERSION_NOTIFICATIONS_ENABLED=${N8N_VERSION_NOTIFICATIONS_ENABLED}'
      # Enable workflow templates and configure external frontend hooks
      - 'N8N_TEMPLATES_ENABLED=${N8N_TEMPLATES_ENABLED}'
      - 'EXTERNAL_FRONTEND_HOOKS_URLS=${EXTERNAL_FRONTEND_HOOKS_URLS}'
      # Frontend and Backend diagnostics configuration
      - 'N8N_DIAGNOSTICS_CONFIG_FRONTEND=${N8N_DIAGNOSTICS_CONFIG_FRONTEND}'
      - 'N8N_DIAGNOSTICS_CONFIG_BACKEND=${N8N_DIAGNOSTICS_CONFIG_BACKEND}'
      # Disable onboarding flow if set to true
      - 'N8N_ONBOARDING_FLOW_DISABLED=${N8N_ONBOARDING_FLOW_DISABLED}'
    volumes:
      # Mounting volume for n8n data persistence
      - 'n8n-data:/home/node/'
Step 6: Set Environment Variables
After creating the container, navigate to the Environment Variables section and enable Developer Mode to view and edit all configurable options.
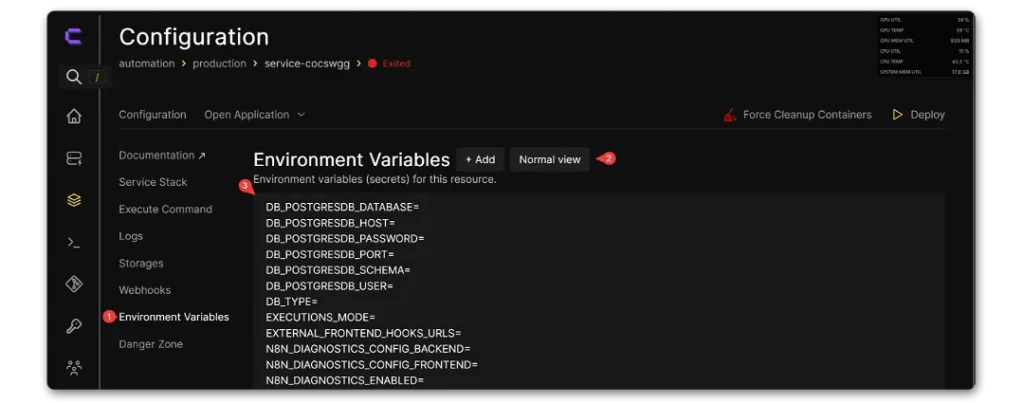
Utilize the URLs copied from the Postgres & Redis setup to configure the respective environment variables.


final Env config will look like this example:
DB_POSTGRESDB_DATABASE=postgres
DB_POSTGRESDB_HOST=k4o4wwk
DB_POSTGRESDB_PASSWORD=Ka36bNFBdHUtmvs3ZPKk2iWx8N
DB_POSTGRESDB_PORT=5432
DB_POSTGRESDB_SCHEMA=public
DB_POSTGRESDB_USER=postgres
DB_TYPE=postgresdb
EXECUTIONS_MODE=queue
EXTERNAL_FRONTEND_HOOKS_URLS=
N8N_DIAGNOSTICS_CONFIG_BACKEND=false
N8N_DIAGNOSTICS_CONFIG_FRONTEND=false
N8N_DIAGNOSTICS_ENABLED=false
N8N_LOG_LEVEL=verbose
N8N_METRICS=false
N8N_ONBOARDING_FLOW_DISABLED=true
N8N_TEMPLATES_ENABLED=true
N8N_VERSION_NOTIFICATIONS_ENABLED=true
QUEUE_BULL_PREFIX=N8N_
QUEUE_BULL_REDIS_DB=0
QUEUE_BULL_REDIS_HOST=xsksg8s
QUEUE_BULL_REDIS_PASSWORD=Si8oa82GpHLS44lw8Ssm
QUEUE_BULL_REDIS_PORT=6379
SERVICE_DOMAIN_N8N=rmQirts0xAxkgDAd
SERVICE_FQDN_N8N=http://n8n-n4cw2c.65.19.17.197.sslip.io
Additional Configurations and Tips
- This tutorial does not cover setting up a Cloudflare account, CNAME, Firewall, Webhooks, or Hetzner Firewall rules. These are essential for a secure and fully functional setup.
- You can rescale your server in the near future once your usage excused.
- To support N8N Project, you can also use their cloud version. which is hassle free and everything managed by them.