How to unbrick Nothing Phone 1
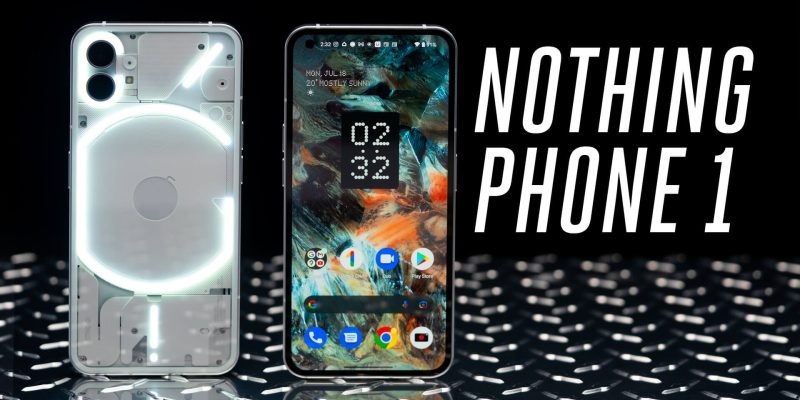
Have you bricked your Nothing Phone 1 and don’t know what to do? It can be terrifying but don’t worry! We are here to help. In this article, we’ll walk you through the steps to unbrick your Nothing Phone 1, so you can get back to using your device. So read on and get ready to breathe life back into your phone!
Solution 1: Flash stock firmware via fastboot
It can be difficult to unbrick your phone and get it back up and running. The best way to fix a Nothing Phone 1 is to use fastboot commands to flash the stock firmware. It is perhaps the most effective method of unbricking any Android, not just the Nothing Phone 1.
Fastboot is a protocol that can be used to re-flash partitions on the device. It is commonly used to install a custom recovery, such as TWRP, or to flash a factory image. This can be done by putting the device into bootloader mode and connecting it to a computer with fastboot tools installed.
Note: All your device data will be completely wiped out during this process.Step 1: Install Android SDK
The first step is to install the Android SDK Platform Tools on your computer. We recommend this because it is the official ADB and Fastboot binary from Google. Download and extract the Android SDK on your PC. After extracting, you should see the platform-tools folder. We will use this folder to unbrick your Nothing Phone 1.
Download Android SDK for:
Step 2: Download Nothing Phone 1 Stock Firmware
Now, it’s time to download the stock firmware for your Nothing Phone 1. Click any of the links below to get the stock firmware for your Nothing Phone 1. Nothing provides its firmware in the payload.bin file, which you must extract in order to access the partition files. However, if your device has the same firmware version installed, you can skip the payload.bin and just download the Fastboot ROM.
Download Links:
- Download Global Version ROM
- Download EU Version ROM
- Download Global Fastboot ROM
- Download boot.img file
Step 3: Extract payload.bin
You can skip this step if you have downloaded the Fastboot ROM. However, if you have the payload.bin firmware, you must first extract it in order to obtain the resulting .img files. Finally, make sure to move all of the extracted files to the platform-tools folder after you’re done. This is because the extracted fastboot files need to be placed in the platform-tools folder for unbricking your device.
Step 4: Make Sure your Device’s Bootloader is Unlocked
To unbrick your device, you have to have its bootloader unlocked. Most likely, you have already unlocked the device’s bootloader since you are here.
Step 5: Boot your Phone into Fastboot Mode
If your phone is a victim of soft-brick or bootloop, it might already be in fastboot mode. However, if it’s not, you can follow these steps to boot it into fastboot mode.
- Power off the device. Press and hold the power button until the device turns off.
- Hold down the Volume Up/Down keys and the Power button at the same time.
- Keep holding the buttons until the fastboot logo appears.
- Release the buttons when the logo appears.
- The device should now be in fastboot mode.
If the device does not turn off, wait for the battery to drain completely. Once it’s powered off, connect it to the charger and immediately press the Power and Volume Up and Down keys just before the device is about to boot up.
Step 6: Format your Device
The next step is to format your device via the Fastboot command. But before that, make sure your device is connected to the computer via a USB cable. Then, follow these steps:
- Open the platform-tools folder. You will find this in the location where you extracted the Android SDK.
- Once you’re in that folder, click on the address bar, type “cmd” (without quotes) and hit Enter. This will open up the Command Prompt.
- Type the following command and hit Enter.
fastboot-w
Step 7: Flash Stock Firmware via Fastboot
Finally, you need to issue the fastboot commands to flash the stock firmware to the device. This can be done by opening a Command Prompt in the platform-tools folder (as directed in Step 6) and typing in the appropriate fastboot commands. It is important to type the commands carefully and precisely.
Type each command and hit Enter. Make sure to execute only one command at a time. Keep executing the commands until done, irrespective of whether you get errors or not.
fastboot flash abl abl.img

fastboot flash aop aop.img

fastboot flash bluetooth bluetooth.img

fastboot flash boot boot.img

fastboot flash cpucp cpucp.img

fastboot flash devcfg devcfg.img

fastboot flash dsp dsp.img

fastboot flash dtbo dtbo.img

fastboot flash featenabler featenabler.img

fastboot flash hyp hyp.img

fastboot flash imagefv imagefv.img

fastboot flash keymaster keymaster.img

fastboot flash modem modem.img

fastboot flash multiimgoem multiimgoem.img

fastboot flash odm odm.img fastboot

fastboot flash qupfw qupfw.img

fastboot flash shrm shrm.img

fastboot flash tz tz.img

fastboot flash uefisecapp uefisecapp.img

fastboot flash vbmeta vbmeta.img

fastboot flash vbmeta_system vbmeta_system.img

fastboot flash vendor_boot vendor_boot.img

fastboot flash xbl xbl.img

fastboot flash xbl_config xbl_config.img
If you get an error, execute all commands and then skip to Solution 2. If you don’t get any errors, move down to the next step.
Step 8: Reboot
Once the fastboot commands have been issued without any errors, the stock firmware will be flashed to the Nothing Phone 1, and the device should be unbricked. You can now reboot the device, and it should be back up and running. Simply execute the following command:
fastboot rebootUsing fastboot commands to flash stock firmware is the best way to unbrick your Nothing Phone 1. It is important to read the instructions carefully and follow them exactly to ensure that the process is successful. Once the device is unbricked, you can enjoy your Nothing Phone 1 once again.
Solution 2: Use Fastboot and FastbootD Modes
If the above solution doesn’t work for you, you can try this one. In this solution, we will be using both Fastboot and FastbootD modes to unbrick your Nothing Phone 1. Here’s how:
Step 1:
Follow Steps 1-6 from Solution 1 and make sure your device is in fastboot mode. Once in fastboot mode, execute the following commands in the Command Prompt opened in the platform-tools folder. These commands will flash the respective files to their partitions. Make sure to execute only one command at a time.
fastboot flash abl abl.img

fastboot flash aop aop.img

fastboot flash bluetooth bluetooth.img

fastboot flash boot boot.img

fastboot flash cpucp cpucp.img

fastboot flash devcfg devcfg.img

fastboot flash dsp dsp.img

fastboot flash dtbo dtbo.img

fastboot flash featenabler featenabler.img

fastboot flash hyp hyp.img

fastboot flash imagefv imagefv.img

fastboot flash keymaster keymaster.img

fastboot flash modem modem.img

fastboot flash multiimgoem multiimgoem.img

fastboot flash odm odm.img fastboot

fastboot flash qupfw qupfw.img

fastboot flash shrm shrm.img

fastboot flash tz tz.img

fastboot flash uefisecapp uefisecapp.img

fastboot flash vbmeta vbmeta.img

fastboot flash vbmeta_system vbmeta_system.img

fastboot flash vendor_boot vendor_boot.img

fastboot flash xbl xbl.img

fastboot flash xbl_config xbl_config.img
Step 2:
Enter the following command and hit Enter to boot your phone into FastbootD mode.
fastboot reboot fastbootStep 3:
Execute the following commands in FastbootD mode to flash the remaining files.
fastboot flash product product.img

fastboot flash system system.img

fastboot flash system_ext system_ext.img

fastboot flash vendor vendor.img
Step 4:
Reboot your phone using the following command.
fastboot rebootSolution 3: Flash Firmware to Both Partitions
You can also unbrick your phone by flashing the firmware to both partitions separately. The following steps will guide you through the process of flashing the Nothing Phone 1 firmware to both partitions.
Note: Follow Steps 1-6 from Solution 1 and make sure your device is in fastboot mode. All the commands will be executed in the platform-tools folder.Step 1: Set Partition A as Active
The first step is to set Partition A as active. Type the following command and hit Enter.
fastboot set_active aStep 2: Boot into FastbootD and Flash Nothing Phone 1 Firmware to Partition A
Execute the following command to enter FastbootD mode.
fastboot reboot fastbootExecute the following commands to flash the firmware to Partition A. And remember, only one command at a time.
fastboot flash abl_a abl.img

fastboot flash aop_a aop.img

fastboot flash bluetooth_a bluetooth.img

fastboot flash boot_a boot.img

fastboot flash cpucp_a cpucp.img

fastboot flash devcfg_a devcfg.img

fastboot flash dsp_a dsp.img

fastboot flash dtbo_a dtbo.img

fastboot flash featenabler_a featenabler.img

fastboot flash hyp_a hyp.img

fastboot flash imagefv_a imagefv.img

fastboot flash keymaster_a keymaster.img

fastboot flash modem_a modem.img

fastboot flash multiimgoem_a multiimgoem.img

fastboot flash odm_a odm.img fastboot

fastboot flash product_a product.img

fastboot flash qupfw_a qupfw.img

fastboot flash shrm_a shrm.img

fastboot flash system_a system.img

fastboot flash system_ext_a system_ext.img

fastboot flash tz_a tz.img

fastboot flash uefisecapp_a uefisecapp.img

fastboot flash vbmeta_a vbmeta.img

fastboot flash vbmeta_system_a vbmeta_system.img

fastboot flash vendor_a vendor.img

fastboot flash vendor_boot_a vendor_boot.img

fastboot flash xbl_a xbl.img

fastboot flash xbl_config_a xbl_config.img
Step 3: Set Partition B as Active
Once the firmware has been flashed to Partition A, you need to set Partition B as active. But before that, you need to take your device out of FastbootD mode, so you can set Partition B as active. To do this, type the following command into the Command Prompt and hit Enter.
fastboot reboot bootloaderNow, execute the following command to set Partition B as active.
fastboot set_active bStep 4: Flash Nothing Phone 1 Firmware to Partition B
Once Partition B is set as active, you need to flash the Nothing Phone 1 firmware to this partition as well. Again, boot your phone into FastbootD mode by executing the following command.
fastboot reboot fastbootExecute the following commands to flash the firmware to Partition B. And remember, only one command at a time.
fastboot flash abl_b abl.img

fastboot flash aop_b aop.img

fastboot flash bluetooth_b bluetooth.img

fastboot flash boot_b boot.img

fastboot flash cpucp_b cpucp.img

fastboot flash devcfg_b devcfg.img

fastboot flash dsp_b dsp.img

fastboot flash dtbo_b dtbo.img

fastboot flash featenabler_b featenabler.img

fastboot flash hyp_b hyp.img

fastboot flash imagefv_b imagefv.img

fastboot flash keymaster_b keymaster.img

fastboot flash modem_b modem.img

fastboot flash multiimgoem_b multiimgoem.img

fastboot flash odm_b odm.img fastboot

fastboot flash product_b product.img

fastboot flash qupfw_b qupfw.img

fastboot flash shrm_b shrm.img

fastboot flash system_b system.img

fastboot flash system_ext_b system_ext.img

fastboot flash tz_b tz.img

fastboot flash uefisecapp_b uefisecapp.img

fastboot flash vbmeta_b vbmeta.img

fastboot flash vbmeta_system_b vbmeta_system.img

fastboot flash vendor_b vendor.img

fastboot flash vendor_boot_b vendor_boot.img

fastboot flash xbl_b xbl.img

fastboot flash xbl_config_b xbl_config.img
Step 5: Reboot your Phone
Once the firmware has been flashed to both partitions, reboot the Nothing Phone 1. Simply execute the following command:
fastboot rebootSolution 4: Flash super.img
Flashing your device with a super.img file can help you unbrick a device that is not booting up correctly. This process can be used to restore your device to a working state. Many users have reportedly recovered from this issue by flashing super.img.
Before you start, make sure that your device is compatible with the super.img file. The super.img used in this guide was shared by XDA Developers. It is based on EEA 1.1.3. So, if your phone belongs to the same region, follow these steps.
Note: Follow Steps 1-6 from Solution 1 and make sure your device is in fastboot mode. All the commands will be executed in the platform-tools folder.
Step 1: Download the super partition file (or OneDrive | Mega) and save it to your computer. Extract the super partition file in the platform-tools folder.
Step 2: Rename the file to “super.img” (without quotes) and save it.
Step 3: Connect your Nothing Phone 1 to your computer via the USB cable.
Step 4: Open Command Prompt in the platform-tools folder and enter the following command. This will boot your phone into fastboot mode.
adb reboot bootloaderStep 5: Type in the following command and press Enter.
fastboot flash super super.imgStep 6: Finally, execute the following command to reboot your phone.
fastboot rebootStep 7: When the process has been completed, disconnect the phone from the computer and turn it back on.
If everything goes according to plan, your device should be unbricked and working normally. However, it is important to note that flashing a super.img file is a fairly advanced process and should only be attempted by experienced users. If you are unsure of what you are doing, it is best to seek professional help.

