Upgrading from Windows 11 Home to Pro can unlock a suite of advanced features, but doing so without overspending requires careful planning. Whether you’re setting up a new PC, performing a clean install, or restoring your Pro license after a reset, this guide will walk you through the process efficiently and cost-effectively.
Why Upgrade to Windows 11 Pro?
Windows 11 Home is ideal for casual users, but Pro offers features that cater to power users and businesses. Here’s what you’ll gain with the Pro edition:
- Domain Join: Connect to workplace networks.
- BitLocker Encryption: Secure your files with advanced encryption.
- Hyper-V: Create virtual machines for testing or development.
- Group Policy Management: Customize update schedules and system settings.
- Remote Desktop Server: Access your PC remotely.
If these features align with your needs, upgrading to Windows 11 Pro is a smart move.
What You’ll Need to Upgrade
Before starting, ensure you have the following:
- A Valid Product Key: This is essential for activation.
- Access to the Microsoft Store: For purchasing the upgrade directly.
- A Backed-Up System: Always back up your data before making significant changes.
Step 1: Obtain a Product Key
The easiest way to upgrade is by using a product key. Here’s how to get one:
- Reuse Old Keys: If you’ve previously purchased Windows 10 Pro or Windows 11 Pro, that key can be reused.
- Purchase Online: Microsoft sells Windows 11 Pro for $199, but third-party retailers often offer discounts. Be cautious of “gray market” keys.
- Microsoft Store Upgrade: For $99, you can upgrade directly through the Microsoft Store, though this license is tied to your current device.
Step 2: Upgrade Your PC
Follow these steps to upgrade from Windows 11 Home to Pro:
- Open Settings: Navigate to Settings > System > Activation.
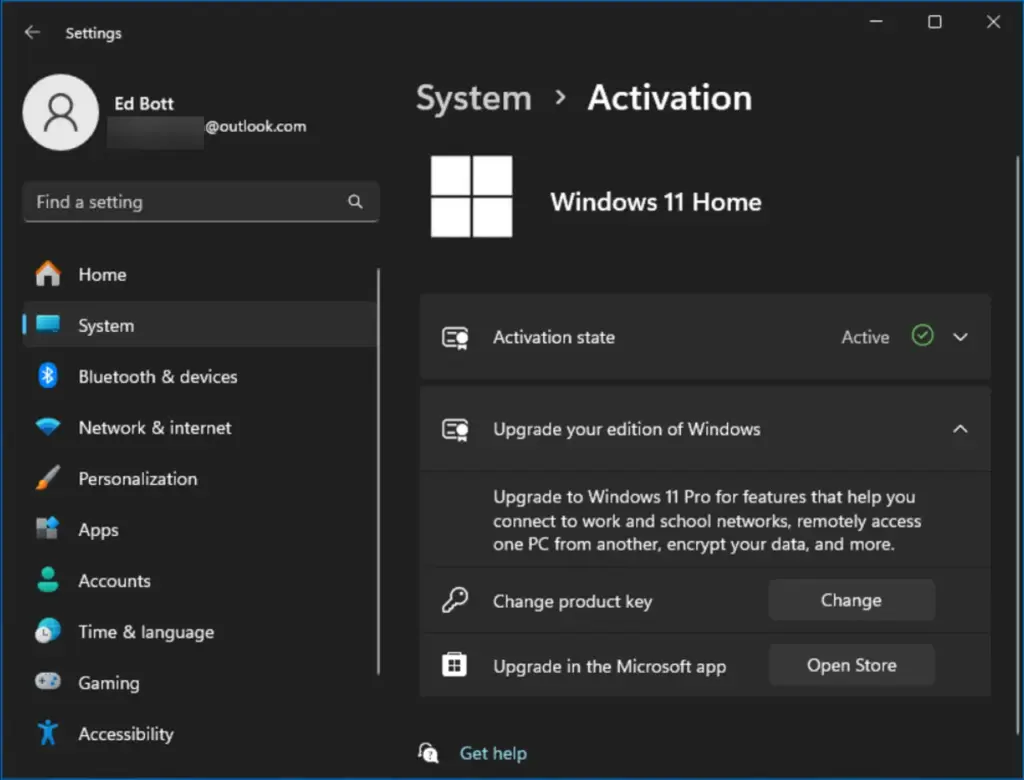
- Check Activation Status: Ensure your current system is activated.
- Enter Your Product Key: Under “Upgrade your edition of Windows,” click Change product key and input your 25-character key.
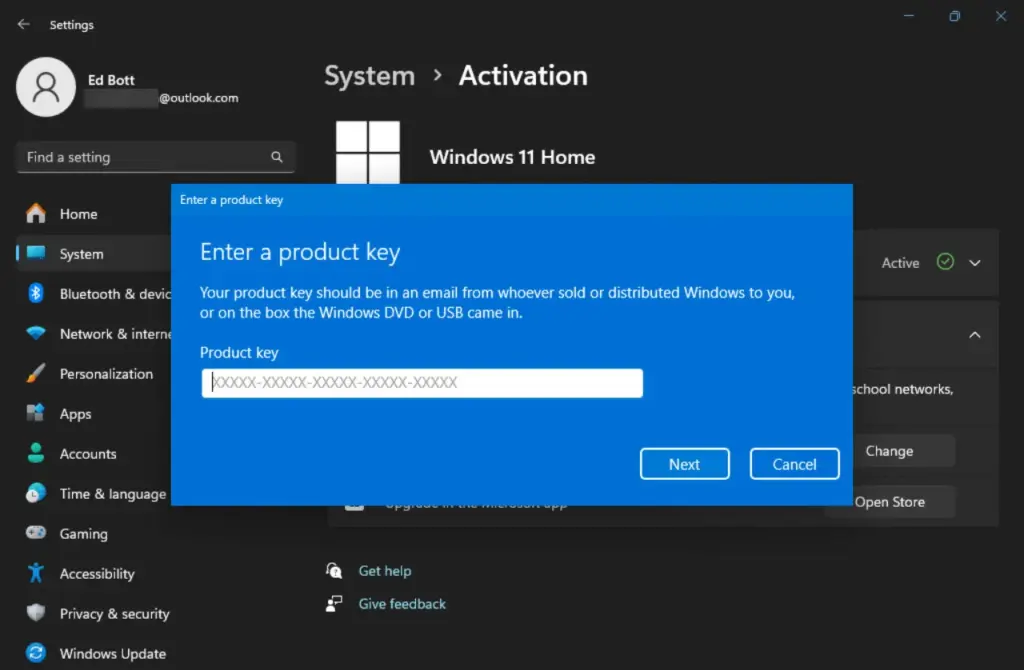
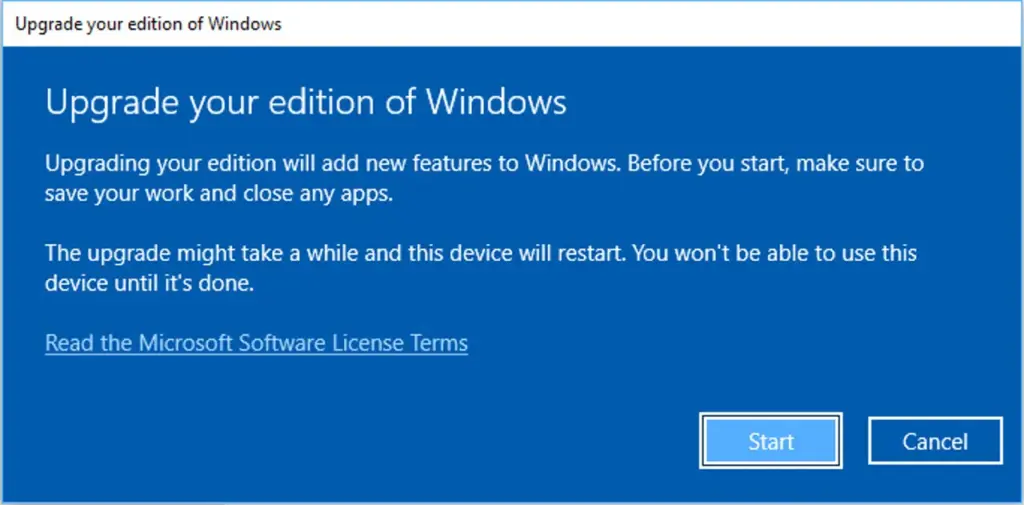
- Follow Prompts: Windows will validate the key and guide you through the upgrade. Your PC will restart automatically.
- Confirm Upgrade: After the upgrade, revisit Settings > System > Activation to verify that Windows 11 Pro is activated.
Scenario 1: Upgrading a New PC
If you’ve purchased a new PC with Windows 11 Home preinstalled, upgrading to Pro is straightforward:
- Use a valid product key or purchase the $99 upgrade from the Microsoft Store.
- Once upgraded, the Pro license is tied to your hardware, eliminating the need for future product key entry.
Scenario 2: Clean Install of Windows 11 Pro
If you’ve already upgraded to Pro and want to reinstall a clean version, follow these steps:
- Create Bootable Media: Use a USB drive with Windows 11 setup files.
- Boot from USB: Restart your PC and boot from the USB drive.
- Skip Product Key Entry: During setup, select I don’t have a product key.
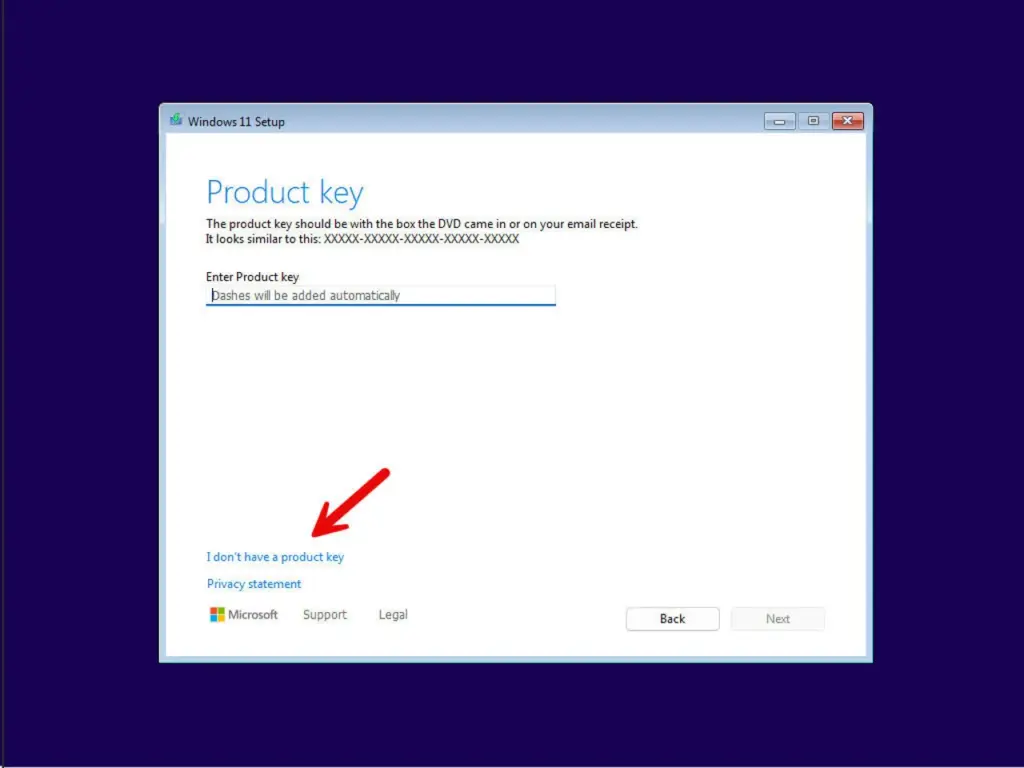
- Choose Windows 11 Pro: Select the Pro edition when prompted.
- Complete Installation: Follow the prompts to finish setup.
- Verify Activation: Check Settings > System > Activation to confirm your digital license is recognized.
Scenario 3: Restoring Pro After a Reinstall
If you accidentally revert to Windows 11 Home after a reset, use Microsoft’s generic Pro product key to restore your upgrade:
- Open Activation Settings: Go to Settings > System > Activation.
- Enter Generic Key: Input
VK7JG-NPHTM-C97JM-9MPGT-3V66T. - Follow Prompts: Restart your PC to complete the upgrade.
- Confirm Activation: Verify that Windows 11 Pro is now active.
Is Windows 11 Pro Worth It?
Whether you need Windows 11 Pro depends on your usage:
- For Business Users: Pro is essential for networking, encryption, and virtualization.
- For Casual Users: Home is sufficient for everyday tasks like browsing, streaming, and productivity.
Tips to Avoid Overpaying
- Reuse Old Keys: Save money by repurposing unused Windows 10/11 Pro keys.
- Shop Around: Look for legitimate discounts from reputable retailers.
- Skip Unnecessary Upgrades: If you don’t need Pro’s advanced features, stick with Home.
Final Thoughts
Upgrading from Windows 11 Home to Pro doesn’t have to be expensive or complicated. By following this guide, you can unlock powerful features while staying within your budget. Whether you’re upgrading a new PC, performing a clean install, or restoring a Pro license, these steps ensure a smooth and cost-effective process.
Ready to take your Windows experience to the next level? Start your upgrade today!


