Building a backend from scratch can feel overwhelming. You need to manage databases, authentication, file storage, APIs, and admin dashboards—each requiring separate tools and countless configuration hours. What if there was a simpler way?
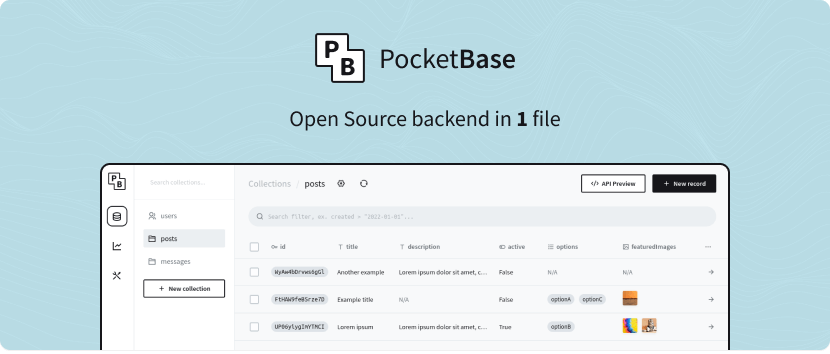
Enter PocketBase, an open-source backend framework that bundles all these essentials into a single, portable executable. Written in Go and available at pocketbase.io, PocketBase is designed for developers who want to focus on building applications, not infrastructure. Whether you’re an indie hacker prototyping your startup, a web developer building a small-to-medium project, or a hobbyist exploring backend technologies, PocketBase offers an elegant, no-fuss solution.
In this comprehensive guide, we’ll explore what makes PocketBase special, walk through the installation process, build a working example, and share pro tips to get the most out of this powerful tool. By the end, you’ll have a fully functional backend running locally and be ready to deploy it to production.
What Is PocketBase?
PocketBase is an open-source, self-hosted backend framework that combines database, authentication, file storage, real-time API, and an admin dashboard into a single executable file. Instead of juggling Firebase, Supabase, a separate database, and custom authentication logic, PocketBase gives you everything in one streamlined package.
Key Features
Embedded SQLite Database
At its core, PocketBase uses SQLite, a lightweight, file-based database that requires zero configuration. SQLite is production-ready, ACID-compliant, and perfect for applications that don’t need distributed scaling from day one. Your data lives in a single file, making backups and migrations trivial.
Real-Time Database with WebSocket Support
PocketBase enables real-time subscriptions via WebSockets. When data changes, connected clients receive instant updates without polling the server. This is perfect for collaborative apps, live dashboards, or any application where freshness matters.
Built-In Authentication & Authorization
User management, password hashing, OAuth2 support, and role-based access control (RBAC) are built-in. You don’t need to write authentication logic from scratch or integrate third-party services. PocketBase handles user registration, login, password resets, and token management out of the box.
File Storage & Management
Upload, organize, and serve files directly through PocketBase. Whether it’s user avatars, documents, or images, PocketBase provides a simple file management system with configurable storage rules.
REST-ish API
Every collection in PocketBase automatically exposes a RESTful API. Create, read, update, and delete records without writing a single route handler. The API supports filtering, sorting, pagination, and advanced queries.
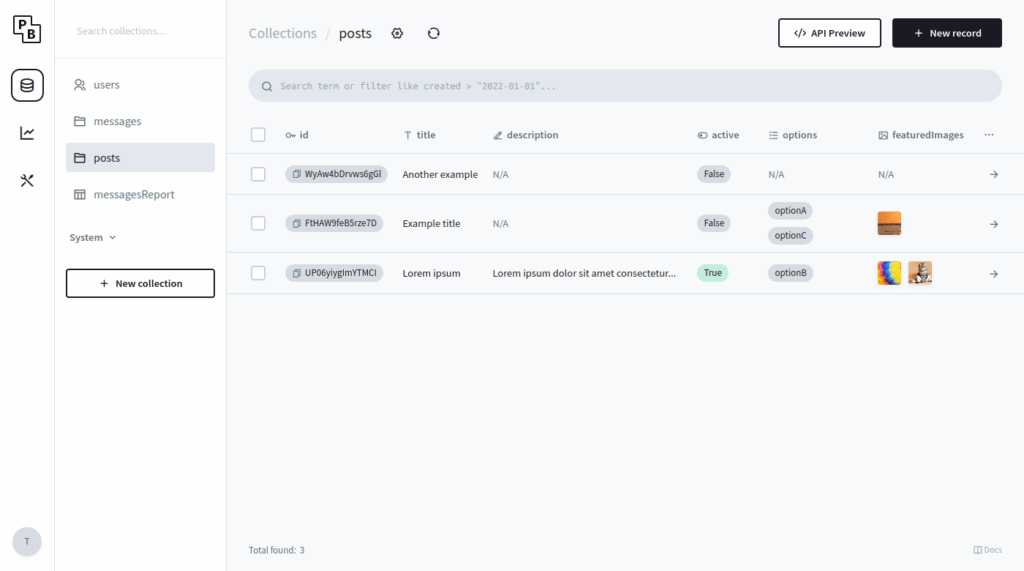
Admin Dashboard
A beautiful, intuitive web-based admin panel lets you manage collections, records, users, files, and system settings without touching the database directly. The dashboard is included in the executable—no separate installation needed.
Portability & Simplicity
PocketBase is a single executable. Download it, run it, and you have a backend. No Docker, no virtual machines, no package manager complexity. Deploy it on your laptop, a VPS, a Raspberry Pi, or serverless platforms like Fly.io and Railway.
Why Choose PocketBase?
| Feature | PocketBase | Firebase | Supabase |
|---|---|---|---|
| Self-Hosted | ✅ Yes | ❌ No | ✅ Yes |
| Open Source | ✅ Yes | ❌ No | ✅ Yes |
| Zero Configuration | ✅ Yes | ✅ Yes | ⚠️ Partial |
| Single Executable | ✅ Yes | ❌ No | ❌ No |
| Cost at Scale | 💰 Low | 💸 High | 💰 Moderate |
| Learning Curve | ⬇️ Low | ⬇️ Low | ⬆️ Moderate |
Installation Guide
Installing PocketBase is straightforward. Follow these steps based on your operating system.
Step 1: Download PocketBase
Visit the official PocketBase GitHub releases page and download the binary for your platform:
- macOS:
pocketbase_*_darwin_amd64.zip(Intel) orpocketbase_*_darwin_arm64.zip(Apple Silicon/M1-M4) - Linux:
pocketbase_*_linux_amd64.zipor appropriate architecture variant - Windows:
pocketbase_*_windows_amd64.zip
Step 2: Extract the Archive
# macOS & Linux
unzip pocketbase_*.zip

# Windows (use your preferred archive tool or PowerShell)
Expand-Archive pocketbase_*.zip -DestinationPath .
Step 3: Run PocketBase
# macOS & Linux
./pocketbase serve

# Windows
.\pocketbase.exe serve
You’ll see output similar to:
Server started at: http://127.0.0.1:8090
 ├─ API: http://127.0.0.1:8090
 ├─ Admin UI: http://127.0.0.1:8090/_/
 └─ Data: ./pb_data
Congratulations! Your PocketBase backend is now running.
Step 4: Access the Admin Dashboard
Open your browser and navigate to http://127.0.0.1:8090/. You’ll be prompted to create a superuser account (admin credentials). Set a strong email and password—this is your master key to the admin panel.
Optional: macOS Quick Start Alternative
If you use Homebrew, you can install PocketBase with:
brew install pocketbase
pocketbase serve
Getting Started: Build Your First Backend
Now that PocketBase is running, let’s create a simple note-taking backend to demonstrate core concepts.
Creating Your First Collection
Collections in PocketBase are similar to tables in a traditional SQL database. Let’s create a notes collection.
Steps:
- Open the Admin Dashboard at
http://127.0.0.1:8090/ - Click the Collections icon in the left sidebar
- Click + Create collection button
- Enter
notesas the collection name - Keep the type as Base (the default)
- Click Create
Adding Fields to Your Collection
PocketBase provides flexible field types. Let’s add fields to our notes collection:
Field 1: title
- Type: Text
- Required: ✅ Yes
Field 2: content
- Type: Text (Editor)
- Required: ❌ No
Field 3: tags
- Type: Select (Multiple)
- Options: Work, Personal, Ideas, Research
- Required: ❌ No
Field 4: isPinned
- Type: Checkbox
- Default: ✅ No
To add each field:
- Click the + Add field button
- Enter the field name
- Select the field type from the dropdown
- Configure options (if needed)
- Click Save
Testing Your API
PocketBase automatically generates a REST API for your collections. Let’s test it using curl:
Create a note:
curl -X POST http://127.0.0.1:8090/api/collections/notes/records \
  -H "Content-Type: application/json" \
  -d '{
    "title": "My First Note",
    "content": "This is a sample note created via API.",
    "tags": ["Personal", "Ideas"],
    "isPinned": true
  }'
Fetch all notes:
curl http://127.0.0.1:8090/api/collections/notes/recordsFetch a specific note (replace RECORD_ID with an actual ID):
curl http://127.0.0.1:8090/api/collections/notes/records/RECORD_IDUpdate a note:
curl -X PATCH http://127.0.0.1:8090/api/collections/notes/records/RECORD_ID \
  -H "Content-Type: application/json" \
  -d '{
    "title": "Updated Title"
  }'
Delete a note:
curl -X DELETE http://127.0.0.1:8090/api/collections/notes/records/RECORD_IDUsing the JavaScript SDK
While curl is useful for testing, most applications interact with PocketBase using an SDK. The PocketBase JavaScript SDK makes it easy to integrate PocketBase with frontend frameworks like React, Vue, or plain JavaScript.
Installation
npm install pocketbaseBasic Usage Example
import PocketBase from 'pocketbase';

// Initialize PocketBase client
const pb = new PocketBase('http://127.0.0.1:8090');

// Example 1: List all notes
async function getNotes() {
  try {
    const records = await pb.collection('notes').getList(1, 50, {
      sort: '-created',
    });
    console.log('Notes:', records.items);
  } catch (error) {
    console.error('Error fetching notes:', error);
  }
}

// Example 2: Create a new note
async function createNote() {
  try {
    const record = await pb.collection('notes').create({
      title: 'Learn PocketBase',
      content: 'PocketBase is awesome!',
      tags: ['Personal', 'Ideas'],
      isPinned: false,
    });
    console.log('Created note:', record);
  } catch (error) {
    console.error('Error creating note:', error);
  }
}

// Example 3: Update a note
async function updateNote(recordId) {
  try {
    const record = await pb.collection('notes').update(recordId, {
      title: 'Updated Title',
      isPinned: true,
    });
    console.log('Updated note:', record);
  } catch (error) {
    console.error('Error updating note:', error);
  }
}

// Example 4: Delete a note
async function deleteNote(recordId) {
  try {
    await pb.collection('notes').delete(recordId);
    console.log('Note deleted successfully');
  } catch (error) {
    console.error('Error deleting note:', error);
  }
}

// Example 5: Real-time subscriptions
async function subscribeToNotes() {
  try {
    await pb.collection('notes').subscribe('*', (e) => {
      console.log('Change detected:', e.action, e.record);
    });
  } catch (error) {
    console.error('Error subscribing:', error);
  }
}

// Run examples
getNotes();
subscribeToNotes();
Advanced Filtering & Sorting
PocketBase supports powerful filtering and sorting:
// Filter notes by tag and sort by creation date
const records = await pb.collection('notes').getList(1, 50, {
  filter: 'tags ?~ "Personal" && isPinned = true',
  sort: '-created',
});

// Search within the content field
const searched = await pb.collection('notes').getList(1, 50, {
  filter: `content ~ "important"`,
});
User Authentication
PocketBase includes built-in user management. Let’s set up authentication.
Create a Users Collection
- In the Admin Dashboard, create a new collection named
users - Select Auth collection as the type
- PocketBase automatically adds essential auth fields (email, password, verified, etc.)
User Registration
// Register a new user
async function registerUser(email, password) {
  try {
    const record = await pb.collection('users').create({
      email,
      password,
      passwordConfirm: password,
    });
    console.log('User registered:', record);
  } catch (error) {
    console.error('Registration error:', error);
  }
}

registerUser('[email protected]', 'SecurePassword123');
User Login
// Login user
async function loginUser(email, password) {
  try {
    const authData = await pb.collection('users').authWithPassword(
      email,
      password
    );
    console.log('Logged in:', authData.record.email);
    console.log('Auth token:', authData.token);
  } catch (error) {
    console.error('Login error:', error);
  }
}

loginUser('[email protected]', 'SecurePassword123');
Check Authentication Status
// Check if user is logged in
if (pb.authStore.isValid) {
  console.log('User is authenticated:', pb.authStore.record.email);
} else {
  console.log('User is not authenticated');
}

// Logout
pb.authStore.clear();
Advanced Tips & Best Practices
1. Enable CORS for Frontend Integration
By default, PocketBase restricts cross-origin requests. To enable CORS for your frontend:
- Go to Settings → Cors Origins
- Add your frontend URL (e.g.,
http://localhost:3000for local development) - For production, use your domain URL
2. Set Up File Upload Permissions
To allow users to upload files:
- Create a field of type File in your collection
- Go to Settings → File system
- Configure storage limits and upload rules
- Adjust file upload permissions in the collection rules
3. Use Rules for Access Control
PocketBase supports rule-based access control:
- List Rule: Control who can view records
- View Rule: Control who can read a specific record
- Create Rule: Control who can create records
- Update Rule: Control who can modify records
- Delete Rule: Control who can delete records
Example: Allow users to see only their own notes:
@request.auth.id != '' && owner = @request.auth.id4. Enable HTTPS for Production
When deploying PocketBase to production:
./pocketbase serve --http=0.0.0.0:80 --https=0.0.0.0:443 \
  --cert=/path/to/cert.pem \
  --key=/path/to/key.pem
Use Let’s Encrypt for free SSL certificates:
./pocketbase serve --encryptionEnv=YOUR_ENCRYPTION_KEY \
  --http=0.0.0.0:80 --https=0.0.0.0:443
5. Database Backups
Since PocketBase uses SQLite, backing up is simple:
# Backup the database
cp pb_data/data.db pb_data/data.db.backup

# Or use a cron job for automated backups
0 2 * * * cp /path/to/pb_data/data.db /backups/data.db.$(date +\%Y\%m\%d)
6. Extend with Go
For advanced customization, PocketBase can be extended using Go:
package main

import (
  "log"
  "github.com/pocketbase/pocketbase"
  "github.com/pocketbase/pocketbase/core"
)

func main() {
  app := pocketbase.New()

  app.OnServe().BindFunc(func(se *core.ServeEvent) error {
    // Add custom routes
    se.Router.GET("/api/hello", func(e *core.RequestEvent) error {
      return e.String(200, "Hello from PocketBase!")
    })
    return se.Next()
  })

  if err := app.Start(); err != nil {
    log.Fatal(err)
  }
}
7. Deployment Options
Fly.io – Recommended for easiest deployment:
fly launch
fly deploy
Docker – Containerize PocketBase:
FROM golang:1.23 as builder
RUN go install github.com/pocketbase/pocketbase@latest

FROM alpine:latest
COPY --from=builder /go/bin/pocketbase /usr/local/bin/
EXPOSE 8090
CMD ["pocketbase", "serve", "--http=0.0.0.0:8090"]
VPS (Hetzner, DigitalOcean, Linode):
- SSH into your server
- Upload the PocketBase binary
- Run with a systemd service for auto-restart
Pros and Cons
Pros
- Single executable – No dependency hell, easy deployment
- Zero configuration – Works out of the box
- Complete solution – Database, auth, file storage, API, admin panel
- Open source – Full control and transparency
- Self-hosted – Your data, your rules
- Real-time capabilities – Built-in WebSocket support
- Perfect for prototyping – Get to MVP quickly
- Affordable – Minimal server resources needed
Cons
- Not for massive scale – SQLite has limitations for large datasets
- Still in development – API may change before v1.0.0
- Limited official hosting – No managed cloud option from the maintainer
- JavaScript/Go only – Native clients only available for these languages
- Community-driven – Smaller ecosystem compared to Firebase or Supabase
- Single-file database – Not ideal for clustered deployments
Conclusion
PocketBase is a game-changer for developers who want a powerful, no-nonsense backend without the complexity and cost of traditional solutions. Whether you’re building a note-taking app, a real-time dashboard, or a full-fledged SaaS product, PocketBase provides everything you need to get started quickly.
In this tutorial, we covered installation, collection setup, API basics, JavaScript SDK usage, authentication, and deployment strategies. You now have the knowledge to build a complete backend application with PocketBase.
Next steps: Clone a PocketBase starter project from GitHub, deploy it to Fly.io or your favorite hosting platform, or contribute to the project on GitHub. The PocketBase community is growing, and every contribution matters.
Ready to simplify your backend? Download PocketBase today from pocketbase.io and start building. Share your experience in the comments below—we’d love to hear what you create!