Ready to take full control of your product analytics? Ditch the limitations and high costs of third-party tools and unlock powerful, self-hosted insights. This guide will walk you through everything you need to know to install PostHog, the all-in-one open-source analytics platform, on your own Ubuntu server using Docker.
PostHog is a comprehensive, open-source product analytics platform built for engineers and product teams. It bundles a suite of powerful tools into a single ecosystem, empowering you to make data-driven decisions and streamline your development workflow.
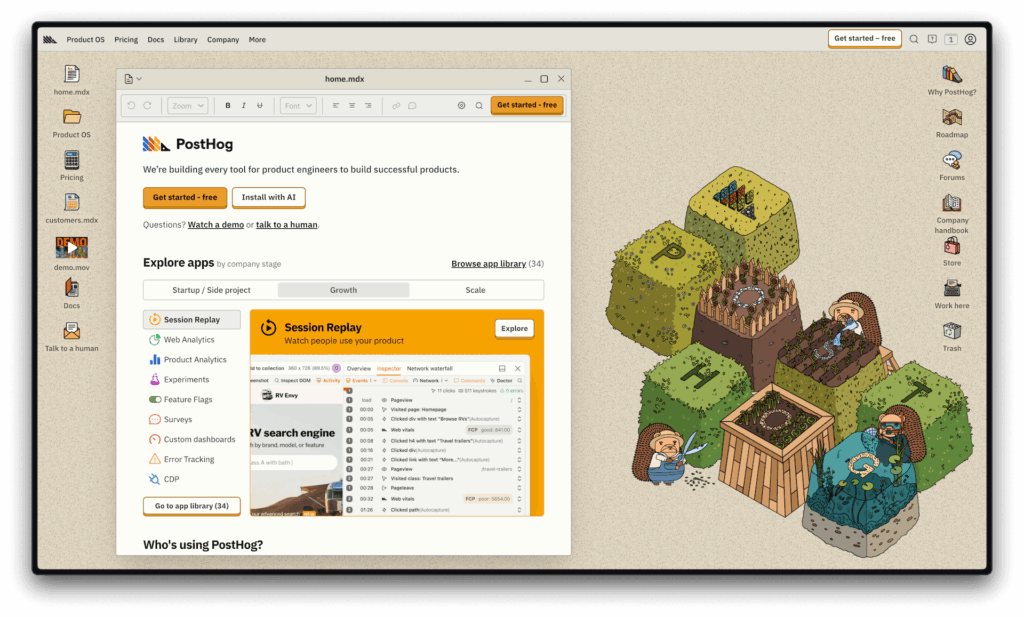
Why Choose PostHog? The All-in-One Analytics Powerhouse
- Product Analytics: Visualize user behavior with intuitive dashboards, funnel analysis, and cohort tracking.
- Session Replay: Watch real user sessions to understand exactly how people interact with your product.
- Feature Flags: Roll out new features safely and confidently to specific user segments.
- A/B Testing & Experiments: Run experiments to optimize conversion rates and enhance user experience.
- Error Tracking: Monitor and debug application errors in real-time.
- Surveys: Collect direct feedback from your users with customizable surveys.
- Data Warehouse: Integrate with over 120 sources to unify your data pipelines.
Real-World Use Cases
Here’s how top companies leverage PostHog to drive growth:
1. Tracking Marketing Campaign Performance
PostHog can track campaign effectiveness using UTM parameters, giving you a complete view of the customer journey from ad click to conversion. The company Pry used this to compare the value of paid vs. organic customers, helping them optimize their ad spend.
2. Analyzing Data Retrospectively
Unlike other tools that require you to define events upfront, PostHog’s autocapture feature lets you analyze data retroactively. MentionMe used this to define new events and see historical data instantly, without waiting months for new data to accumulate.
3. Optimizing with A/B Testing
Companies like Y Combinator and ResearchGate use PostHog to run experiments that improve conversion rates. With integrated feature flags, they can safely test different variants in production.
4. Improving UX with Session Replay
Phantom used session replays to diagnose failure rates in their payment process, allowing them to prioritize crucial infrastructure updates. Combining session replays with funnel analysis helped them understand exactly why users were dropping off.
5. Streamlining Feature Development
PostHog uses its own platform to build and validate new features. Their four-step process—MVP testing with feature flags, beta testing, a wider launch, and usage monitoring—ensures every feature is battle-tested before a full release.
Prerequisites: What You’ll Need
Before you begin, make sure your server meets the following requirements.
Minimum Hardware
- CPU: 4 vCPU
- RAM: 16GB (4GB is the absolute minimum, but 16GB is strongly recommended for smooth operation)
- Storage: 30GB minimum (100GB+ recommended if you plan to store observability data)
- Network: A stable internet connection
Software & Services
- OS: Ubuntu 20.04 LTS or 22.04 LTS
- Domain: A domain name with an A record pointed to your server’s IP address.
- SSL: Don’t worry about this—PostHog automatically generates a free SSL certificate via LetsEncrypt.
Detailed Installation Guide
We’ll cover two methods: the super-fast automated script (recommended) and the manual Docker Compose setup for more control.
Method 1: The Automated Script (Recommended)
This is the easiest and fastest way to get PostHog up and running.
Step 1: Connect to Your Server
First, SSH into your Ubuntu server:
ssh username@your-server-ipStep 2: Run the Installation Script
PostHog provides a convenient script that handles everything for you. Just run this command:
/bin/bash -c "$(curl -fsSL https://raw.githubusercontent.com/posthog/posthog/HEAD/bin/deploy-hobby)"The script will prompt you for the following:
- Version tag: Press
Enterto use thelatestversion. - Domain: Enter your domain name (e.g.,
analytics.yourdomain.com). - Sudo password: Provide your sudo password to allow the script to install necessary packages.
Step 3: Monitor the Installation
The script will now automatically:
- Install Docker and Docker Compose.
- Clone the PostHog repository.
- Create the necessary configuration files.
- Download the GeoIP database.
- Start all the PostHog containers.
- Provision your SSL certificate.
The process takes about 5-10 minutes. Once it’s done, you’ll see a success message:
🎉🎉🎉  Done! 🎉🎉🎉
PostHog will be up at the location you provided!
https://your-domain.com
Method 2: Manual Installation with Docker Compose
This method gives you more insight into the setup process.
Step 1: Install Docker
# Update your package index
sudo apt update

# Install dependencies
sudo apt install -y apt-transport-https ca-certificates curl software-properties-common

# Add Docker's official GPG key
curl -fsSL https://download.docker.com/linux/ubuntu/gpg | sudo apt-key add -

# Add the Docker repository
sudo add-apt-repository "deb [arch=amd64] https://download.docker.com/linux/ubuntu $(lsb_release -cs) stable"

# Install Docker Engine
sudo apt update
sudo apt install -y docker-ce

# Add your user to the docker group to run commands without sudo
sudo usermod -aG docker $USER
newgrp docker
Step 2: Install Docker Compose
sudo curl -L "https://github.com/docker/compose/releases/latest/download/docker-compose-$(uname -s)-$(uname -m)" -o /usr/local/bin/docker-compose
sudo chmod +x /usr/local/bin/docker-compose
Step 3: Clone the PostHog Repository
git clone https://github.com/PostHog/posthog.git
cd posthog
Step 4: Create the Configuration File
Create a .env file with your environment variables. Remember to replace your-domain.com.
cat > .env <<EOF
POSTHOG_SECRET=$(head -c 28 /dev/urandom | sha224sum -b | head -c 56)
ENCRYPTION_SALT_KEYS=$(openssl rand -hex 16)
DOMAIN=your-domain.com
POSTHOG_APP_TAG=latest
SESSION_RECORDING_V2_METADATA_SWITCHOVER=$(date -Iseconds)
EOF
Step 5: Download the GeoIP Database
mkdir -p ./share
curl -L 'https://mmdbcdn.posthog.net/' --http1.1 | brotli --decompress --output=./share/GeoLite2-City.mmdb
echo '{"date": "'$(date +%Y-%m-%d)'"}' > ./share/GeoLite2-City.json
chmod 644 ./share/GeoLite2-City.*
Step 6: Start PostHog
# Copy the hobby docker-compose files
cp docker-compose.base.yml docker-compose.base.yml
cp docker-compose.hobby.yml docker-compose.yml

# Start the stack in detached mode
docker-compose up -d
Configuration and Customization
Configuring Environment Variables
You can customize your PostHog instance using variables in the .env file. Here are a few important ones:
# Security (already generated, but keep them safe)
POSTHOG_SECRET=your-secret-key
ENCRYPTION_SALT_KEYS=your-encryption-keys

# Database
DATABASE_URL=postgres://posthog:posthog@db:5432/posthog

# Redis
REDIS_URL=redis://redis:6379/

# Email (optional, for sending invites, alerts, etc.)
EMAIL_HOST=smtp.yourdomain.com
EMAIL_PORT=587
[email protected]
EMAIL_HOST_PASSWORD=your-password

# External Object Storage (optional, for S3-compatible storage)
OBJECT_STORAGE_ENABLED=true
OBJECT_STORAGE_ENDPOINT=https://s3.amazonaws.com
OBJECT_STORAGE_ACCESS_KEY_ID=your-access-key
OBJECT_STORAGE_SECRET_ACCESS_KEY=your-secret-key
Configuring a Reverse Proxy (Optional)
If PostHog is running behind a reverse proxy, add these variables to your .env file:
IS_BEHIND_PROXY=True
TRUSTED_PROXIES=192.168.1.1,10.0.0.1
ALLOWED_HOSTS=your-domain.com,proxy-domain.com
Health Checks and Troubleshooting
Check Container Status
To see if all services are running correctly, use:
docker psYou should see posthog-web, posthog-worker, posthog-db, posthog-redis, posthog-clickhouse, and others.
View Logs
- To view logs for all containers:Bash
docker-compose logs - To tail the logs of a specific container (e.g., the web server):Bash
docker-compose logs -f web
System Health Endpoint
Visit https://your-domain.com/_health to see a detailed system status check.
Backup and Maintenance
Backing Up Your Data
- Backup PostgreSQL:
docker-compose exec db pg_dump -U posthog posthog > posthog_backup.sql - Backup ClickHouse:
docker-compose exec clickhouse clickhouse-client --query "BACKUP DATABASE posthog TO Disk('backups', 'posthog_backup')"
Updating PostHog
The easiest way to update to the latest version is with the official upgrade script:
/bin/bash -c "$(curl -fsSL https://raw.githubusercontent.com/posthog/posthog/HEAD/bin/upgrade-hobby)"Monitoring Resources
Keep an eye on your server’s resource usage:
# Check container resource usage
docker stats

# Check disk space
df -h

# Check memory
free -h
Lock It Down: Essential Security Measures
SSL/TLS
PostHog automatically handles SSL certificate generation and renewal via LetsEncrypt.
Firewall
Use a firewall to restrict traffic to only necessary ports.
- 443: HTTPS (Essential)
- 80: HTTP (For redirecting to HTTPS)
- 22: SSH (For server access)
sudo ufw allow 22/tcp
sudo ufw allow 80/tcp
sudo ufw allow 443/tcp
sudo ufw enable
Database Security
- Always use strong, unique keys for
POSTHOG_SECRETandENCRYPTION_SALT_KEYS. - Change default database passwords if you customize the setup further.
- Perform and test regular backups.
Conclusion
Self-hosting PostHog with Docker provides a powerful, flexible, and private analytics solution. By following this guide, you can successfully deploy PostHog and start gathering invaluable insights into your user behavior.
This approach is perfect for organizations that prioritize data privacy, require deep customization, or want a cost-effective solution at scale. While it requires more hands-on maintenance than PostHog Cloud, the trade-off is complete control over your data and infrastructure. Happy analyzing!