Self-hosted Coze Studio is an open-source AI agent development platform developed by ByteDance that enables users to create, debug, and deploy conversational AI applications without relying on cloud services. Available at https://github.com/coze-dev/coze-studio, this platform provides a comprehensive visual toolkit for building sophisticated AI agents using large language models (LLMs).
The self-hosted version offers significant advantages over cloud-based alternatives: complete data privacy by keeping all information on your own infrastructure, cost control through elimination of subscription fees, customization flexibility for specific business needs, and vendor independence to avoid lock-in scenarios. Key features include a drag-and-drop agent designer, support for multiple LLM providers (OpenAI, Claude, Gemini, local models via Ollama), workflow automation tools, knowledge base integration, plugin ecosystem for custom functionality, real-time debugging capabilities, and comprehensive deployment options.
This platform is ideal for developers, enterprises, and privacy-conscious organizations seeking powerful AI development tools while maintaining complete control over their data and infrastructure.
Prerequisites
Before installing Self-hosted Coze Studio, ensure your system meets the following requirements:
Hardware Requirements:
- CPU: Minimum 2 cores (4+ cores recommended for production)
- RAM: Minimum 4 GiB (8 GiB recommended for multi-user environments)
- Storage: At least 20 GB free space for Docker images, databases, and application data
- Network: Stable internet connection for initial setup and model API calls
Software Requirements:
- Docker: Version 20.10 or later with Docker Compose v2.x
- Operating System:
- Linux: Ubuntu 20.04+, CentOS 8+, or equivalent
- macOS: 11.0 or later with Docker Desktop
- Windows: 10+ with WSL2 and Docker Desktop
- Git: For cloning the repository (optional – can download ZIP)
- Web Browser: Modern browser (Chrome, Firefox, Safari, Edge) for accessing the interface
Optional Requirements:
- LLM API Keys: OpenAI, Claude, Gemini, or local model endpoints for AI functionality
- SSL Certificate: For production HTTPS deployment
- Reverse Proxy: Nginx or similar for advanced routing and security
Verification Steps:
# Verify Docker installation
docker --version
docker compose version

# Test Docker functionality
docker run hello-world
Ensure Docker daemon is running and you have sufficient permissions to execute Docker commands.
Installation Steps
Follow these step-by-step instructions to install and deploy Self-hosted Coze Studio:
1. Clone the Repository
# Clone the source code
git clone https://github.com/coze-dev/coze-studio.git
cd coze-studio

# Alternative: Download ZIP from GitHub if Git is unavailable
2. Navigate to Docker Directory
cd docker3. Configure Environment Variables
# Copy environment template
cp .env.example .env

# Edit configuration (optional for basic setup)
nano .env
The default .env file works for local deployment. For production, modify:
PORT: Web interface port (default: 8888)- Database credentials and connection strings
- External service configurations
4. Configure Model Services (Critical Step)
Before starting services, configure at least one LLM model:
# Navigate to model configuration directory
cd ../backend/conf/model

# Copy a model template (example: OpenAI GPT-4)
cp template/model_template_openai.yaml model_template_openai.yaml

# Edit the configuration file
nano model_template_openai.yaml
Required Configuration Fields:
id: Unique integer identifier (e.g., 1, 2, 3…)meta.conn_config.api_key: Your API key from the model providermeta.conn_config.model: Model name/ID (e.g., “gpt-4”, “claude-3-sonnet”)
Example Configuration:
id: 1
meta:
  conn_config:
    api_key: "your-openai-api-key-here"
    model: "gpt-4"
    base_url: "https://api.openai.com/v1"
5. Deploy and Start Services
# Return to docker directory
cd ../../docker

# Start all services
docker compose --profile '*' up -d
Initial deployment may take 10-15 minutes to pull images and build containers. Monitor progress:
# Check container status
docker compose ps

# View startup logs
docker compose logs -f coze-server
Look for the message “Container coze-server Started” indicating successful deployment.
6. Restart Services (After Model Configuration)
# Restart server to load model configurations
docker compose restart coze-server

# Verify all services are running
docker compose ps
7. Access the Application
Open your web browser and navigate to:
- Local access:
http://localhost:8888/ - Remote server:
http://your-server-ip:8888/
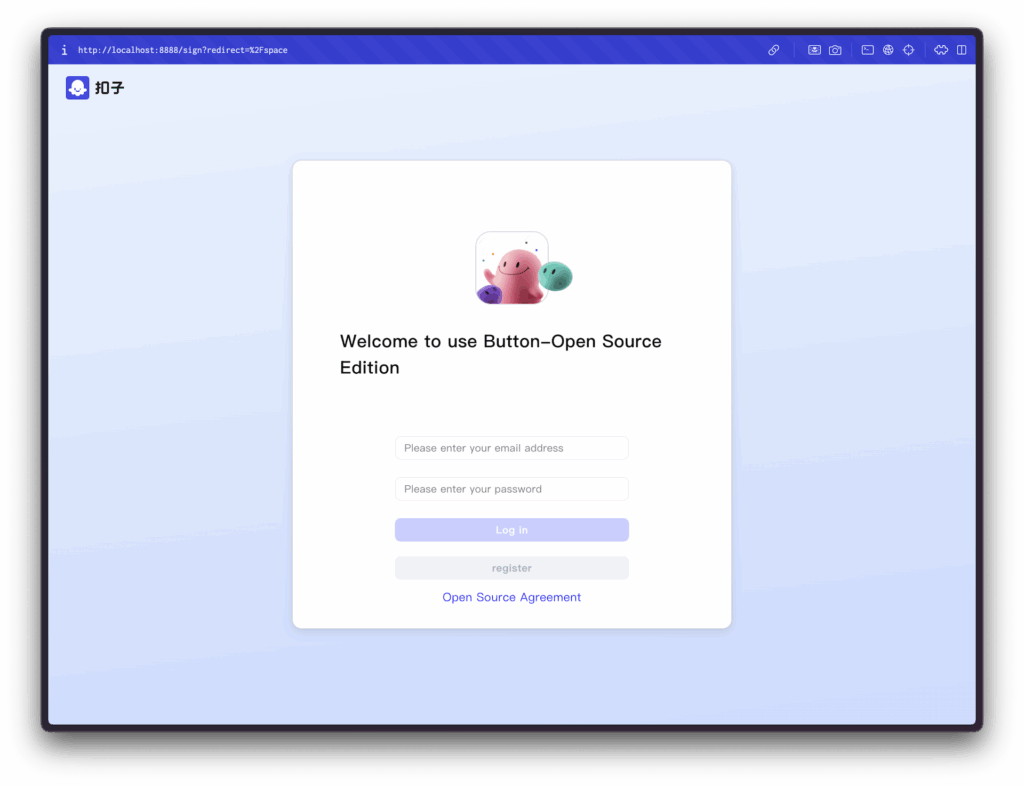
First-time setup:
- Click “Register” (not “Log In”) for initial account creation
- Enter email and password
- First registered user automatically becomes Super Admin
- Complete registration and automatic login
Getting Started and Usage
Once Coze Studio is running, follow these steps to create your first AI agent:
Accessing the Interface
- Navigate to the web interface at
http://localhost:8888/ - Log in with your registered credentials
- The dashboard displays Development, Resources, and Settings sections
Creating a Simple AI Bot
Step 1: Create New Agent
- Click Development → Create Agent
- Enter agent name (e.g., “Customer Support Bot”)
- Provide description and select category
Step 2: Configure Agent Prompt
You are a helpful customer support assistant.
Always be polite, professional, and provide accurate information.
If you don't know something, ask for clarification or escalate to a human agent.
Step 3: Select Model
- Choose from configured models in the dropdown
- Verify model connection status is “Connected”
- Adjust model parameters (temperature, max tokens) as needed
Step 4: Add Knowledge Base (Optional)
- Upload documents, FAQs, or product information
- Configure retrieval settings for relevant context
Step 5: Test the Agent
- Use the built-in chat interface on the right panel
- Test various scenarios and edge cases
- Refine prompts based on responses
Step 6: Deploy Agent
- Click “Publish” to create deployment
- Generate API endpoints or web chat widget
- Configure access permissions and rate limits
Integration Examples
API Integration:
import requests

url = "http://localhost:8888/api/v1/chat"
headers = {
    "Authorization": "Bearer your-api-key",
    "Content-Type": "application/json"
}

data = {
    "agent_id": "your-agent-id",
    "message": "Hello, I need help with my order",
    "conversation_id": "unique-conversation-id"
}

response = requests.post(url, headers=headers, json=data)
print(response.json())
Web Integration:
<script src="http://localhost:8888/sdk/web-chat.js"></script>
<script>
CozeChat.init({
  agentId: 'your-agent-id',
  apiKey: 'your-api-key',
  containerId: 'chat-container'
});
</script>
Advanced Features
- Workflows: Create complex multi-step processes with conditional logic
- Plugins: Add custom functionality like web search, file processing, or database queries
- Multi-modal: Handle text, images, and audio inputs
- A/B Testing: Compare different agent configurations
Troubleshooting
Common Issues and Solutions
1. Container Startup Failures
# Check Docker daemon status
sudo systemctl status docker

# Restart Docker service
sudo systemctl restart docker

# View detailed error logs
docker compose logs coze-server
2. Port Conflicts
# Check port usage
netstat -tuln | grep 8888

# Modify port in .env file
echo "PORT=9999" >> .env
docker compose down && docker compose up -d
3. Model Configuration Errors
- Verify API keys are correct and have sufficient quotas
- Check model names match provider specifications
- Ensure network connectivity to model APIs
- Restart coze-server after configuration changes:
docker compose restart coze-server4. Memory Issues
# Check container resource usage
docker stats

# Increase Docker memory allocation (Docker Desktop)
# Restart containers if memory-constrained
docker compose down && docker compose up -d
5. Database Connection Problems
# Check database container status
docker compose ps coze-mysql

# Reset database (WARNING: destroys data)
docker compose down -v
docker compose up -d
6. Login/Registration Issues
- Clear browser cache and cookies
- Try incognito/private browsing mode
- Check network connectivity to server
- Verify environment variables in
.envfile
7. Network Access Problems
# For remote access, ensure firewall allows port 8888
sudo ufw allow 8888/tcp

# Check if service is listening on all interfaces
netstat -tuln | grep 8888
Getting Help
- GitHub Issues: github.com/coze-dev/coze-studio/issues
- Official Wiki: github.com/coze-dev/coze-studio/wiki
- Community Discussions: Check Reddit r/selfhosted and r/LocalLLaMA communitiesgithub+1
Best Practices and Resources
Security Best Practices
1. Access Control
- Change default ports for production deployment
- Implement reverse proxy with SSL/TLS encryption
- Use strong, unique passwords for all accounts
- Enable two-factor authentication when available
2. Network Security
# Use nginx reverse proxy with SSL
server {
    listen 443 ssl;
    server_name your-domain.com;

    ssl_certificate /path/to/certificate.crt;
    ssl_certificate_key /path/to/private.key;

    location / {
        proxy_pass http://localhost:8888;
        proxy_set_header Host $host;
        proxy_set_header X-Real-IP $remote_addr;
    }
}
3. API Key Management
- Store API keys in environment variables, never in code
- Regularly rotate API keys
- Monitor API usage and set up alerts for unusual activity
Scaling and Performance
1. Resource Monitoring
# Monitor container performance
docker stats

# Check disk usage
df -h
du -sh /var/lib/docker/
2. Database Optimization
- Use PostgreSQL for production environments instead of SQLite
- Implement regular database backups
- Monitor query performance and optimize indexes
3. Load Balancing
# For high-traffic scenarios, deploy multiple instances
# Use Docker Swarm or Kubernetes for orchestration
docker swarm init
docker service create --replicas 3 cozedev/coze-studio-server
Maintenance and Updates
1. Backup Strategy
# Backup database
docker exec coze-mysql mysqldump -u root -p coze_db > backup.sql

# Backup configuration files
tar -czf coze-config-backup.tar.gz backend/conf/

# Backup user data
cp -r data/ backup-$(date +%Y%m%d)/
2. Updates
# Pull latest changes
cd coze-studio
git pull origin main

# Rebuild and restart services
docker compose down
docker compose --profile '*' up -d --build
3. Health Monitoring
- Implement uptime monitoring (UptimeRobot, Pingdom)
- Set up log aggregation and alerting
- Monitor API response times and error rates
Additional Resources
Official Documentation:
Community Resources:
Related Projects:
- Coze Loop: AI agent optimization platform
- LangChain Integration: Connect with LangChain ecosystem
- Ollama Integration: Run local LLMs without cloud dependencies
This comprehensive guide provides everything needed to successfully deploy and operate Self-hosted Coze Studio in production environments while maintaining security, performance, and scalability best practices.