In the age of Generative AI, we often face a difficult choice: pay expensive per-token fees through official APIs, or purchase fixed subscription plans (like Claude Pro or Gemini Advanced) but remain confined to a chat interface. What if there was a way to combine both worlds?
Imagine using the power of Claude Sonnet 4.5 or Gemini 3 Pro in your automation workflows (n8n, coding agents) while leveraging the generous limits of your personal subscription instead of burning money on API keys. This is exactly the problem that CLIProxyAPI solves.
What is CLIProxyAPI?
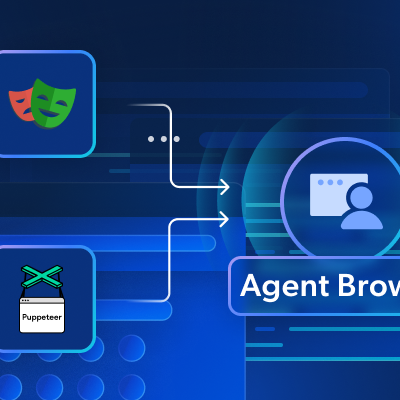
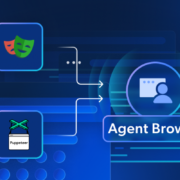
CLIProxyAPI is a middleware proxy server that acts as a technical bridge between your applications and AI providers. It works by wrapping the proprietary command-line interface tools from Google, Anthropic, and OpenAI, then exposing them as standard OpenAI-compatible API endpoints.
In other words, your applications (VS Code, n8n, Factory Droid) will think they’re talking to the OpenAI API, but CLIProxyAPI is actually handling and forwarding those requests through your personal subscription account.
How Does the “Arbitrage” Mechanism Work?
Understanding CLIProxyAPI’s architecture is key to operating it safely. The system doesn’t use traditional provider API keys, but instead employs a legitimate Man-in-the-Middle approach:
First, the proxy intercepts requests from your application (for example, a chat request from n8n) and removes the “dummy API key” you configured in your application.
Next comes authentication injection. The proxy locates the OAuth tokens (access and refresh tokens) that you previously logged in with and injects them into the request headers.
Then it performs protocol conversion, sending the request to Google or Anthropic under the guise of their official CLI tools (like gemini-cli or claude-code). Since these CLI tools typically come with user subscriptions, you avoid enterprise API costs.
Finally, the response (usually an SSE stream) is repackaged into standard OpenAI JSON format so your application can understand it.
Quick Installation Guide
Method 1: Using Docker (Recommended for Servers and Homelabs)
This is the most stable way to run the service around the clock and integrate it with n8n. Here’s an optimized docker-compose.yml configuration:
services:
  cli-proxy-api:
    image: eceasy/cli-proxy-api:latest
    container_name: cli-proxy-api
    pull_policy: always
    restart: unless-stopped
    ports:
      - "8317:8317"   # Main API port (OpenAI-compatible)
      - "8085:8085"   # Web UI port (if enabled)
      - "54545:54545" # OAuth callback port (required for login)
    volumes:
      # Mount config file for easy editing
      - ./config.yaml:/CLIProxyAPI/config.yaml

      # CRITICAL: Store login tokens persistently
      # Without this, you'll lose access every time the container restarts
      - ./auths:/root/.cli-proxy-api

      # Store logs for debugging if needed
      - ./logs:/CLIProxyAPI/logs
    environment:
      - TZ=Asia/Ho_Chi_Minh
Before running, you need to create an empty config.yaml file or copy from the example configuration and place it in the same directory as your docker-compose file. Then run:
docker-compose up -dAfter that, enter the container to log in:
# Login with Google account
docker exec -it cli-proxy-api ./CLIProxyAPI -login

# Or with Claude Code
docker exec -it cli-proxy-api ./CLIProxyAPI -claude-login

# Login to Antigravity using OAuth
docker exec -it cli-proxy-api ./CLIProxyAPI -antigravity-login

# Other login options available for various providers
Method 2: Package Manager (Mac/Windows)
For users running directly on personal computers:
macOS:
brew install cliproxyapiWindows:
winget install -e --id LuisPater.CLIProxyAPIThe login process creates a temporary server at http://localhost:54545. You log in through your browser, and the token is automatically saved to the auths directory.
Tip for VPS (Headless Servers): If installing on a VPS without a GUI, you’ll need to use SSH tunneling to forward port 54545 to your local machine for authentication: ssh -L 54545:127.0.0.1:54545 user@vps-ip
Advanced System Configuration (config.yaml)
The config.yaml file is the “brain” that controls CLIProxyAPI’s behavior. A small syntax error in YAML (like incorrect indentation) can prevent the service from starting. Let me break down each configuration block in detail.
Network and Basic Security Configuration
# Service listening port
port: 8317

# TLS configuration (HTTPS)
# Only enable when you have a valid SSL certificate and need secure internal communications
tls:
  enable: false
  cert: "/path/to/cert.pem"
  key: "/path/to/key.pem"

# Remote Management
remote-management:
  # Allow management API access from non-localhost IPs?
  # RECOMMENDED: Set to false unless you understand the risks
  allow-remote: false
  # Secret key required if allow-remote is true
  # If left empty, the management API will be completely disabled
  secret-key: "YourSuperSecretManagementKey"
The allow-remote parameter is a potential attack vector. If set to true without a strong secret-key, attackers could access your proxy’s management console, view logs, or even change model mapping configurations. Always keep allow-remote: false if the proxy is only used by services on the same server (like n8n running in the same Docker network).
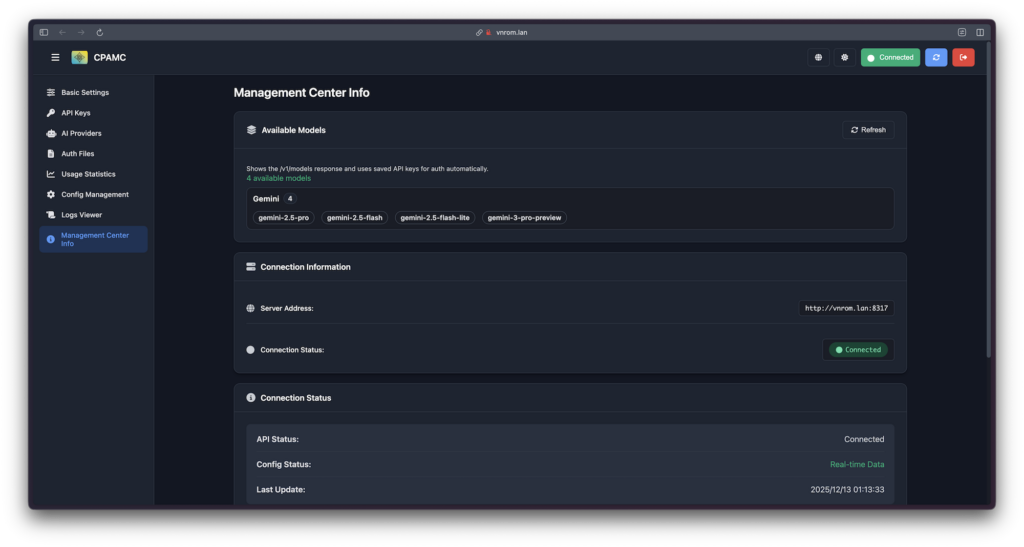
If you want the easiest user interface, enable allow-remote: true in the configuration file, then you can simply access http://localhost:8317/management.html for a management interface.
Client Key Definition and Token Storage
# OAuth Token storage directory
# The tilde (~) represents the home directory of the user running the process
auth-dir: "~/.cli-proxy-api"

# List of API keys to protect this proxy
# Clients (e.g., Cursor, n8n) must send header "Authorization: Bearer my-secure-client-key"
api-keys:
  - "my-secure-client-key"
  - "team-member-key"
The api-keys mechanism is important to understand. These are not Google or Anthropic API keys. This is a protection layer you create for your own proxy. When you configure n8n to connect to CLIProxyAPI, you’ll enter my-secure-client-key into n8n’s API key field. The proxy validates this key first, then uses its OAuth token to communicate with Google.
Quota Management and Automatic Failover
An advanced feature is the ability to handle errors when exceeding usage quotas (rate limits):
quota-exceeded:
  # Automatically switch to another Google Cloud project or account if current project runs out of quota
  switch-project: true

  # Automatically downgrade to preview model if the official model is limited
  # Example: gemini-1.5-pro -> gemini-1.5-pro-preview
  switch-preview-model: true
This feature transforms CLIProxyAPI into an intelligent load balancer. For batch processing tasks in n8n, enabling switch-project and providing multiple login accounts allows the system to maintain continuous operation without interruption from free account API limits.
Model Mapping (Model Aliasing)
This feature helps CLIProxyAPI remain compatible with any software:
models:
  # Scenario: Client (e.g., legacy app) only supports selecting "gpt-4" in the menu
  # Solution: Map "gpt-4" to "gemini-2.5-pro"
  - name: "gemini-2.5-pro"  # Actual model that will run
    alias: "gpt-4"          # Name that client sends

  # Scenario: Client requests Claude 3 Opus, but you want to use Sonnet for cost savings or speed
  - name: "claude-3-5-sonnet-20241022"
    alias: "claude-3-opus"
This configuration helps users “trick” restrictive client applications, forcing them to use more powerful or cheaper models without needing to modify the application’s source code.
Integrating into Workflows
JSON Configuration for n8n (Handling Multimodal/Images)
The biggest challenge when using n8n with CLIProxyAPI is that n8n’s default OpenAI node typically sends public image URLs, while this proxy requires image data in Base64 format.
To solve this, we won’t use the OpenAI node, but instead use the HTTP Request node combined with some JavaScript to process images.
Step 1: “Code” Node (Convert Binary to Base64)
After using the “Read Binary File” or “Telegram Trigger” node to get an image, connect it to a Code node (JavaScript language) with this content:
// This node extracts binary data and prepares the Base64 string
const items = $input.all();

return items.map(item => {
  // Assume binary data is in a field named 'data' (n8n default)
  const binaryData = item.binary.data;

  return {
    json: {
      // In n8n, item.binary.data.data is the Base64 string
      base64_image: binaryData.data
    }
  };
});
The purpose is to get the encoded string of the image to prepare for embedding it into JSON.
Step 2: “HTTP Request” Node (Send request to Proxy)
This replaces the OpenAI node. Configure this node as follows:
- Method:
POST - URL:
http://cli-proxy-api:8317/v1/chat/completions - Authentication:
Generic Credential Type->Header Auth- Name:
Authorization - Value:
Bearer <your-api-key>(the key you set inconfig.yamlunderapi-keys)
- Name:
- Body Content Type:
JSON - Body Parameters (most important): Copy this JSON into the Body’s Expression section:
{
  "model": "gemini-3-pro-preview",
  "messages": [
    {
      "role": "user",
      "content": [
        {
          "type": "text",
          "text": "Please analyze the content in this image in detail."
        },
        {
          "type": "image_url",
          "image_url": {
            "url": "data:image/jpeg;base64,{{ $json.base64_image }}"
          }
        }
      ]
    }
  ],
  "stream": false
}
The data:image/jpeg;base64,{{ $json.base64_image }} syntax is the standard way to send images directly in the JSON payload without needing to upload the image to the internet. The {{ $json.base64_image }} variable comes from the result of the Code node in Step 1.
Coding Assistant (Cursor, VS Code, Factory Droid)
You can use the most powerful models like Claude Sonnet 4.5 or Gemini 3 Pro for coding without worrying about cost:
- Base URL:
http://localhost:8317/v1 - API Key: Enter anything (or the key you set in
config.yaml) - Model: Enter the model name (e.g.,
gemini-3-pro-preview). If the software doesn’t allow custom model names, use the Mapping (Alias) feature inconfig.yamlto mapgpt-4togemini-3-pro-preview.
Common Issues and Troubleshooting
HTTP 401 or Token Unavailable: Your token has expired. Re-run the login command (--claude-login).
Model not found (404): The model name is incorrect. Check your config.yaml and ensure the alias matches the client’s request.
Address in use: Port 8317 is occupied. Change the port in both config and docker-compose files.
Final Thoughts
CLIProxyAPI is a powerful tool for anyone wanting to maximize the value of their AI subscriptions. It requires some technical knowledge to set up (Docker, OAuth), but the economic and performance benefits are substantial.
However, remember that this is a community-driven project. Providers like Google and Anthropic may change their mechanisms at any time, so staying updated with the router-for-me repository is important. This tool represents an innovative approach to making enterprise-grade AI accessible through personal subscriptions, bridging the gap between consumer and developer needs.