Download macOS Monterey DMG file for clean installation (macOS 12)
In this article, we will share the direct links to Download macOS Monterey DMG File for Clean Installation.
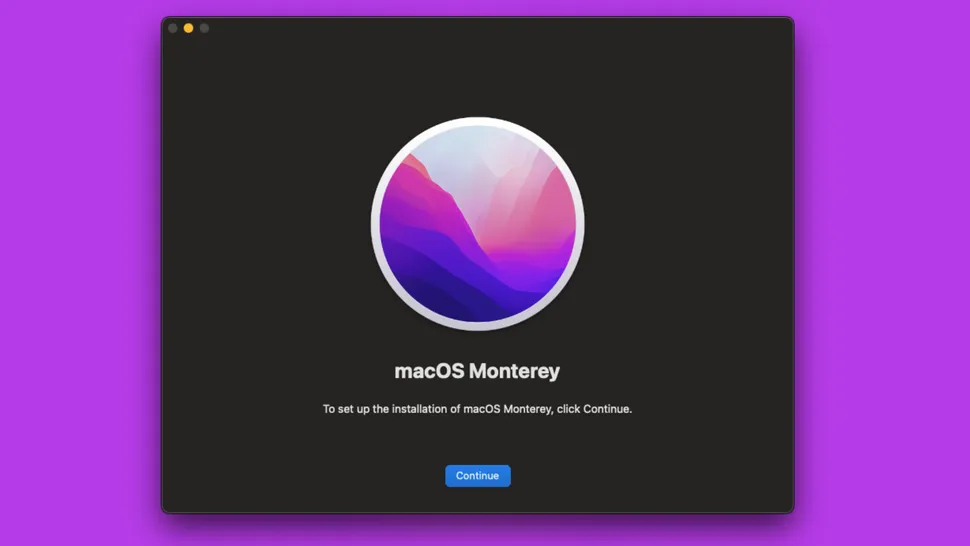
macOS 12 Monterey is available to download, showcasing many refinements and improvements to Mac users.
When macOS 12 Monterey was announced back in June during the WWDC 2021 keynote, it turned out to not be as big of an update as its predecessor, macOS 11 Big Sur, but that didn’t mean there isn’t plenty to the new OS update.
There had been a lot of interest in how to download macOS 12 Monterey even in its public beta phase, and now that macOS 12 Monterey has its full release, you are able to download the much more stable version of Apple’s latest operating system on compatible machines, without having to worry about a whole host of bugs to spot and report that risked crashing your MacBook and Mac devices.
Can your Mac run macOS 12 Monterey?
Before you begin to download macOS 12 Monterey, you should make sure your Mac can run the software. These are the Macs that you can install macOS 12 Monterey on:
- iMac late 2015 and later
- iMac Pro 2017 and later
- MacBook Air early 2015 and later
- MacBook Pro early 2015 and later
- Mac Pro late 2013 and later
- Mac mini late 2014 and later
- MacBook early 2016 and later
Download
- Google Drive:
- macOS Monterey v12.6.8.dmg (12G) | OneDrive | Backup
- macOS Monterey v12.6.3.dmg (12G) | OneDrive | Backup
- macOS Monterey v12.6.dmg (12G) | OneDrive | Backup
- macOS Monterey v12.5.1.dmg (12G) | OneDrive | Backup
- macOS Monterey v12.5.dmg (12G) | OneDrive | Backup
- macOS Monterey v12.4.dmg (11G) | OneDrive | Backup
- macOS Monterey v12.3.1.dmg (11G) | OneDrive | Backup
- macOS Monterey v12.3.dmg (11G) | OneDrive | Backup
- macOS Monterey v12.2.1.dmg (11G) | OneDrive | Backup
- macOS Monterey v12.2.dmg (11G) | OneDrive | Backup
- macOS Monterey v12.1.dmg (11G) | OneDrive | Backup
- macOS Monterey v12.0.1.dmg (11G) | OneDrive | Backup
- Apple Server:
- macOS Monterey 12.6.8 (21G725)
- macOS Monterey 12.6.3 (21G419)
- macOS Monterey 12.6 (21G115)
- macOS Monterey 12.5.1 (21G83)
- macOS Monterey 12.5 (21G72)
- macOS Monterey 12.4 (21F79)
- macOS Monterey 12.3.1 (21E258)
- macOS Monterey 12.3 (21E230)
- macOS Monterey 12.2.1 (21D62)
- macOS Monterey 12.2 (21D48)
- macOS Monterey 12.1 (21C52)
- macOS Monterey 12.0.1 (21A559)
DOWNLOAD MORE: Download macOS Big Sur DMG file for clean installation (macOS 11)Create a bootable installer for macOS
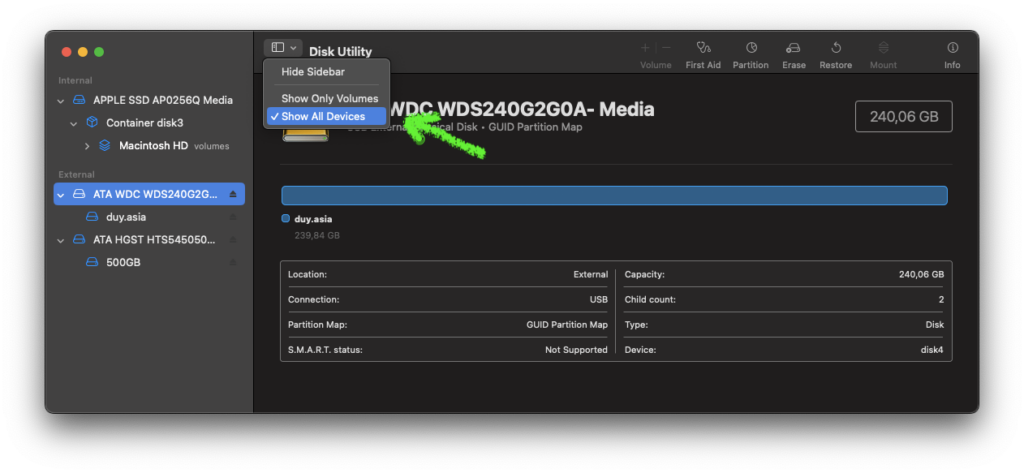
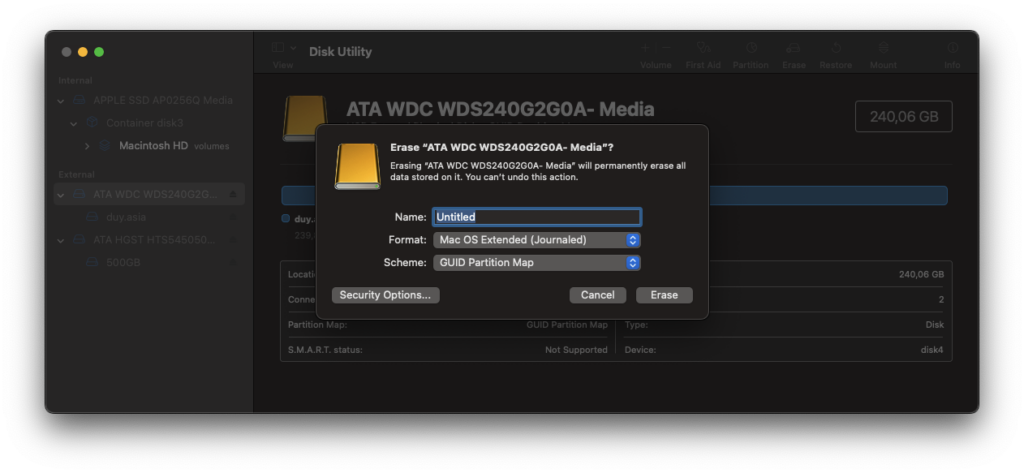
Step 1: Format the USB
Go to Disk Utility (Click on Launchpad > Other > Disk Utility). Then Format the USB with the following information:
- Name: Untitled (This name is optional, subject to change)
- Format: MacOS Extended (Journaled)
- Scheme: GUID Partion Map
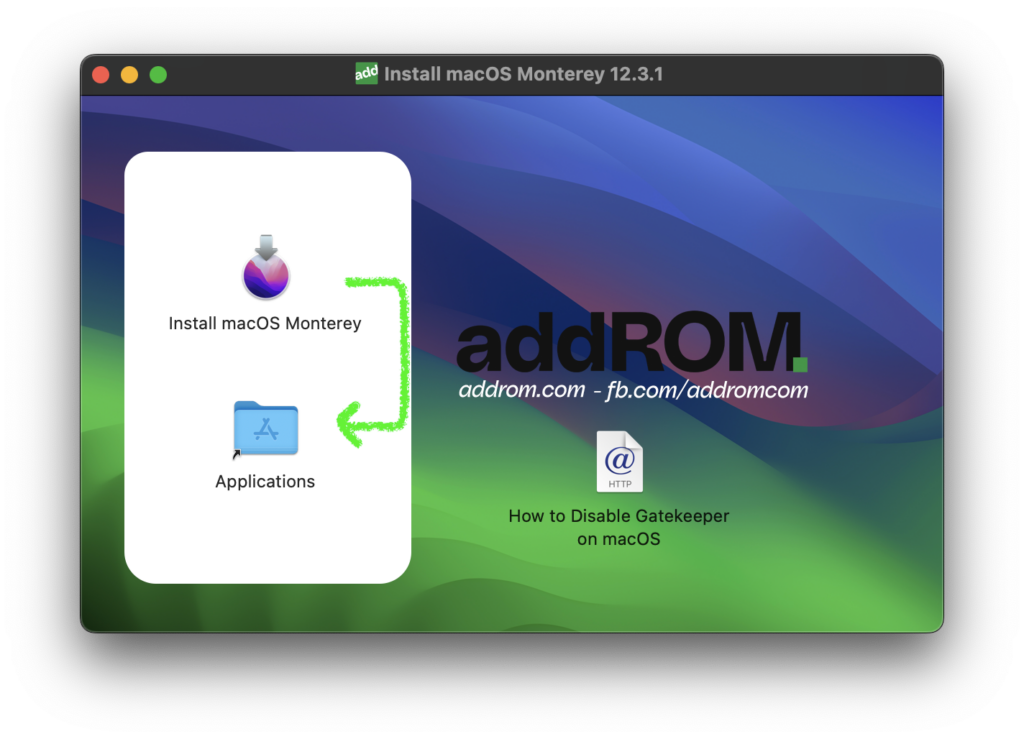
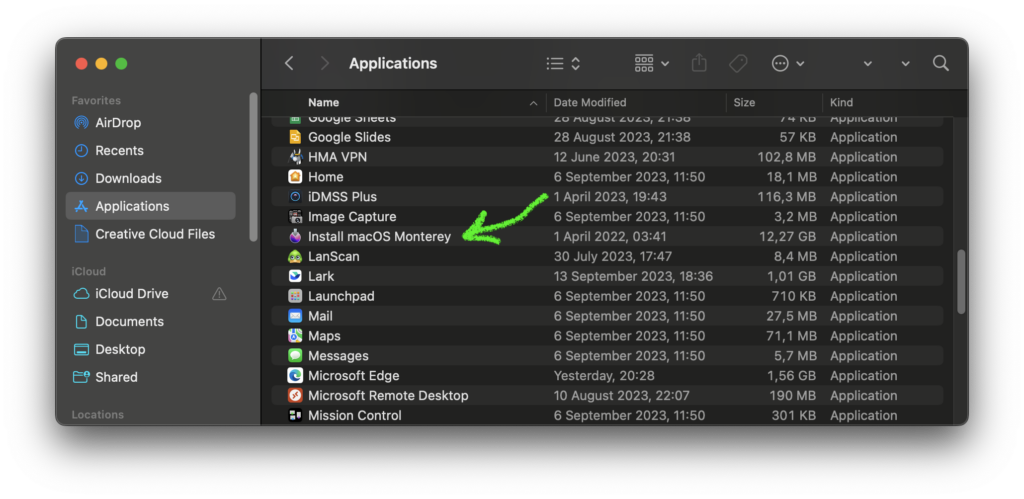
Step 2: Copy the installation file to the Application folder
After downloading, if the .DMG, double-click to mount, then drag the installation file to the Application folder. If it is InstallAssistant.pkg file, double-click to install.
Step 3: Plug in the USB flash drive or other volume that you’re using for the bootable installer.
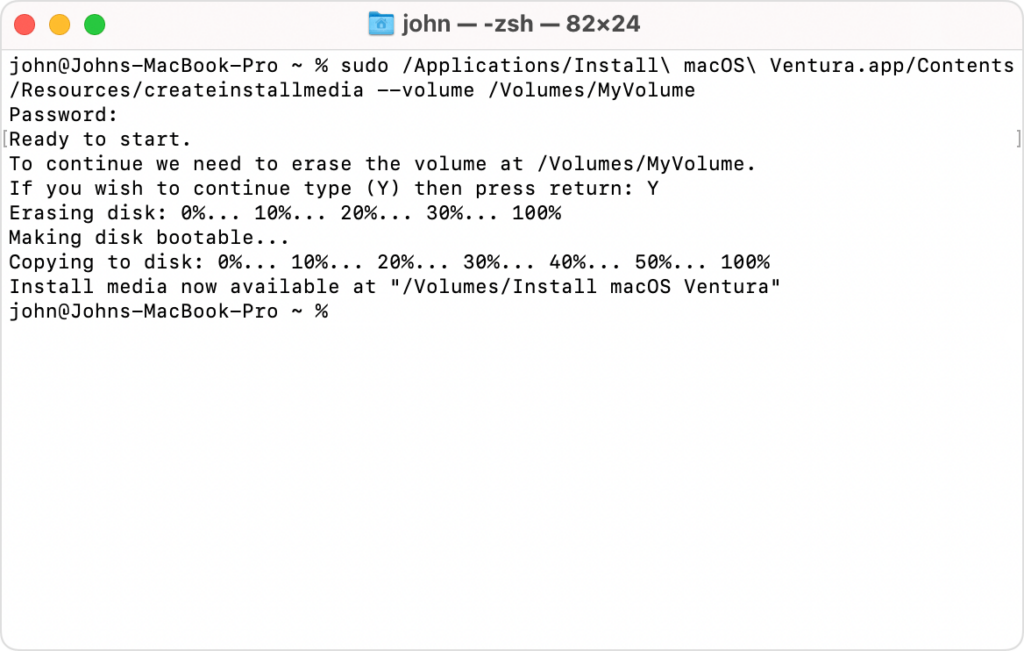
Step 4: Open Terminal, which is in the Utilities folder of your Applications folder.
Step 5: Type or paste one of the commands below into Terminal, then press Return to enter the command. Each command assumes that the installer is in your Applications folder, and Untitled is the name of the USB flash drive or other volume you’re using. If the volume has a different name, replace Untitled in the command with the name of your volume.
sudo /Applications/Install\ macOS\ Monterey.app/Contents/Resources/createinstallmedia --volume /Volumes/UntitledStep 6: When prompted, type your administrator password. Terminal doesn’t show any characters as you type. Then press Return.
Step 7:When prompted, type Y to confirm that you want to erase the volume, then press Return. Terminal shows the progress as the volume is erased.
Step 8: After the volume is erased, you may see an alert that Terminal would like to access files on a removable volume. Click OK to allow the copy to proceed.
Step 7:When Terminal says that it’s done, the volume will have the same name as the installer you downloaded, such as Install macOS Ventura. You can now quit Terminal and eject the volume.