Download macOS Sequoia DMG file for clean installation (macOS 15)
macOS Sequoia (version 15) is the twenty-first and current major release of Apple’s macOS operating system, the successor to macOS Sonoma. It was announced at WWDC 2024 on June 10, 2024. In line with Apple’s practice of naming macOS releases after landmarks in California, it is named after Sequoia National Park, located in the Sierra Nevada mountain range.
The first developer beta was released on June 10, 2024. The first public beta was released on July 15, 2024, and the second was released on July 23, 2024. It was released on September 16, 2024.
Features
macOS Sequoia introduced several new features and improvements, mainly focused on productivity:
- iPhone Mirroring, a feature to mirror and interact with content from an iPhone as a macOS window, has been introduced. This function is not available in Europe, except for the UK, due to the lack of conformity to the Digital Markets Act (DMA).
- The Calculator app has been redesigned to be more similar to that of iOS and iPadOS, including rounded buttons, departing from the design that has been used since OS X Yosemite.
- Notes has been updated with the Math Notes feature, which can be used to calculate simple equations, evaluate expressions, and assign variables within the app.
- Passwords, a cross-platform password manager application, was introduced.
- In System Settings, individual menus have been rearranged and slightly redesigned for quick access to frequently used menus.
- Safari has been revamped, including revamped reader mode (now called Reader), faster page load times, a new start page, and a brand new unified menu; these had previously been exclusive to compact mode on iOS/iPadOS.
- macOS Sequoia will release with the second iteration of Game Porting Toolkit, a Windows API compatibility layer derived from Wine and Crossover, allowing developers to more easily port Windows games to macOS.
- Apple Intelligence will be available on all Apple silicon Macs and will include artificial intelligence features such as a revamped and redesigned Siri, Writing Tools with which selected text can be proofread or have its tone changed, Smart Reply in Mail to quickly draft email responses, and a system-wide integration with ChatGPT. Apple Intelligence will be available on MacOS in Europe
- Window tiling is now automatically suggested by macOS when dragging a window to the edges of the display, similar to Microsoft Windows’ Window snapping feature.
- The Tips app has a new UI and includes many new tips for individual apps such as Freeform, Pages, Keynote, Notes, and Apple TV, it can also now be added to the dock.
- A feature to enable users to edit the iPhone home screen through iPhone Mirroring is available in the latest betas of macOS Sequoia 15 and macOS Sequoia 15.1. This function is not available in Europe, except for the UK, due to the lack of conformity to the Digital Markets Act (DMA).
Supported hardware
macOS Sequoia supports all Macs with Apple silicon and those with Intel’s Xeon W and 8th-generation Coffee Lake chips or later. A Mac with an M1 chip or later is required to use Apple Intelligence. macOS Sequoia supports every Mac that supports macOS Sonoma with the exception of the 2018–2019 MacBook Air models with Amber Lake chips. Similar to Sonoma, the 2019 iMac is the only supported Intel Mac that lacks a T2 security chip. macOS Sequoia is the first version of macOS to drop support for a Mac with a T2 security chip.

macOS Sequoia is compatible with these devices
- iMac (2019 and later)
- Mac Studio (2022 and later)
- Mac mini (2018 and later)
- Mac Pro (2019 and later)
- iMac Pro (2017 and later)
- MacBook Air (2020 and later)
- MacBook Pro (2018 and later)
DOWNLOAD MORE: Download macOS Sonoma DMG file for clean installation (macOS 14)
Download
Google Drive:
Apple server:
Create a bootable installer for macOS
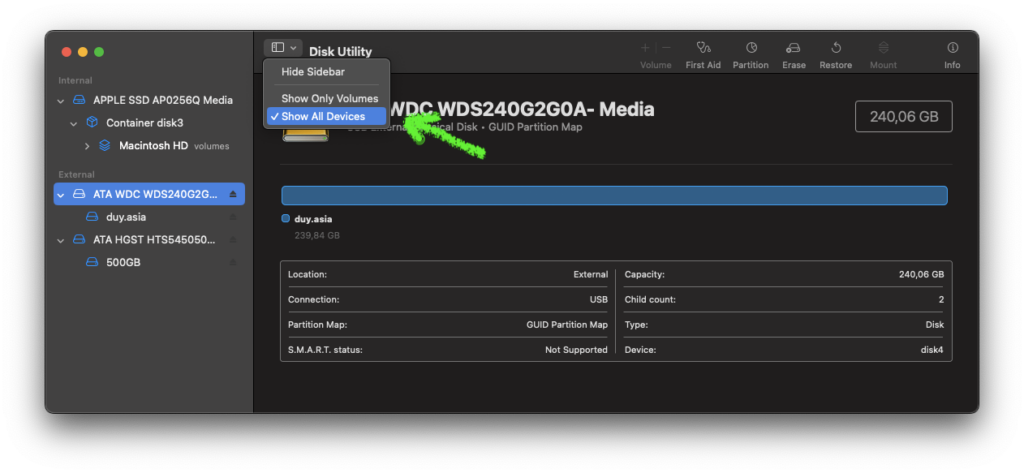
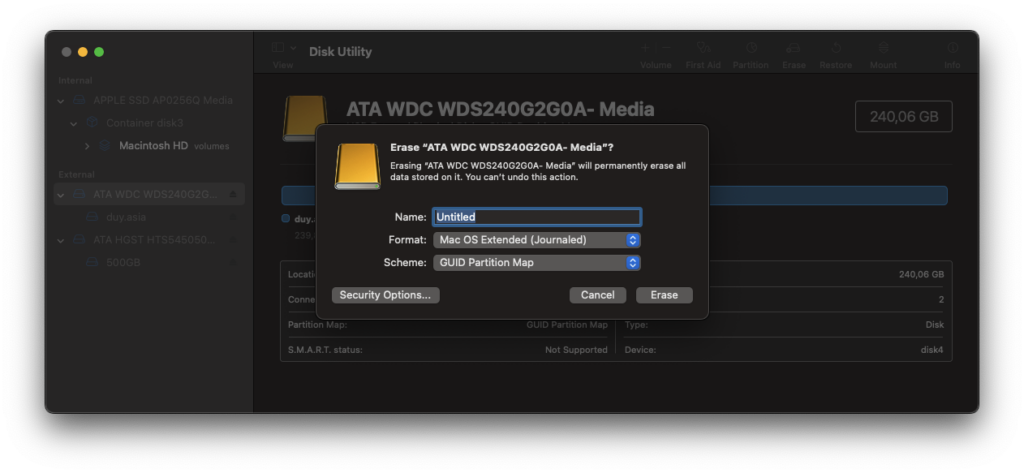
Step 1: Format the USB
Go to Disk Utility (Click on Launchpad > Other > Disk Utility). Then Format the USB with the following information:
- Name: Untitled (This name is optional, subject to change)
- Format: MacOS Extended (Journaled)
- Scheme: GUID Partion Map
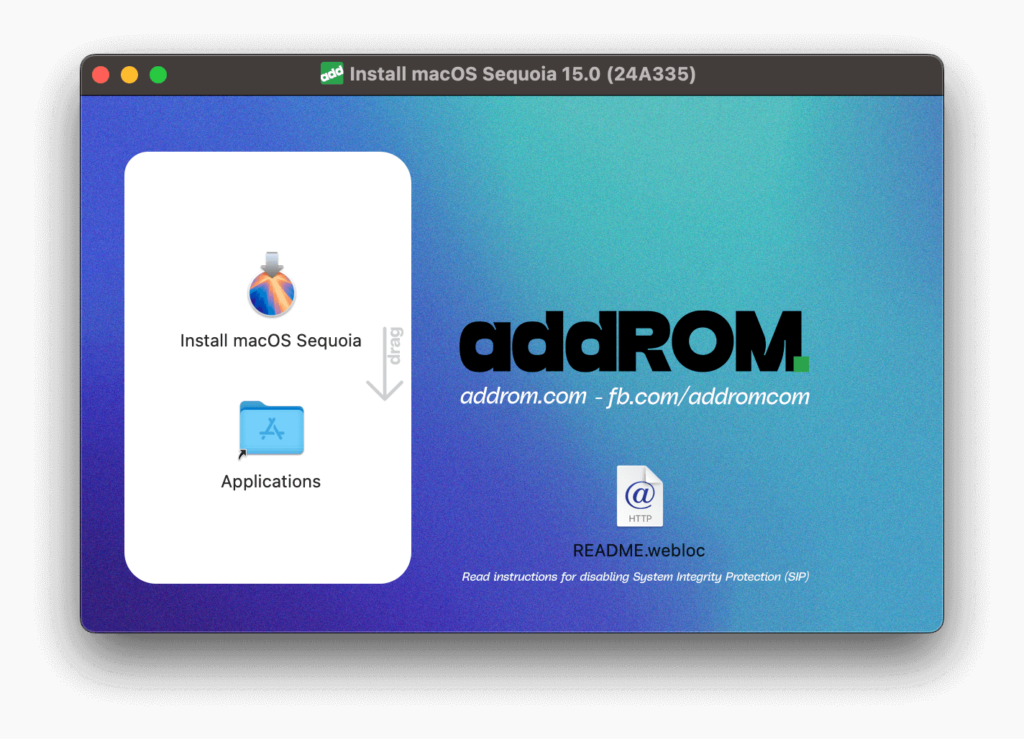
Step 2: Copy the installation file to the Application folder
After downloading, if the .DMG, double-click to mount, then drag the installation file to the Application folder. If it is InstallAssistant.pkg file, double-click to install.

Step 3: Plug in the USB flash drive or other volume that you’re using for the bootable installer.
Step 4: Open Terminal, which is in the Utilities folder of your Applications folder.
Step 5: Type or paste one of the commands below into Terminal, then press Return to enter the command. Each command assumes that the installer is in your Applications folder, and Untitled is the name of the USB flash drive or other volume you’re using. If the volume has a different name, replace Untitled in the command with the name of your volume.
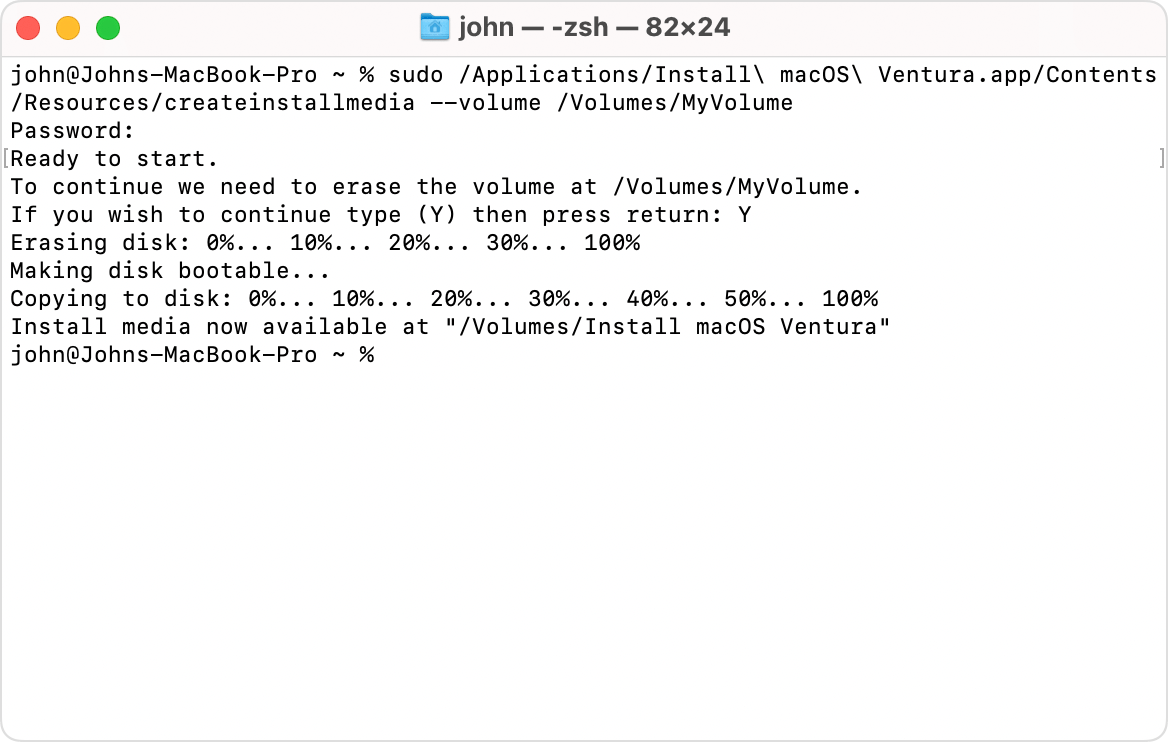
sudo /Applications/Install\ macOS\ Sequoia.app/Contents/Resources/createinstallmedia --volume /Volumes/UntitledStep 6: When prompted, type your administrator password. Terminal doesn’t show any characters as you type. Then press Return.
Step 7: When prompted, type Y to confirm that you want to erase the volume, then press Return. Terminal shows the progress as the volume is erased.
Step 8: After the volume is erased, you may see an alert that Terminal would like to access files on a removable volume. Click OK to allow the copy to proceed.
Step 9: When Terminal says that it’s done, the volume will have the same name as the installer you downloaded, such as Install macOS Sequoia. You can now quit Terminal and eject the volume.