How to build your own RAID for macOS on a budget
Today, RAID is fast and can speed up drive access on your Mac. Here’s how to get started building your own, inexpensively.
A Redundant Array of Inexpensive Disks (RAID) is a way to speed up your computer by using special hardware to make multiple drives look like a single drive to your Mac.
This usually involves multiple drives inside a special enclosure with a controller board that knows how to do disk input/output (I/O) to all the drive mechanisms. But at the same time, it aggregates the data and presents it to the computer as one single storage device.
RAID has been around for decades, long before SSDs. It was originally developed as a way to speed up relatively slow mechanical spinning platter disk drives in the early 1980’s.
The original RAID systems were expensive and usually required some kind of expansion card. Today, while the expansion cards still exist, there are USB and Thunderbolt RAID enclosures which make the process easier and cheaper.
While there are many different levels of RAID incorporating mirroring, bit-level and block-level striping, and full disk striping, we’re only going to discuss two in this piece because Apple’s Disk Utility is limited.
Starting off, full disk striping is known as RAID 0.
When you stripe several drives together, they behave like one single large disk (called a span), and the computer thinks they are a single disk.
The big performance benefits of RAID are a result of the drive’s controller being able to do I/O on multiple drives at once, but from a single stream of data usually from one connection to a computer.
Your computer sees the drive as one drive, and it makes I/O requests to the drive in the same way as it would a single drive. But inside the drive enclosure, the drive’s RAID controller is marshaling data in and out across multiple mechanisms in concert.
The result is faster throughput.
The only downside to striped RAID is if one of the mechanisms in the span fails, you lose the entire drive and all the data on it. Mirroring (RAID 1) solves this problem, but it’s not as fast as striping.
You’ll need a good backup strategy to mitigate the risk of drive loss.
Software-only RAID
There are also software-only RAID solutions, but they tend to be slower since data coordination usually happens in a RAID software driver instead of on a drive’s hardware controller board.
You can use macOS’s Disk Utility to create some RAID configurations, but not all. There are also third-party software RAID products such as SoftRAID ($49, 15-day free trial).
Disk Utility allows you to create RAID 0 (striped), RAID 1 (mirrored), and what Apple calls “Concatenated JBOD” disks. Disk Utility also includes a RAID Assistant. See this page for more info on using Disk Utility to set up software-controlled RAID disks in macOS.

Drives and enclosures
Today, there are a wide variety of off-the-shelf RAID drives, most of which usually contain multiple mechanisms. There are two, four, five, and eight-drive models available, some of which aren’t extremely expensive, but can still cost a bit.
Companies such as Other World Computing, ORICO, and others sell pre-assembled drives which you can plug into your Mac and start using RAID.
Drives such as OWC’s Thunderblade can transfer data at speeds up to 2,800 megabytes per second over Thunderbolt, if populated with fast enough drives.
We’ve also reviewed the OWC Gemini Thunderbolt 3 drive previously.
A word of note, though. If you find an older RAID enclosure and have a newer operating system than the system intended, be wary of the software that the RAID needs to run properly. Many vendors have chosen to not update older software specific to some enclosures for the new driver requirements that Apple imposed a few OS revisions ago.
In short, make sure that the enclosure and all it promises is compatible with your operating system and hardware before you buy. It’s not enough to just make sure it connects to your host system.
Compounding all of this, Intel macOS natively supports some RAID levels that Apple Silicon macOS does not. This is beyond the scope of this article, but in short, be wary of older enclosures.
Ready-made external SSD RAID docks
A few companies make ready-to-go external SSD docks with multiple slots for SSD drives. You plug these docks into your Mac, and simply insert as many SSDs as you want.
You can format the drives individually, or make a RAID set out of them.
One such dock is the BlackMagic MultiDock 10G ($615 USD at B&H and Amazon), from BlackMagic Design in Australia:
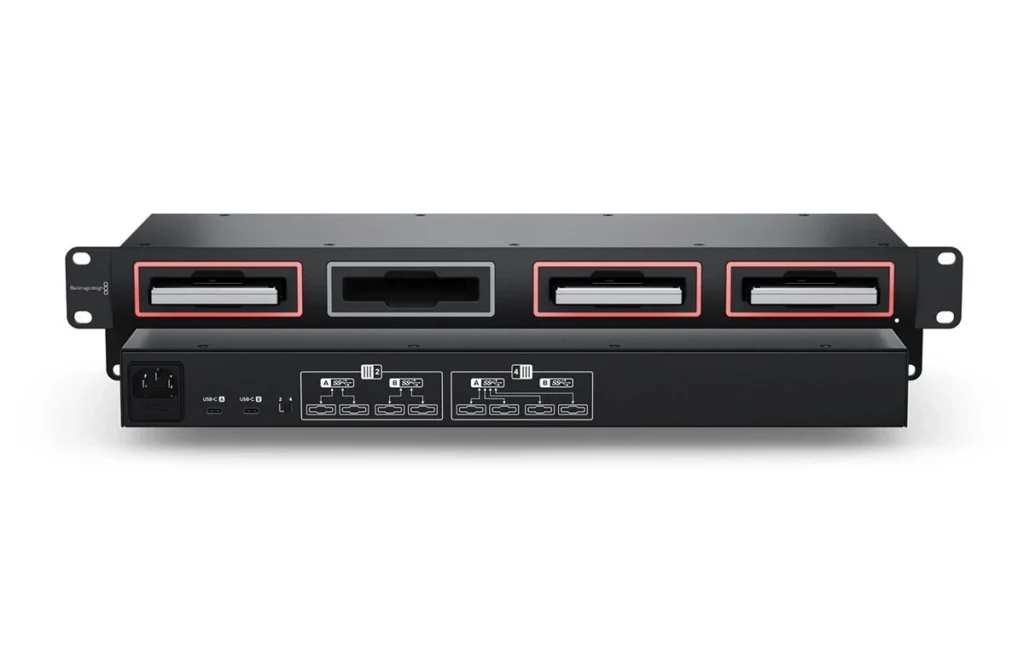
While the MultiDock 10G is USB-C instead of Thunderbolt, it’s still plenty fast – especially in RAID configuration.
Blackjet makes a 2-bay SSD dock ($120) which is similar to MultiDock 10G and which allows quick and easy drive insertion on the device’s front panel.
Both of these docks support RAID 0, RAID 1, or plain JBOD (Just a Bunch Of Drives) configuration. In a JBOD config, each drive mechanism is treated as a separate drive.
Both docks have hardware RAID controllers built-in to make configuration a breeze.
But there’s an even cheaper way to get a RAID drive without too much effort or expense and gain huge performance improvements: get an empty RAID enclosure, buy your own drives, and build it yourself.
Hard drive RAID versus SSD performance
In terms of performance, SSD drives are obviously faster than mechanical drives, but a RAID SSD is even faster still. A low-end USB SSD RAID can be quite fast and even serve as a RAID boot drive.
But hands down, a Thunderbolt RAID SSD drive is the fastest external drive possible on a Mac.
In a DIY Thunderbolt RAID SSD setup, you purchase an empty drive bay enclosure that has Thunderbolt connectors on the back, then acquire a set of fast SSD drives, install them, plug the box into your Mac’s Thunderbolt port, and format the drive using Apple’s Disk Utility.
In general, the more SSD mechanisms an enclosure has, the faster the drive’s overall performance will be.
You’re still limited by the speed of Thunderbolt externally, though. In practice, you won’t exceed that previously mentioned 2.8 gigabytes per second, because of PCI-E channel allocation limits in Thunderbolt to any one peripheral.
A new breed of consumer RAID: M.2 NVMe drive enclosures
With the advent of tiny M.2 NVMe SSD drives, storage performance has increased yet again. Many of these drives are designed to snap directly into an M.2 socket on a PC motherboard.
But some enterprising storage companies have come up with tiny desktop M.2 NVMe drive enclosures ($60) barely larger than an external laptop drive.
These enclosures are small, fit in a pocket, are totally silent, accept two M2 NVMe drives, and usually have a switch on them to set the RAID mode or JBOD. Connection is usually over USB-C, and a 5V/9V DC wall power adapter.
For most users, these drives provide the best of both worlds: RAID SSD speed but in a small, portable, unobtrusive form factor.
While these enclosures won’t provide the extreme performance of large drive RAID arrays, or Thunderbolt, they’re still incredibly fast compared to single-drive mechanisms.
To build one of these pocket RAID drives, you simply buy the enclosure, two M.2 SATA “blade”-style drives, insert both drives in the enclosure, and secure the unit’s cover.
Once powered and plugged into your Mac via USB-C, you then format the drive using Disk Utility as you normally would. Fast, easy, and cheap storage.
With 1TB M.2 SSD drives priced less than $100 each as a rule, and with the $60 RAID enclosure or similar, you can build yourself a fast external 2TB SSD RAID for just over $200.
That’s a great value.
With drive prices so low and a new class of fast, small, cheap external RAID enclosures, there’s no reason to wait to speed up your Mac using RAID.