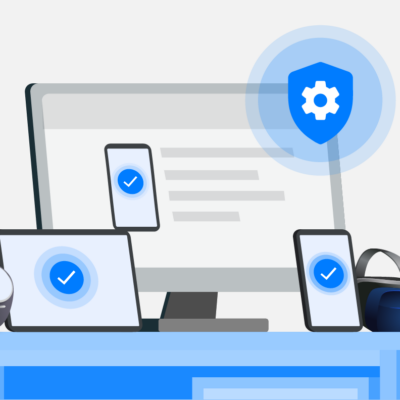
In today’s digital world, security and privacy should be top priorities. Every time you browse the internet, your Android device performs Domain Name System (DNS) queries to convert website names (like Google.com) into IP addresses. But did you know that most DNS requests are sent in plain text, making them vulnerable to interception by hackers, network administrators, or even your ISP?
That’s where Private DNS Mode comes in. When enabled, it encrypts your DNS queries, keeping them hidden from prying eyes and protecting your sensitive data. Whether you’re accessing financial accounts, confidential work tools, or simply browsing the web on a public Wi-Fi network, Private DNS Mode is a must-have security feature.
Here’s why you need to enable Private DNS Mode on Android and how to set it up in just a few simple steps.

Why Standard DNS Puts Your Privacy at Risk
By default, your internet traffic relies on an unencrypted DNS, which means your browsing activity can be tracked, logged, or even manipulated. Here’s why that’s a problem:
- Hackers Can Intercept Your Traffic: If you’re on a public Wi-Fi network (like in a coffee shop, airport, or hotel), bad actors can monitor your browsing activity and even redirect you to malicious websites without your knowledge.
- Your ISP Can Track and Sell Your Data: Most internet service providers (ISPs) log your browsing history and may even sell it to advertisers. This means your searches, website visits, and online habits are all recorded.
- Websites Can Be Manipulated: Unsecured DNS makes it easier for cybercriminals to launch phishing attacks, where they redirect you to fake websites that steal your login credentials.
- Companies Can Restrict Access: Some workplaces, schools, and governments censor or block websites by intercepting DNS requests. Using Private DNS bypasses these restrictions and ensures an open internet.
The solution? Enable Private DNS Mode on your Android device.
How to Turn On Private DNS Mode on Android
What You Need
- An Android device running Android 9 or later (most modern phones are supported).
- A trusted Private DNS provider hostname (such as Cloudflare, Google, or Quad9).
Step-by-Step Guide to Enable Private DNS on Android
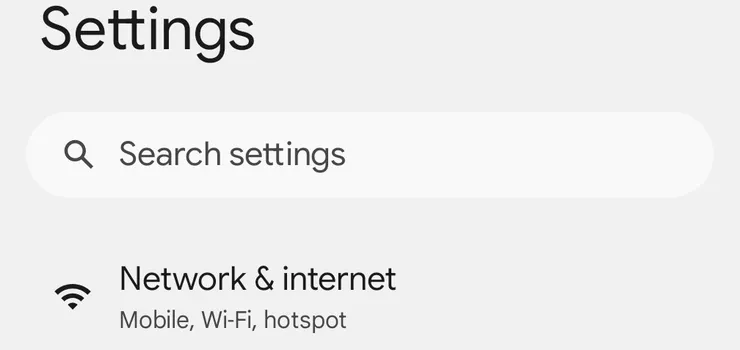
- Open Your Android Settings
- Swipe down on your Android home screen and tap the Settings app.
- Scroll down and select Network & Internet (or Connections on Samsung devices).
- Locate the Private DNS Option
- Tap Advanced (if using stock Android) or More Connection Settings (on Samsung).
- Look for Private DNS.
- If you don’t see it, use the Search bar in Settings and type “Private DNS.”
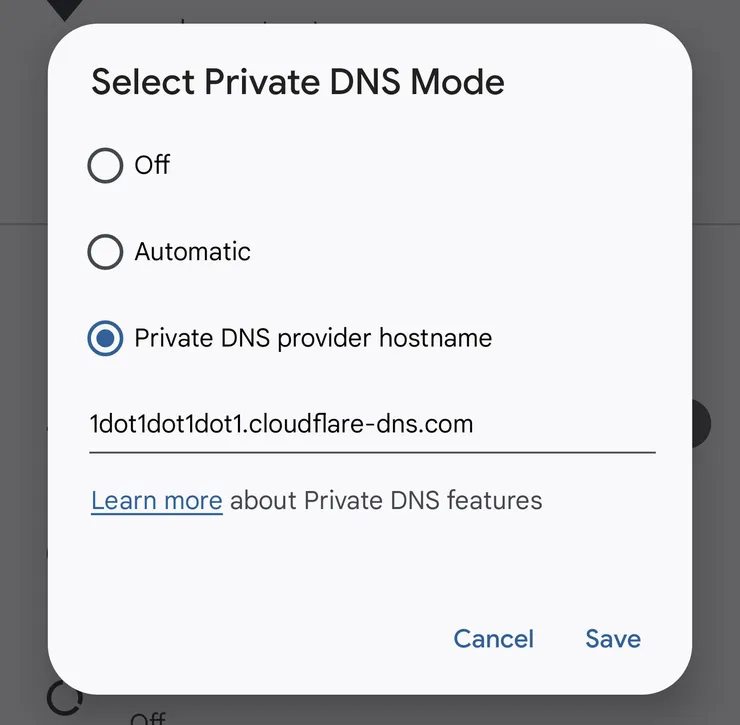
- Choose a Private DNS Provider
- Tap Private DNS and select “Private DNS provider hostname”.
- Enter the hostname of a trusted Private DNS provider.

Recommended Private DNS Providers:
| Provider | Private DNS Hostname |
|---|---|
| Cloudflare | 1dot1dot1dot1.cloudflare-dns.com |
| Google Public DNS | dns.google |
| Quad9 Secure DNS | dns.quad9.net |
| CleanBrowsing (Family Filter) | family-filter-dns.cleanbrowsing.org |
| NextDNS | 45.90.28.0 |
| OpenDNS | 208.67.222.222 |
| Comodo Secure DNS | 8.26.56.26 |
Recommended: Use Cloudflare (1dot1dot1dot1.cloudflare-dns.com) for fast, secure, and privacy-focused DNS encryption.
- Save Your Settings
- Tap Save to apply the new settings.
How to Verify Private DNS is Working
To confirm that your Private DNS is active, follow these steps:
- Open your web browser and go to Cloudflare’s DNS Test Page.
- Look for the status “Using DNS over TLS (DoT)”.
- If it says Yes, your Private DNS is working.
Why You Should Use Private DNS Over VPNs
Some people think a VPN (Virtual Private Network) is enough, but Private DNS Mode offers several unique advantages:
| Feature | VPN | Private DNS Mode |
|---|---|---|
| Encrypts DNS requests | ✅ Yes | ✅ Yes |
| Encrypts all internet traffic | ✅ Yes | ❌ No |
| Works without extra apps | ❌ No | ✅ Yes |
| Prevents ISP tracking | ✅ Yes | ✅ Yes |
| Improves browsing speed | ❌ No | ✅ Yes |
| Works on all networks | ❌ No (VPNs may be blocked) | ✅ Yes |
For basic security and privacy, Private DNS Mode is a lightweight solution that improves browsing speed and encryption without slowing down your device.
Final Thoughts: Enable Private DNS for Safer Browsing
With cyber threats and data tracking on the rise, enabling Private DNS Mode on Android is a simple but powerful step to keep your browsing secure, private, and unrestricted.
Key Takeaways:
- Encrypt your DNS traffic to prevent spying and tracking.
- Bypass network restrictions and censorship.
- Prevent phishing attacks and DNS hijacking.
- Improve internet speed with a fast, secure DNS provider.
So, if you care about online privacy, don’t wait—enable Private DNS Mode today and enjoy safer, more secure browsing.
Do you use Private DNS? Which provider do you prefer? Let us know in the comments!