A step-by-step guide to building a self-hosted, always-on AI assistant with Telegram integration – no subscription fees, no data leaks, full control.
Why self-host an AI gateway in 2026?
Every major AI service – ChatGPT, Claude, Gemini – requires you to send your data to someone else’s servers. For individuals and teams who handle sensitive code, proprietary documents, or client information, that is a dealbreaker.
Self-hosting solves three problems at once:
Cost. No monthly subscription. Google Cloud’s free tier and low-cost VMs mean you can run a production-grade AI gateway for under five dollars a month – or nothing at all during your trial period.
Privacy. Your prompts, your documents, your API keys – everything stays on infrastructure you control. No third party ever sees your data.
Flexibility. You choose which models to run. You decide how many agents to deploy. You control who gets access and through which channels. Want a Telegram bot that responds in Vietnamese and another that generates images? You can build that in a single configuration file.
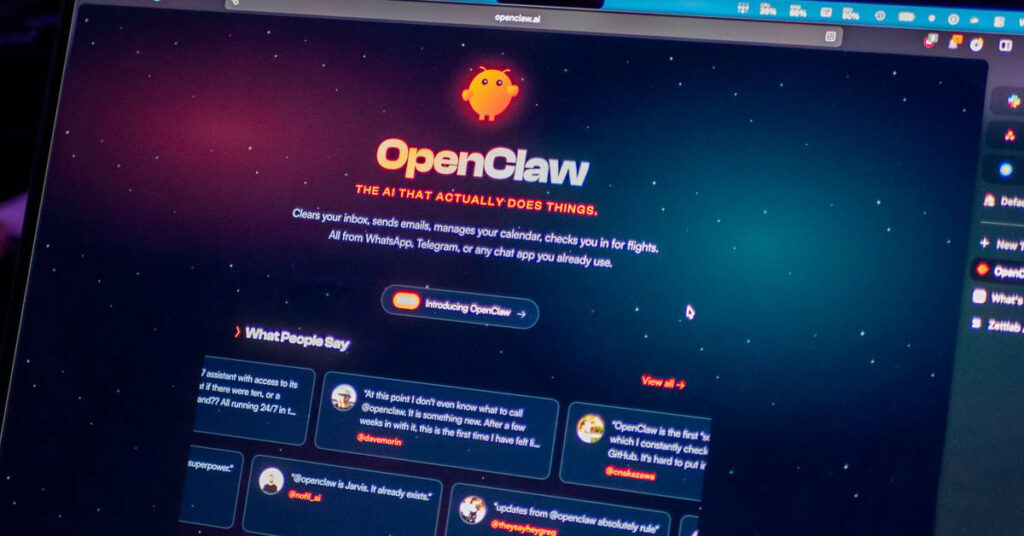
OpenClaw is the open-source platform that makes all of this practical. It acts as an AI gateway: a central hub that connects to multiple language models, exposes them through a clean web interface and Telegram bots, and runs autonomously on any Linux server.
This guide walks you through the entire deployment process on Google Cloud Platform, from creating a virtual machine to configuring multi-agent Telegram bots secured behind Cloudflare.
What you will need before starting
- A Google Cloud account with billing enabled (free trial credits work fine)
- A domain name (for Cloudflare Tunnel configuration)
- A Cloudflare account with Zero Trust access
- Basic familiarity with terminal commands
Step 1: Create a virtual machine on Google Cloud
Set up your project and enable the required APIs
Open Google Cloud Shell or your local terminal with the gcloud CLI installed:
gcloud projects create <PROJECT_ID> --name="OpenClaw Gateway"
gcloud config set project <PROJECT_ID>
gcloud billing projects link <PROJECT_ID> --billing-account=<BILLING_ID>
gcloud services enable compute.googleapis.com aiplatform.googleapis.com
Launch the VM instance
The recommended configuration uses an e2-medium instance (2 vCPUs, 4 GB RAM) with a 30 GB SSD running Debian 12:
gcloud compute instances create openclaw-gateway \
    --zone=<ZONE> \
    --machine-type=e2-medium \
    --boot-disk-size=30GB \
    --image-family=debian-12 \
    --image-project=debian-cloud \
    --scopes=cloud-platform
The --scopes=cloud-platform flag is mandatory. Without it, OpenClaw cannot access Vertex AI services and you will encounter ACCESS_TOKEN_SCOPE_INSUFFICIENT errors later.
Connect to your VM
gcloud compute ssh openclaw-gateway --zone=<ZONE>Step 2: Install Docker
Once connected to the VM, install Docker and add your user to the docker group:
sudo apt-get update
sudo apt-get install -y git curl ca-certificates
curl -fsSL https://get.docker.com | sudo sh
sudo usermod -aG docker $USER
You must log out and log back in for the group change to take effect:
exit
gcloud compute ssh openclaw-gateway --zone=<ZONE>
docker --version
Step 3: Deploy OpenClaw
Clone the repository and initialize
git clone https://github.com/openclaw/openclaw.git ~/openclaw
cd ~/openclaw
mkdir -p ~/.openclaw ~/.openclaw/workspace
Run the automated setup
chmod +x docker-setup.sh
./docker-setup.sh --non-interactive
Verify the deployment
docker compose ps
curl -s http://localhost:18789 | head -5
If both commands return successful output, OpenClaw is running on your server.
Step 4: Set up CLIProxyAPI as a model router
CLIProxyAPI acts as an intermediary layer between OpenClaw and the language models you want to use (Claude, Gemini, Llama, and others). It provides a unified API endpoint:
git clone https://github.com/router-for-me/CLIProxyAPI.git ~/CLIProxyAPI
cd ~/CLIProxyAPI
mkdir -p auths logs
nano config.yaml
sudo docker compose up -d
Edit config.yaml according to the CLIProxyAPI documentation before starting the container.
Step 5: Secure access with Cloudflare Tunnel
Exposing ports directly to the internet is a security risk. Cloudflare Tunnel creates an encrypted connection between your VM and the Cloudflare network without opening any inbound ports.
Create a tunnel in the Cloudflare dashboard
- Log in to Cloudflare Zero Trust.
- Navigate to Networks, then Tunnels, and click Create a tunnel.
- Name your tunnel (for example,
openclaw-gateway). - Copy the tunnel token.
Run the Cloudflared container
sudo docker run -d \
    --name cloudflared \
    --restart unless-stopped \
    --network openclaw_default \
    cloudflare/cloudflared:latest \
    tunnel --no-autoupdate run --token <TUNNEL_TOKEN>
The --network openclaw_default flag allows Cloudflared to connect directly to the OpenClaw container without routing through the host network.
Configure the public hostname
In the Cloudflare dashboard, add a public hostname for your tunnel:
| Field | Value |
|---|---|
| Subdomain | openclaw (or any name you prefer) |
| Domain | Your domain |
| Type | HTTP |
| URL | openclaw-gateway:18789 |
Use the container name as the URL when both containers share the same Docker network. Use localhost:18789 if Cloudflared runs outside the Docker network.
Configure trusted proxies in OpenClaw
This step is critical. Without it, OpenClaw will reject requests forwarded by Cloudflare and return 403 Forbidden errors.
Edit ~/.openclaw/openclaw.json:
{
  "gateway": {
    "mode": "local",
    "trustedProxies": [
      "172.18.0.1",
      "172.16.0.0/12",
      "10.0.0.0/8",
      "192.168.0.0/16",
      "127.0.0.1"
    ]
  }
}
Step 6: Add Google SSO authentication (optional but recommended)
Cloudflare Access adds a login layer in front of your OpenClaw instance. Only approved email addresses can reach the web interface.
Create OAuth credentials on Google Cloud
- Go to Google Cloud Console > Credentials.
- Create an OAuth client ID of type Web application.
- Add the authorized redirect URI:
https://<TEAM_NAME>.cloudflareaccess.com/cdn-cgi/access/callback- Save the Client ID and Client Secret.
Connect Google login to Cloudflare
In Cloudflare Zero Trust, navigate to Settings, then Authentication. Add Google as a login method and paste your credentials.
Create an Access application
- Go to Access, then Applications, and add a self-hosted application.
- Set the application domain to
openclaw.<your-domain>. - Create a policy that allows specific email addresses.
After this setup, every request to your OpenClaw web interface will require Google authentication first.
Step 7: Configure OpenClaw models and agents
The main configuration file
The file ~/.openclaw/openclaw.json defines your entire system — models, providers, agents, and communication channels:
{
  "gateway": {
    "mode": "local",
    "trustedProxies": ["172.18.0.1", "10.0.0.0/8", "127.0.0.1"]
  },
  "models": {
    "providers": {
      "proxypal": {
        "baseUrl": "http://host.docker.internal:8317/v1",
        "apiKey": "<YOUR_PROXY_KEY>",
        "api": "openai-completions",
        "models": [
          {"id": "claude-sonnet-4-5", "name": "Claude Sonnet 4.5"},
          {"id": "gemini-3-pro-preview", "name": "Gemini 3 Pro"}
        ]
      }
    }
  },
  "agents": {
    "defaults": {
      "model": {
        "primary": "proxypal/claude-sonnet-4-5",
        "fallbacks": ["proxypal/gemini-3-pro-preview"]
      }
    }
  }
}
Environment variables
The file ~/openclaw/.env stores sensitive values:
OPENCLAW_GATEWAY_TOKEN=<auto-generated>
GOOGLE_CLOUD_PROJECT=<PROJECT_ID>
GOOGLE_CLOUD_LOCATION=us-central1
ANTHROPIC_API_KEY=<PROXY_KEY>
ANTHROPIC_BASE_URL=http://host.docker.internal:8317/v1
Never commit this file to a public repository. Add .env to your .gitignore immediately.
Step 8: Enable Vertex AI and browser automation
Grant IAM permissions to the VM service account
PROJECT_ID=$(gcloud config get-value project)
SA=$(gcloud compute instances describe openclaw-gateway --zone=<ZONE> \
  --format="get(serviceAccounts[0].email)")

gcloud projects add-iam-policy-binding $PROJECT_ID \
  --member="serviceAccount:$SA" \
  --role="roles/aiplatform.user"
Install Python packages inside the container
sudo docker exec openclaw-openclaw-gateway-1 bash -c "
  apt-get update && apt-get install -y python3-pip chromium
  pip3 install google-cloud-aiplatform cognee playwright --break-system-packages
  /home/node/.local/bin/playwright install chromium
"
Run verification tests
sudo docker exec openclaw-openclaw-gateway-1 python3 -c "
import vertexai
vertexai.init(location='us-central1')
print('Vertex AI ready')
"

sudo docker exec openclaw-openclaw-gateway-1 python3 -c "
from playwright.sync_api import sync_playwright
with sync_playwright() as p:
    browser = p.chromium.launch(headless=True)
    print('Playwright ready')
    browser.close()
"
Step 9: Deploy multiple AI agents with Telegram
This is where OpenClaw truly differentiates itself. You can run multiple independent AI agents, each connected to its own Telegram bot, each using a different language model, all managed from a single server.
Create Telegram bots
Chat with @BotFather on Telegram. Create a separate bot for each agent and save the tokens.
Configure multi-agent support
Update ~/.openclaw/openclaw.json:
{
  "agents": {
    "defaults": {
      "model": {
        "primary": "proxypal/claude-sonnet-4-5"
      },
      "maxConcurrent": 4
    },
    "list": [
      {
        "id": "main",
        "name": "Javis",
        "default": true,
        "model": "proxypal/claude-opus-4-5-thinking"
      },
      {
        "id": "lena",
        "name": "Lena",
        "model": "proxypal/gemini-3-pro-high"
      },
      {
        "id": "marcus",
        "name": "Marcus",
        "model": "proxypal/gemini-3-pro-high"
      }
    ]
  },
  "bindings": [
    {"agentId": "main", "match": {"channel": "telegram", "accountId": "javis"}},
    {"agentId": "lena", "match": {"channel": "telegram", "accountId": "lena"}},
    {"agentId": "marcus", "match": {"channel": "telegram", "accountId": "marcus"}}
  ],
  "tools": {
    "agentToAgent": {
      "enabled": true,
      "allow": ["main", "lena", "marcus"]
    }
  },
  "channels": {
    "telegram": {
      "enabled": true,
      "accounts": {
        "javis": {"botToken": "<JAVIS_BOT_TOKEN>"},
        "lena": {"botToken": "<LENA_BOT_TOKEN>"},
        "marcus": {"botToken": "<MARCUS_BOT_TOKEN>"}
      },
      "groupPolicy": "open",
      "streamMode": "partial"
    }
  }
}
Approve Telegram users
When someone messages your bot for the first time, they enter a pending approval queue:
sudo docker compose exec openclaw-gateway openclaw pairing list telegram --pending
sudo docker compose exec openclaw-gateway openclaw pairing approve telegram <USER_ID>
Verify the bots are running
sudo docker logs openclaw-openclaw-gateway-1 --since 1m 2>&1 | grep -E "telegram|agent"You should see log lines confirming each Telegram bot has started successfully.
Step 10: Access the web dashboard
Retrieve your gateway token:
cat ~/openclaw/.env | grep TOKENOpen your browser and navigate to https://openclaw.<your-domain>/. Paste the token in the settings panel to authenticate. Alternatively, append the token directly to the URL:
https://openclaw.<your-domain>/?token=<TOKEN>Common mistakes and how to fix them
| Problem | Cause | Solution |
|---|---|---|
ACCESS_TOKEN_SCOPE_INSUFFICIENT | VM missing cloud-platform scope | Recreate the VM with --scopes=cloud-platform |
token_mismatch | Stale device pairing | Delete paired.json and pending.json, restart the container, clear browser storage |
Proxy headers from untrusted | Missing trusted proxy IP | Add the correct IP ranges to trustedProxies in the config |
Unknown model: anthropic/... | Wrong model prefix | Use proxypal/<model> when routing through CLIProxyAPI |
| 403 Forbidden from Cloudflare | Access policy misconfigured | Verify the allowed email addresses in your Cloudflare Access policy |
| Telegram bot not responding | Container down or channel not enabled | Run docker compose ps and check that "enabled": true is set in the Telegram channel config |
| Redirect loop | Trusted proxies not configured | Add the Cloudflare proxy IP to trustedProxies |
Full reset procedure
If you need to start fresh with device authentication:
sudo docker exec openclaw-openclaw-gateway-1 bash -c "
  echo {} > /home/node/.openclaw/devices/paired.json
  echo {} > /home/node/.openclaw/devices/pending.json
"
sudo docker compose restart openclaw-gateway
Clear your browser’s localStorage as well.
Quick reference commands
# SSH into the VM
gcloud compute ssh openclaw-gateway --zone=<ZONE>

# View recent logs
sudo docker logs openclaw-openclaw-gateway-1 --since 5m

# Restart OpenClaw
cd ~/openclaw && sudo docker compose restart openclaw-gateway

# Full rebuild
sudo docker compose down && sudo docker compose up -d

# Check Cloudflare Tunnel logs
sudo docker logs cloudflared --since 5m
Frequently asked questions
How much does this cost to run?
Google Cloud’s e2-medium instance costs approximately $25 per month at on-demand pricing. With committed use discounts or spot pricing, that drops significantly. If you are within your free trial period, the cost is zero.
Can I use local models instead of cloud APIs?
Yes. OpenClaw supports any model accessible through an OpenAI-compatible API. You can run Ollama, vLLM, or any other local inference server and point CLIProxyAPI to it.
Is this production-ready?
For personal use and small teams, absolutely. For enterprise deployments, you should add monitoring, automated backups, and consider running on a managed Kubernetes cluster.
Can I run multiple agents on the same server?
Yes. The multi-agent configuration in Step 9 demonstrates exactly this. Each agent can use a different model and connect to a separate Telegram bot.
What happens if the VM restarts?
Docker containers are configured with restart policies. OpenClaw and Cloudflared will automatically recover after a VM reboot.
Self-hosting an AI gateway is no longer a weekend experiment for enthusiasts. With OpenClaw on Google Cloud Platform, you get a production-grade system that rivals commercial offerings in capability while giving you something no subscription service can: complete ownership of your data and infrastructure.
The entire setup takes less than an hour. The ongoing cost is minimal. And once it is running, you have a private, always-on AI assistant accessible from any browser or Telegram chat — your own J.A.R.V.I.S., built on open-source software and running on your terms.
Reference: lktiep/OpenClawGCP