Hey there! Are you ready to start streaming your gameplay, recording high-quality tutorial videos, or conducting professional webinars without spending a single dime? If you’ve been looking for the right tool, stop searching. Meet OBS Studio—the free, open-source powerhouse that is revolutionizing how creators broadcast to the world.
Whether you are a gamer wanting to share epic moments on Twitch, an educator creating course content, or a professional hosting online events, OBS Studio delivers professional-grade tools that rival expensive proprietary software. I’ve used a lot of recording software in my career, and frankly, nothing beats the flexibility and price point (free!) of OBS.

Why OBS Studio is the industry standard
OBS Studio has become the go-to choice for millions of content creators worldwide, and it’s easy to see why. It is completely free—no hidden payments, no watermarks, and no premium features locked behind paywalls. Because the software is open-source, a massive community continuously improves it with new features and bug fixes.
It runs smoothly on Windows, macOS, and Linux, making it truly accessible to everyone. With over 67,000 stars on GitHub and a thriving community, you aren’t just downloading software; you are joining a global network of creators who share knowledge and support one another.
What can you actually do with it?
The possibilities are nearly endless. You can:
- Stream your gaming sessions to Twitch or YouTube while displaying chat overlays and alert boxes.
- Record crystal-clear tutorial videos for your online courses.
- Conduct professional webinars with multiple camera angles and screen sharing.
- Host podcast recordings with professional-quality audio mixing.
- Set up a virtual camera to pipe your OBS output directly into Zoom or Teams calls.
Think of OBS Studio as the Swiss Army knife of video content creation.
Source: https://github.com/obsproject/obs-studio
Installation Guide
System requirements: Does your computer qualify?
Before we hit that download button, let’s make sure your rig is up to the task. OBS Studio is surprisingly lightweight, but video encoding is demanding. You’ll want adequate hardware for smooth streaming and recording.
Minimum requirements (Basic use)
If you are just doing simple screen recording, you can get away with:
- Operating System: Windows 10, macOS 12.0+, or Linux
- Processor: Intel i5 2500K, AMD Ryzen 1300X, or equivalent
- RAM: 4 GB
- Graphics: Intel HD Graphics 500 or better
- Disk Space: 500 MB for installation
- Network: Broadband internet (at least 5 Mbps upload speed for streaming)
Recommended requirements (Smooth performance)
If you want to stream 1080p gaming or handle complex scenes, aim for this:
- Operating System: Windows 11, macOS 13+, or modern Linux
- Processor: Intel i7 or AMD Ryzen 5/7 series
- RAM: 8-16 GB (The more, the better for multitasking)
- Graphics: NVIDIA GeForce GTX 1650+, AMD Radeon RX 5000 series, or Apple Silicon
- Disk Space: 800 MB-1 TB (depending on recording needs)
- Network: Broadband with stable 5-10 Mbps upload for HD streaming
PRO TIP:
For the best performance when streaming or recording in high resolution, always record to a solid-state drive (SSD) rather than a traditional hard drive. HDDs can be too slow to write high-bitrate video, causing your recording to stutter or freeze.
Step-by-step installation for Windows
- Visit the official website
- Open your browser and head to https://obsproject.com/download.
- Click the big Windows download button to grab the installer.
- Run the installer
- Double-click the downloaded
.exefile (e.g.,OBS-Studio-30.x.x-Full-Installer-x64.exe). - If Windows asks for permission via User Account Control, click Yes.
- Double-click the downloaded
- Follow the installation wizard
- Select your preferred language.
- Click Next to agree to the GPL 2.0 license.
- Choose your installation directory (the default is usually fine).
- Click Install and wait a moment for the files to extract.
- Complete installation
- Once finished, click Finish.
- OBS Studio will launch automatically—go ahead and close it for now so we can start fresh later.
- First launch setup
- Open OBS Studio from your Start Menu or Desktop shortcut.
- The Auto-Configuration Wizard will pop up.
- Let it analyze your system. It will test your hardware and internet speed to recommend the best settings.
- Click Apply Settings when it’s done.
Troubleshooting Windows installation:
- Antivirus warning? Add OBS to your antivirus whitelist. It is open-source and safe.
- Permission denied? Right-click the installer and choose “Run as Administrator.”
- Won’t launch? This is usually a driver issue. Update your GPU drivers (NVIDIA/AMD/Intel) and try again.
Step-by-step installation for macOS
- Download the correct version
- Visit https://obsproject.com/download.
- Crucial Step: Choose macOS (Intel) if you have an older Intel Mac, or macOS (Apple Silicon) if you have an M1, M2, or M3 Mac.
- Click to download the
.dmgfile.
- Mount the disk image
- Double-click the downloaded
.dmgfile. - A window will appear showing the OBS Studio icon and your Applications folder.
- Double-click the downloaded
- Install OBS Studio
- Drag the OBS Studio icon into the Applications folder.
- Wait for the copy process to finish.
- Eject the disk image by clicking the eject icon in Finder.
- Launch the application
- Open your Applications folder.
- Find OBS Studio and double-click it.
- Important: Grant microphone and camera permissions when prompted. If you deny this, OBS sees nothing and hears nothing.
- Run auto-configuration
- The setup wizard starts automatically.
- Follow the prompts to configure optimal settings for your Mac.
Troubleshooting macOS installation:
- “App is damaged” error? Go to System Preferences > Security & Privacy and click Open Anyway.
- Microphone/Camera not working? Check System Preferences > Security & Privacy > Camera/Microphone and ensure the checkbox next to OBS is ticked.
- M1/M2 performance issues? Double-check that you downloaded the Apple Silicon version, not the Intel version running through Rosetta.
Step-by-step installation for Linux
Linux users, I know you love your terminal. Here is exactly how to get it running.
For Ubuntu 24.04 and newer (Easiest method)
Open your terminal and run these commands to add the official PPA:
sudo add-apt-repository ppa:obsproject/obs-studio
sudo apt update
sudo apt install obs-studio
Once installed, simply launch OBS from your applications menu.
Using Flatpak (Works on most Linux distributions)
If you prefer containerized apps or are on a distro like Fedora/Arch:
flatpak install flathub com.obsproject.Studio
flatpak run com.obsproject.Studio
Other Linux distributions
If you are on a specific distro (Arch, OpenSUSE, etc.), visit the OBS Install Instructions wiki page.
Troubleshooting Linux installation:
- Permission denied? Don’t forget
sudo. - Graphics not recognized? You must install your proprietary GPU drivers (NVIDIA/AMD) to get hardware encoding (NVENC/AMF).
- Audio not working? Ensure you have
pipewireorpulseaudioconfigured correctly.
Usage Tutorial: Getting Started with Your First Stream
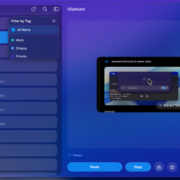
Setting up your first scene
Think of a scene as a canvas. It is where you arrange everything your viewers will see—your game, your face, your overlays.
- Open the Scenes Panel located on the bottom left side of OBS.
- Click the “+” button to create a new one.
- Name your scene something descriptive (e.g., “Gaming,” “Just Chatting,” or “Desktop View”).
- Click OK.
Your canvas is now ready, but it’s black. Let’s paint on it.
Adding your first sources
Sources are the “ingredients” of your scene.
Adding screen capture (Your desktop or window)
- In the Sources panel (next to Scenes), click the “+” icon.
- You have two main choices:
- Display Capture: Records your entire monitor. Good for tutorials where you switch apps.
- Window Capture: Records only one specific application. Better for privacy (pop-ups won’t show).
- Select one, name your source (e.g., “Main Monitor”), and click Create.
- In the properties window:
- Display Capture: Select the correct monitor.
- Window Capture: Select the specific app window.
- Click OK.
PRO TIP:
You can resize the screen in the preview window by dragging the red corners. Holding Alt while dragging will crop the image.
Adding your webcam
- Click the “+” icon in Sources again.
- Select Video Capture Device.
- Name it (e.g., “Logitech Webcam”) and click Create.
- Select your camera from the Device dropdown.
- Click OK.
- Drag your webcam source to a corner of the screen so it doesn’t block the important stuff.
Adding audio sources
Visuals are useless without sound. OBS usually captures system audio automatically, but let’s verify.
- Look at the Audio Mixer at the bottom.
- Speak into your mic: The Mic/Auxiliary bar should bounce in the green/yellow zone.
- Play a YouTube video: The Desktop Audio bar should bounce.
- If a meter is dead, click the three-dot menu next to it -> Properties -> Select the correct device (e.g., your headset mic).
Audio troubleshooting:
- Meter not moving? Check if the speaker icon is red (muted). Click to unmute.
- Echo? If you are recording, wear headphones. If your mic hears your speakers, you get a nasty feedback loop.
Configuring output settings for recording
You want your recordings to look crisp. Let’s set that up.
- Go to File > Settings (Windows/Linux) or OBS > Preferences (macOS).
- Select Output from the left sidebar.
- Look at the Recording section:
- Recording Path: Click Browse to choose where files save (e.g., your Videos folder).
- Recording Format: I recommend MP4 or MKV. MP4 is compatible with everything; MKV is safer (if OBS crashes, you don’t lose the file).
- Encoder: This is huge. Select Hardware (NVENC, AMD, or Apple VT). This uses your graphics card instead of your CPU, making your computer run much smoother.
- Click Apply, then OK.
Configuring output settings for streaming
Planning to hit Twitch or YouTube Live?
- Go to File > Settings > Stream.
- Select your service (Twitch, YouTube, Facebook, etc.).
- Enter your Stream Key:
- Twitch: Creator Dashboard > Settings > Stream.
- YouTube: YouTube Studio > Go Live > Stream Setup.
- Note: Treat this key like a password. Never share it!
- Go to the Output tab again:
- Bitrate: This controls quality vs. internet usage. Start with 6000 kbps for 1080p/60fps.
- Encoder: Again, use GPU encoding (NVENC/AMD) if possible.
- Click Apply, then OK.
INTERNET CHECK:
Go to speedtest.net. Your Upload Speed needs to be higher than your bitrate. If you set 6000 kbps (6 Mbps), you want at least 10-12 Mbps upload speed for stability.
Recording your first video
It is time.
- Arrange your scene in the preview window.
- Click “Start Recording” (bottom right controls).
- Verify the REC circle is red and the timer is ticking.
- Do your thing! Play the game, teach the lesson, give the speech.
- Click “Stop Recording” when done.
- OBS will show a notification path at the bottom telling you where the file is.
Understanding scene transitions
When you switch from “Just Chatting” to “Gaming,” you don’t want a hard cut.
- Look at the Scene Transitions panel.
- Select Fade (classy) or Swipe (dynamic).
- Set the Duration (300ms is standard).
- Now, when you click a different Scene in the list, OBS will automatically apply that effect.
Practical Workflow Examples
Here are three common setups I see people use.
Example 1: Recording a gaming session
- Scene Name: “Gaming”
- Source 1: Game Capture (Better performance than Window Capture for games).
- Source 2: Video Capture Device (Webcam), scaled down in the corner.
- Audio: Balance your Mic volume so it is slightly louder than the Desktop Audio (game sounds).
- Action: Hit Record, play for 30 mins, hit Stop. Edit the file later to remove the boring parts.
Example 2: Streaming a webinar
- Scene 1: “Welcome” (Image source with “Starting Soon” text).
- Scene 2: “Presentation” (Window Capture of PowerPoint + Small Webcam).
- Scene 3: “Q&A” (Full-screen Webcam).
- Action: Start Stream on Scene 1. When ready, switch to Scene 2. During Q&A, switch to Scene 3 for a personal connection.
Example 3: Recording a software tutorial
- Scene: “Desktop”
- Source: Display Capture (allows viewers to see popup menus and tooltips).
- Mic Filters: Add “Noise Suppression” to your mic so keyboard clicks aren’t too loud.
- Action: Record the tutorial. Use “Pause Recording” if you need to sneeze or check your notes!
Advanced Tips and Optimization
Ready to level up? Here are the pro features.
Customizing hotkeys for speed
Fumbling with your mouse to switch scenes looks amateur. Use your keyboard.
- Go to File > Settings > Hotkeys.
- Map keys to actions:
- Switch to Scene [Name]:
NumPad 1 - Mute Mic:
M - Start/Stop Recording:
F9
- Switch to Scene [Name]:
- Click Apply. Now you are directing your show with your fingertips.
Using filters for audio and video
This is the secret sauce for professional quality.
Audio Filters (The must-haves):
- Click the gear icon next to your Mic > Filters.
- Add Noise Suppression: Kills fan noise and background hum.
- Add Compressor: Makes your voice consistent (quieter whispers get louder, screams get quieter).
- Add Noise Gate: Mutes the mic completely when you aren’t talking (great for hiding keyboard clacking).
Video Filters:
- Right-click your Webcam source > Filters.
- Color Correction: Boost saturation and contrast if your cam looks washed out.
- Chroma Key: If you have a green screen, this removes the background.
Studio Mode: Professional production
Ever seen a broadcaster make a mistake live? Avoid that.
- Click Studio Mode on the right.
- OBS splits into two screens: Preview (Left) and Program (Right).
- The Right screen is what viewers see. The Left screen is your workspace.
- You can set up your next scene on the Left, check it, fix it, and then hit Transition to push it to the live audience.
Performance optimization
Is OBS saying “Encoding Overloaded”? Try this:
- Run as Administrator: This gives OBS priority over your game.
- Cap your game FPS: If your GPU is using 100% power for the game, it has nothing left for OBS. Cap the game at 60 or 120 FPS.
- Lower Canvas Resolution: In Video Settings, set Output Resolution to 1280×720. It looks fine on phones and saves massive resources.
Exploring plugins
The community builds amazing add-ons.
- StreamElements: For chat overlays and alerts.
- Move Transition: Makes sources physically fly to new positions instead of just fading.
- DroidCam/Virtual Cam: Turn your phone into a high-end webcam.
Check out https://obsproject.com/resources.
You now have everything needed to start streaming and recording with OBS Studio. We’ve covered installation, setup, your first recording, and even some pro audio tricks. The learning curve can look steep at first glance, but if you take it one scene at a time, you will master it.
Quick resource links
- Official Website: https://obsproject.com
- Wiki & Guides: https://github.com/obsproject/obs-studio/wiki
- Forums: https://obsproject.com/forum/
- Discord: https://obsproject.com/discuss
Next steps for you
- Download OBS right now.
- Run the Auto-Configuration Wizard.
- Record a 2-minute test video just to prove to yourself that you can do it.
- Join the community on Discord if you get stuck.
Whether you are launching a Twitch career or just want to record a presentation for work, OBS Studio has your back. It is powerful, free, and waiting for you to create something amazing.
So, what will you create first? Happy streaming!