Parallels Desktop 20 – Install Windows on Mac
Parallels Desktop is optimized for the latest macOS and Windows versions. Parallels Desktop is designed to work seamlessly with the latest macOS and Windows versions, ensuring you can upgrade your systems without disruptions to your workflow. This provides a smooth and polished experience that takes full advantage of enhanced security, performance, and user interface improvements. Enjoy peace of mind with reliable stability across all editions.
With Parallels Desktop, you can effortlessly set up your system — there’s no need to source a Windows image or grapple with installation and configuration. It’s simplicity at its finest.
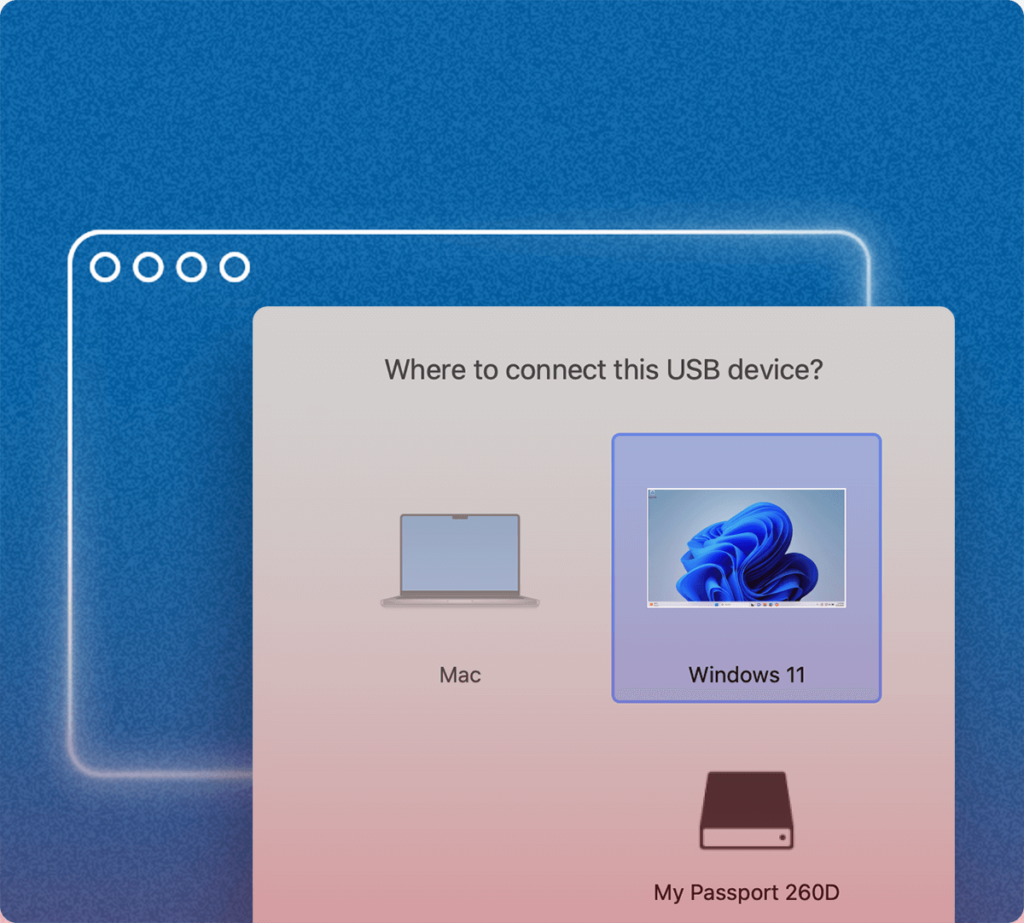
- Use your Mac camera, microphone, trackpad, sound, display, keyboard, and mouse with Windows. Enable USB Windows-only devices like printers and scanners, plus connect your Android phone and many other devices.
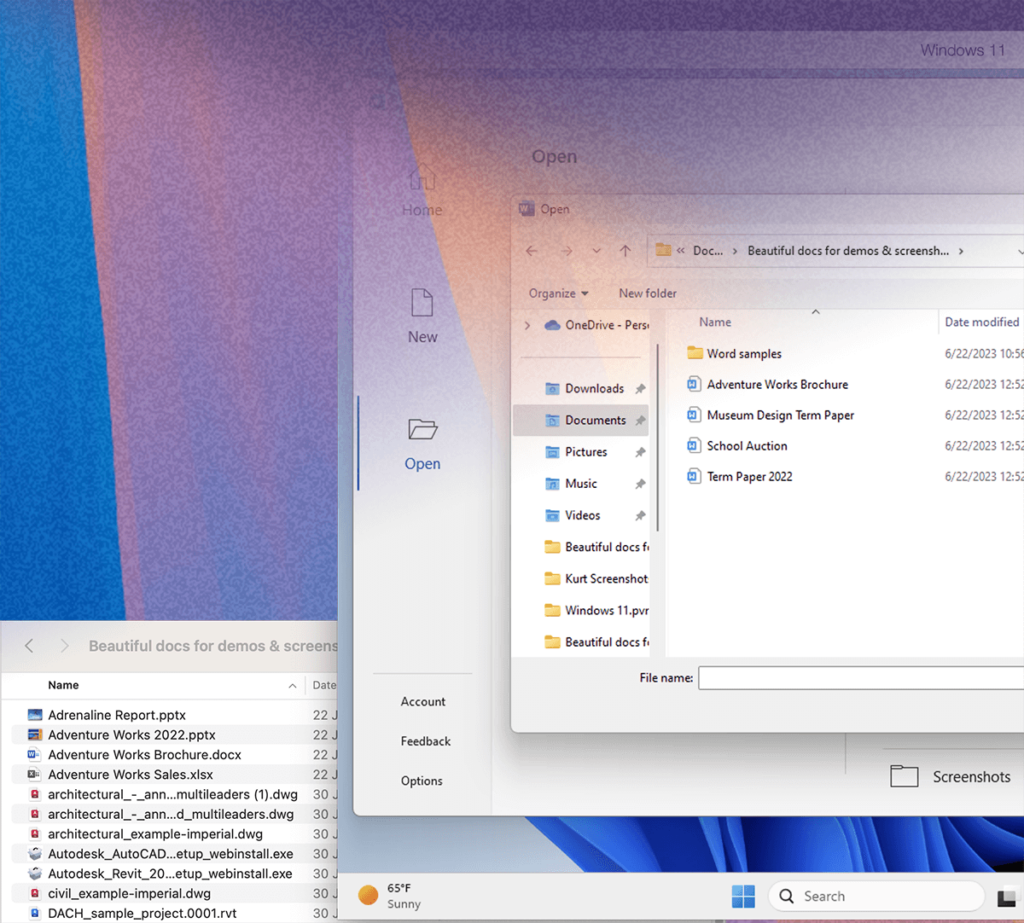
- Effortlessly move and share content between Mac and Windows with seamless integration.
- Use Windows apps side by side with Mac apps and with the Windows desktop hidden.
- Easily access your Mac files in Windows to avoid duplicates and optimize disk space usage.
- Polished and intuitive user experience.
- Improved optimization and performance.
System requirements
For graphics-intensive applications, high loads, and running multiple virtual machines.
Minimum
- Operating system: macOS Mojave 10.14.6 or newer
- Processor: Any Apple silicon chip, Intel Core i5, Core i7, Core i9, Intel Core M or Xeon processor
- Memory: 4 GB of RAM
- Storage: 600 MB for Parallels Desktop application installation. Additional disk space for the guest operating system (at least 16 GB is required for Windows OS)
- Graphics: Any Apple silicon chip, Intel, AMD Radeon, or NVIDIA graphics cards
Best Performance
- Operating system: macOS Mojave 10.14.6 or newer
- Processor: Any Apple silicon chip, Intel Core i5, Core i7, Core i9 or Xeon processor
- Memory: 16 GB of RAM or more
- Storage: 600 MB for Parallels Desktop application installation. Additional disk space for the guest operating system(s) (at least 16 GB is required for Windows OS)
- Graphics: Any Apple silicon chip, AMD Radeon Pro graphics card
Download
- ParallelsDesktop 20.2.2-55879.dmg | Backup
- ParallelsDesktop 20.2.1-55876.dmg
- ParallelsDesktop 20.1.2-55742(fix).dmg | Backup | Backup2
- ParallelsDesktop 20.1.2-55742.dmg | Backup | Backup2
- ParallelsDesktop 20.1.1-55740.dmg | OneDrive | Backup | Backup2
- ParallelsDesktop 20.1.0-55732.dmg | OneDrive | Backup | Backup2
- ParallelsDesktop 20.0.1-55659.dmg | OneDrive | Backup | Backup2
- ParallelsDesktop 20.0.0.55653.dmg | OneDrive | Backup | Backup2
How to install & activate
This version should only be installed on macOS Sonoma or later
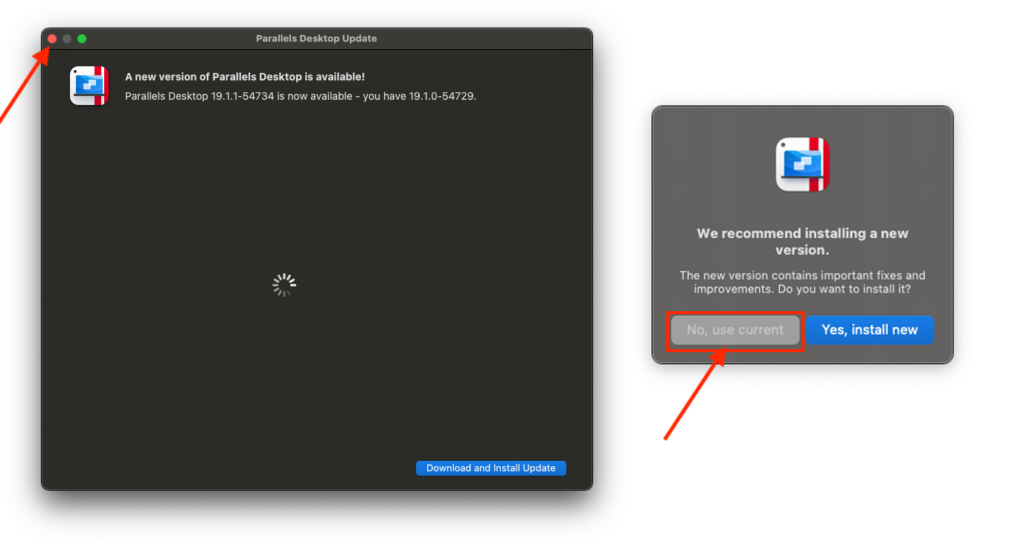
Step 1: Run the Install file to install as usual. During installation, if there is an update, remember to close it and select use current as shown.
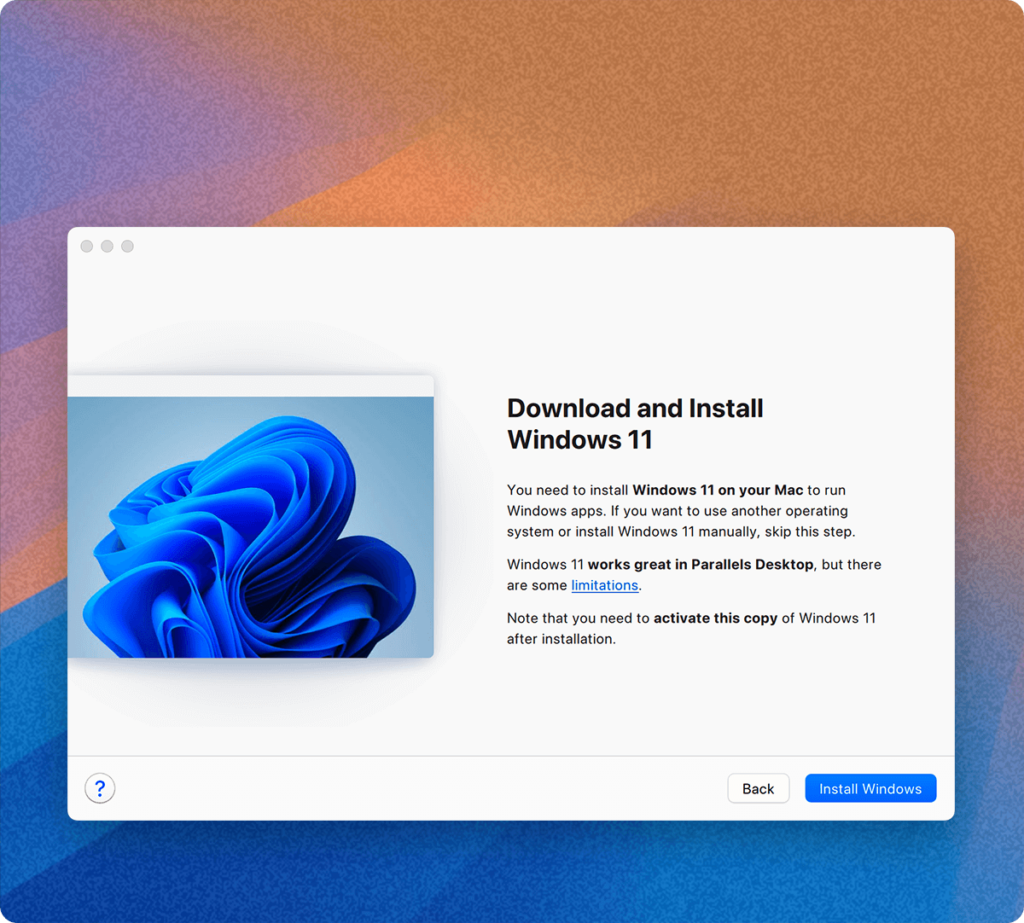
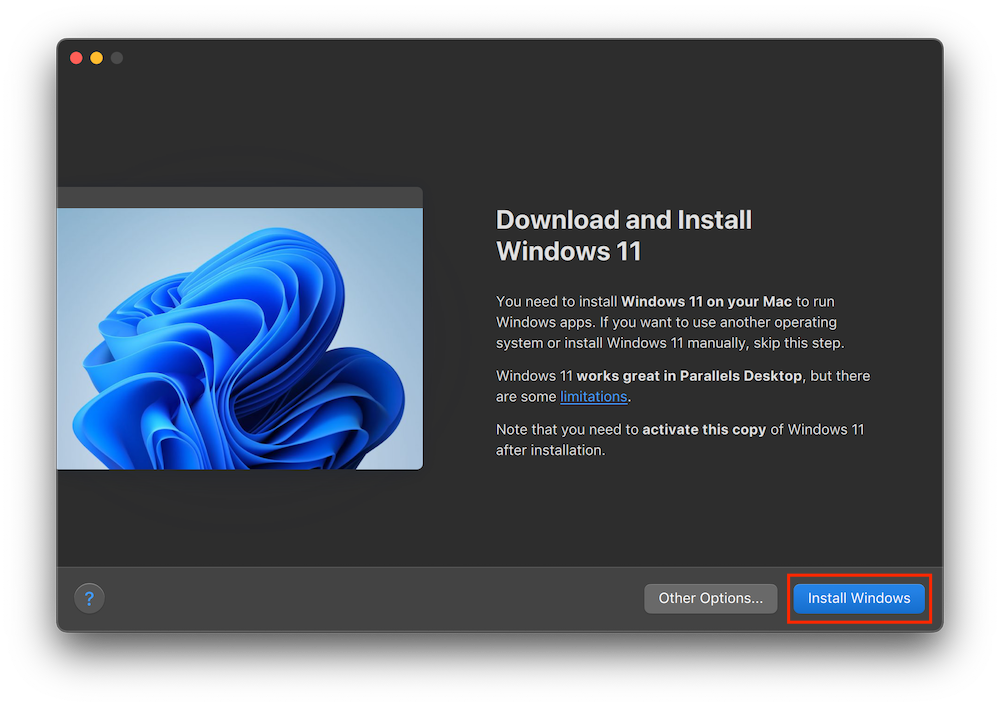
After installation is complete, when you see the Install Windows screen, select Install Windows to install immediately.
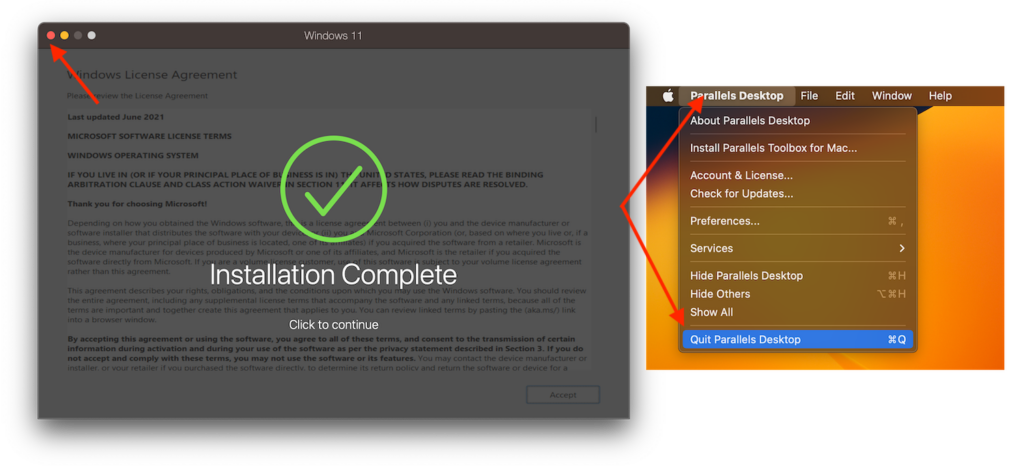
Step 2: After Completed appears, click on the red circle in the corner to exit, select Parallel Desktop again in the Menubar, look up and select Quit.
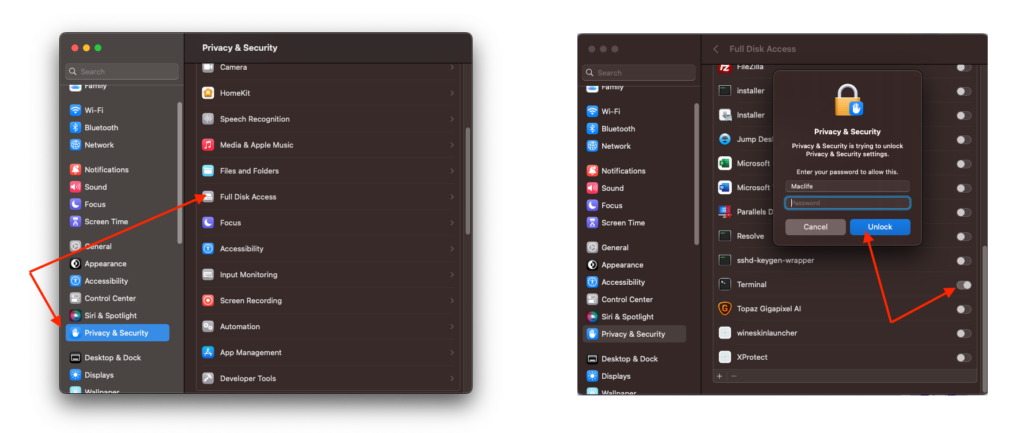
Step 3: Grant permissions to Terminal as instructed below:
- System Settings > Privacy & Security
- Select Full Disk Access
- Scroll down to find Terminal and slide the slider to On . Then enter your password to log in to your device.
If you don’t see Terminal , click the + sign and go to Application to find it.
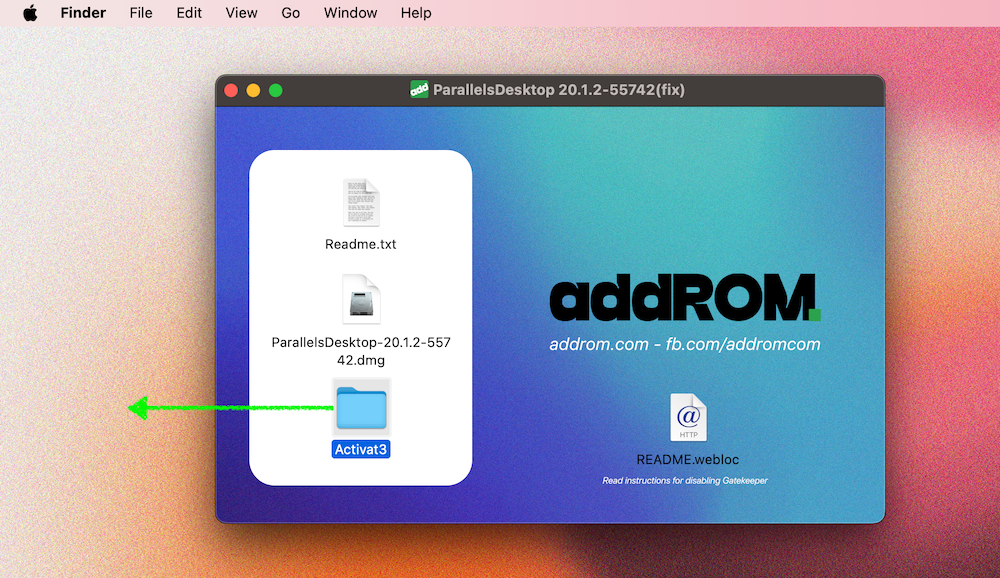
Step 4: Copy the Activat3 folder to the Desktop.
Step 5: Open Terminal and run the following commands in turn:
cd desktop/Activat3
xattr -cr * && chmod +x *.sh && sudo ./PD_Crack_20.1.2.sh
This is a success now.


NOTE:
The second command after Enter is to enter the computer's login password, just type it correctly and then Enter, nothing will appear when typing.
That’s it, open Parallels Desktop and you can use it.
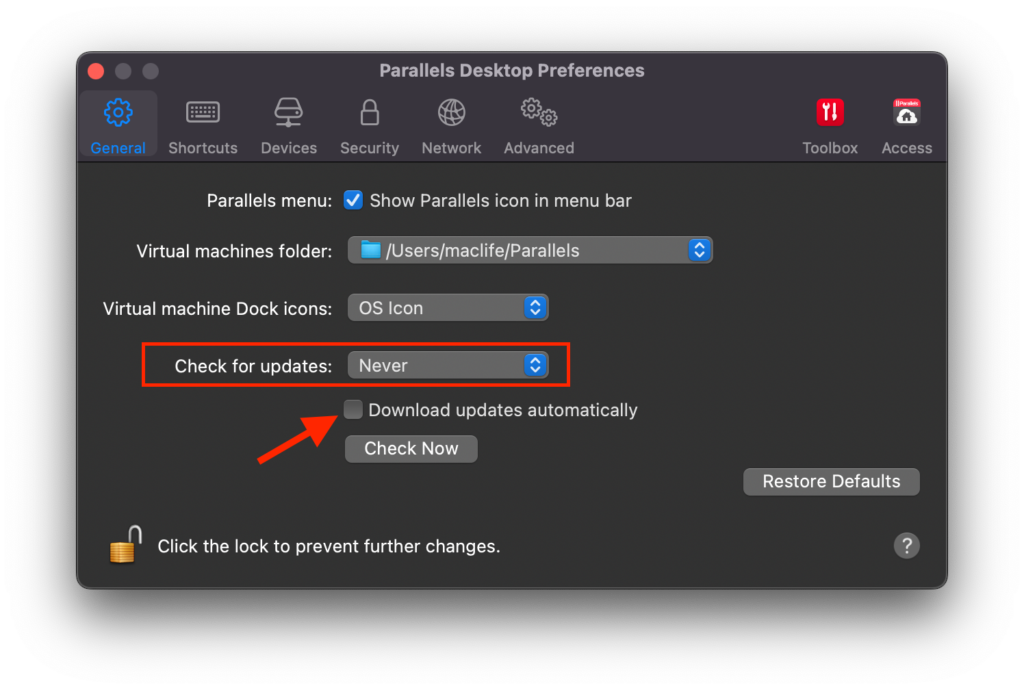
After running, remember to turn off Update.
READ MORE: Parallels Desktop 19 – Install Windows on Mac