How to install Raspberry Pi Connect: Remote Access Made Simple
On May 7, 2024, Gordon Hollingworth, the CTO of Raspberry Pi, unveiled a new software developed by their team to help Raspberry Pi users access, control, and manage their boards remotely via the Internet with ease and security. This application is called Raspberry Pi Connect.
What is Raspberry Pi Connect?
Raspberry Pi Connect provides you with free, simple, and superior access to your Raspberry Pi from anywhere in the world. It offers a secure screen-sharing solution for Raspberry Pi OS, allowing you to connect to your Raspberry Pi desktop directly from any browser.
Traditionally, there have been several methods to access and manage your Raspberry Pi remotely:
- Managing via SSH
- Accessing via VNC
- Connecting through Remote Desktop
However, the recent release of the new Pi OS Bookworm has presented challenges for users installing remote applications due to security conflicts with the Wayland window manager. Raspberry Pi Connect is designed to resolve these issues, making remote access to your Raspberry Pi as straightforward as possible.
How to Install Raspberry Pi Connect for Remote Management
“Remote” here refers to both being on the same local network or accessing your Raspberry Pi from anywhere in the world, provided both your Raspberry Pi and you have Internet access. First, Raspberry Pi Connect requires your Raspberry Pi to be running the 64-bit distribution of Raspberry Pi OS Bookworm with the Wayland window manager (the default for the latest Pi OS). Currently, this means you’ll need a Raspberry Pi 5, Raspberry Pi 4, or Raspberry Pi 400. For older devices, consider the alternative methods mentioned above.
Open the terminal or SSH into your Raspberry Pi and run the following commands sequentially:
sudo apt update
sudo apt upgrade -y
sudo apt install rpi-connect -y
NOTE:
You must run the update and upgrade commands. If not, you will encounter an error when installing rpi-connect: Unable to locate package rpi-connectAfter a successful installation, you should see results indicating completion.

Proceed to restart your Raspberry Pi. You will notice a new icon in the system tray at the top right of the screen. By default, Pi Connect will run automatically every time you power on your device. If it does not start automatically, you can manually start it using the following command:
systemctl --user start rpi-connect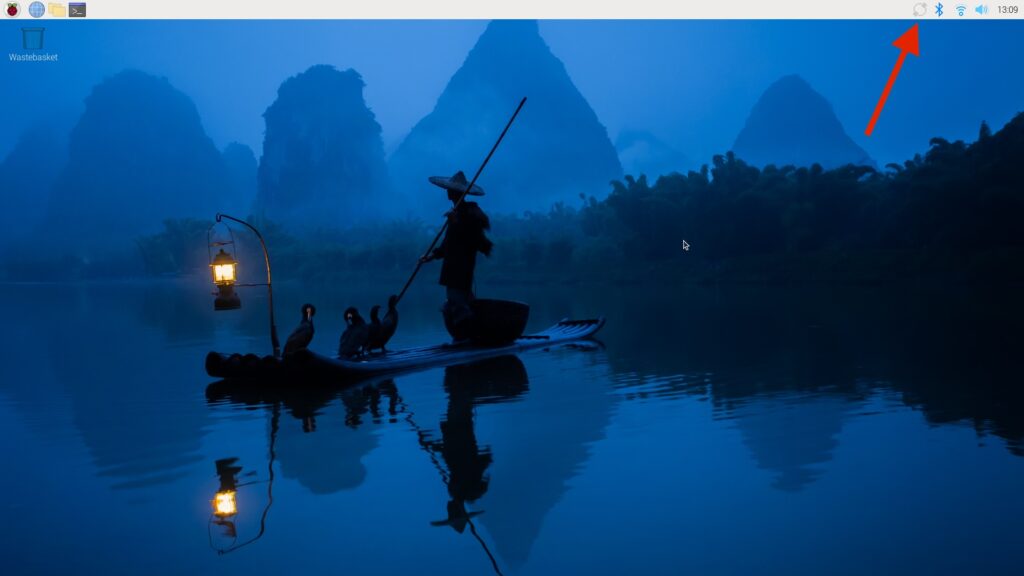
Registering a Raspberry Pi ID
Once installed, you need to log in with your Raspberry Pi ID (Pi ID) to use the application. If you don’t have an account, you can register here. The registration process is straightforward; just enter your email and password as shown below.
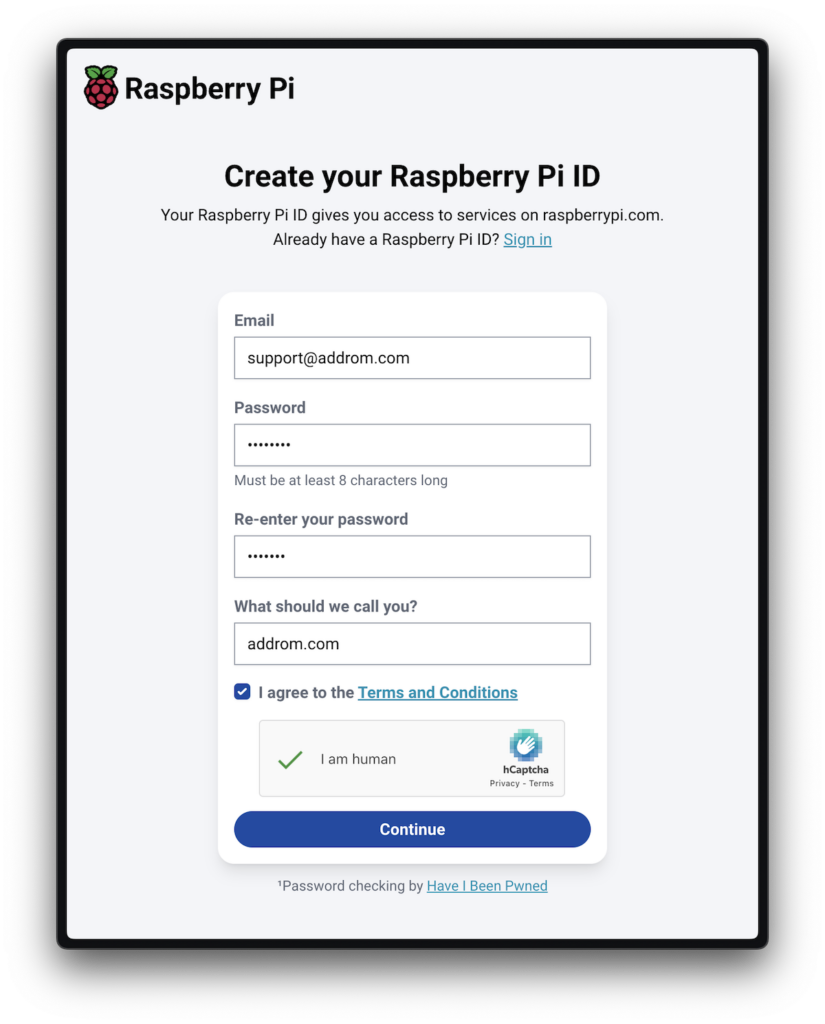
After registering, check your email and click on the confirmation link. You now have a Pi ID.
Linking Your Raspberry Pi ID to Your Raspberry Pi
To access your Raspberry Pi remotely, Raspberry Pi Connect uses your Pi ID to identify and manage the connection. This process is similar to using a VNC Viewer account for remote Internet access. You have two ways to link your Pi ID:
Through the Raspberry Pi Desktop Interface
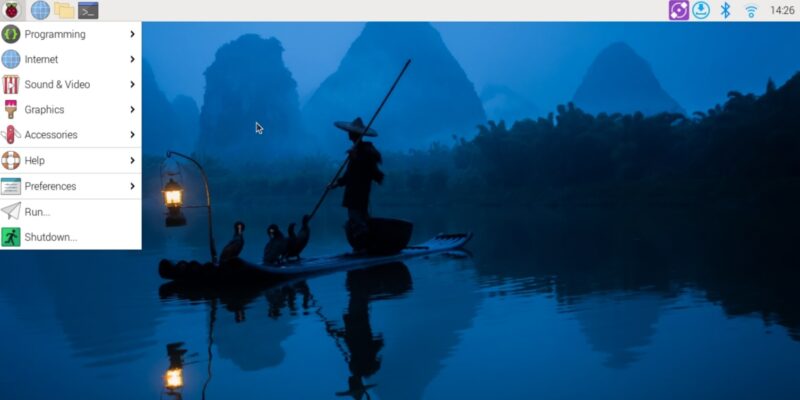
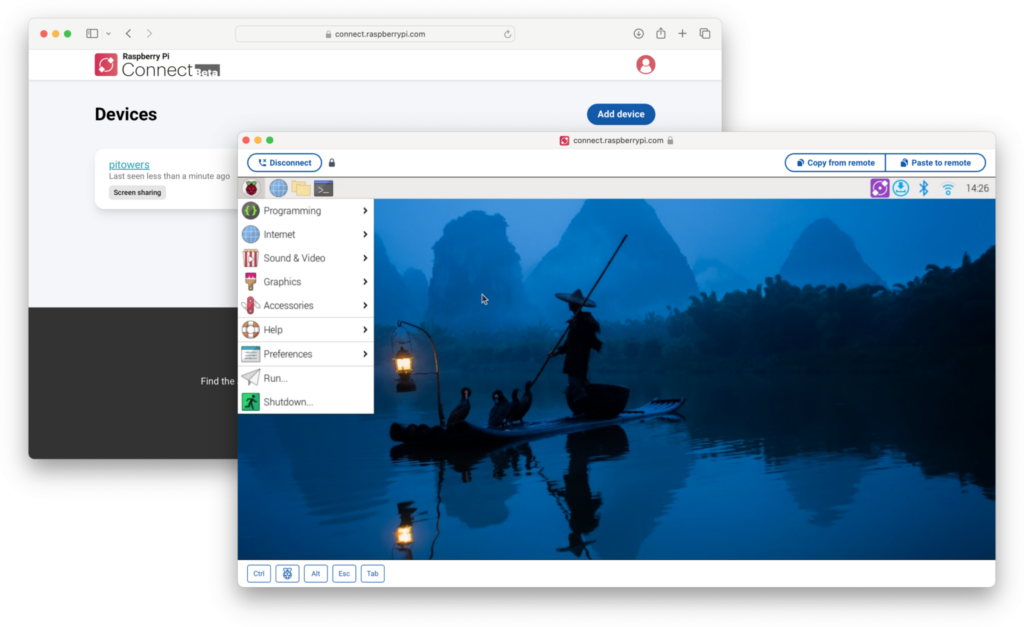
If you are using Pi OS with the Desktop interface and have a screen, keyboard, and mouse connected, you can directly log in with your Pi ID on the device. Right-click on the Raspberry Pi Connect icon in the upper right corner and select “Sign In.” This will open a verification URL that you can use to link your Raspberry Pi with your Pi ID.

Through the Command Line
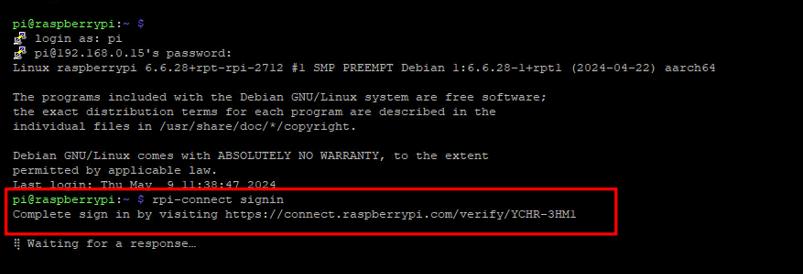
From the Terminal window, type:
rpi-connect signinThis command will provide a link in the format https://connect.raspberrypi.com/verify/XXXX-XXXX. Copy the link, paste it into your computer’s browser, and log in with the Pi ID created earlier.
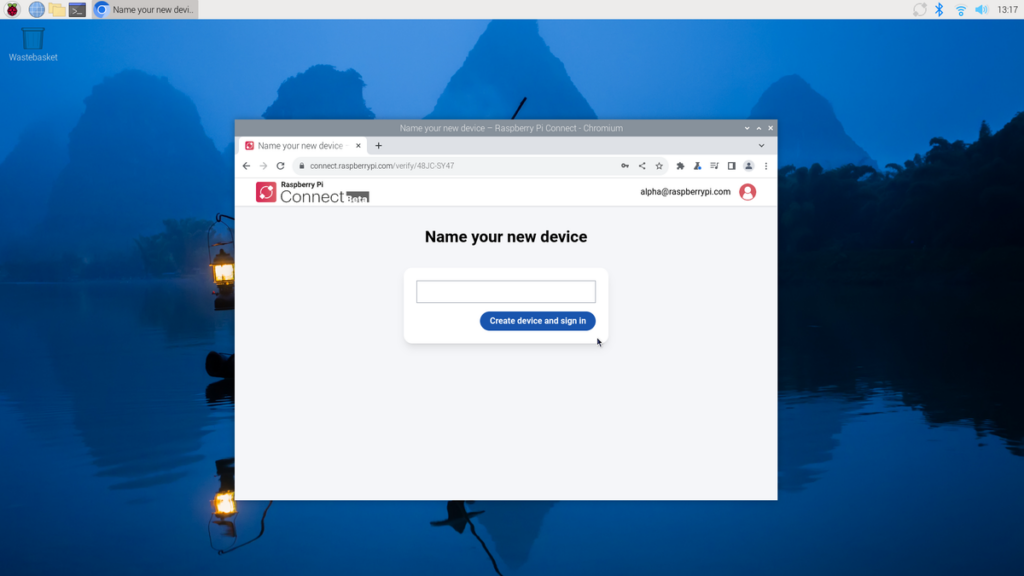
During the connection process, you’ll need to name your device for easy identification if you have multiple machines.
Now, you can share your Raspberry Pi’s screen. The Connect system tray icon will turn blue to indicate that your Raspberry Pi is linked with the Connect service. You will receive an email notification that a new device has logged into Connect.

Connecting and Controlling Your Raspberry Pi Remotely
After completing the steps above, your Raspberry Pi will be listed in the Connect web portal. You can access your Raspberry Pi from anywhere using a browser.
Visit connect.raspberrypi.com on any computer. Pi Connect redirects you to the Raspberry Pi ID service for login. Once logged in, Connect will display a list of linked devices. Devices available for screen sharing will show a gray “Screen Sharing” label under the device name.
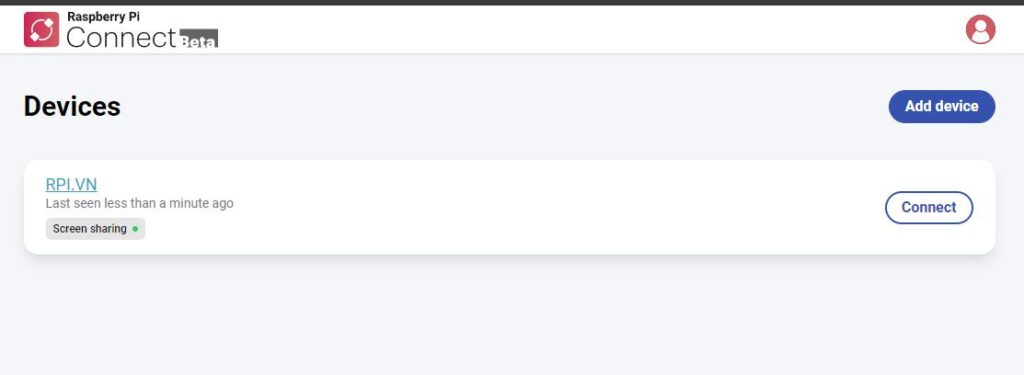
Click the “Connect” button to the right of the device name you want to share the screen with. This will open a browser window displaying your Raspberry Pi’s desktop.
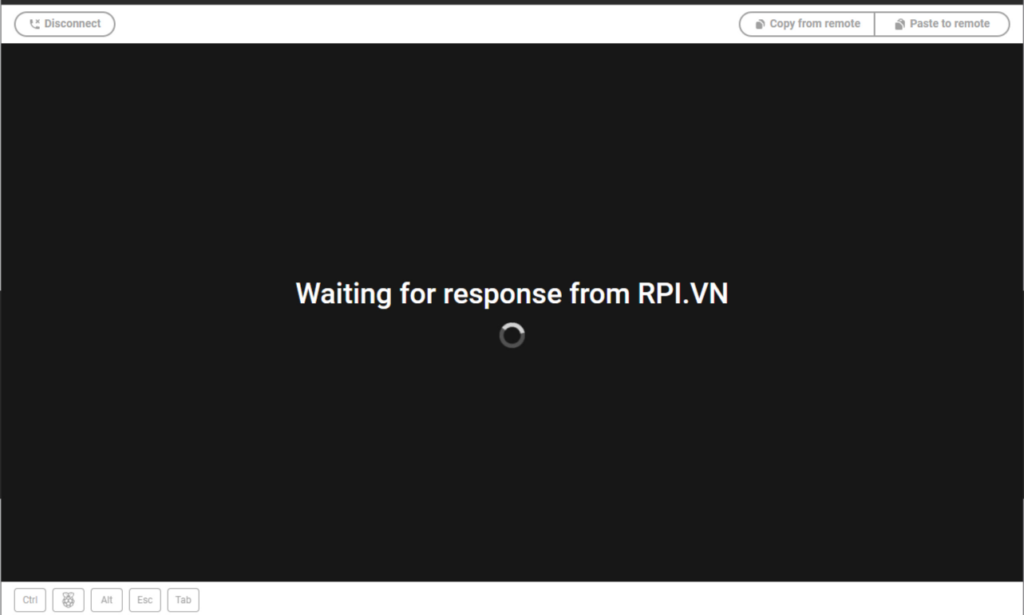
Now, you can use your Raspberry Pi as if you were sitting directly in front of it. Pi Connect allows you to copy data between your Pi and your computer, making data sharing simple and secure.
How Does Raspberry Pi Connect Work?
When you use Raspberry Pi Connect from a web browser to connect to your Raspberry Pi device, the software establishes a secure peer-to-peer connection between the two devices using WebRTC (the same real-time communication technology powering applications like Zoom, Slack, Microsoft Teams, and Google Meet).
The rpi-connect daemon on Raspberry Pi OS listens for new screen-sharing sessions from the Raspberry Pi Connect website and determines the best possible connection (i.e., lowest latency) between the VNC client in the browser and the VNC server running on your device. According to the company, once the connection is established, signals are sent directly between your computer and your Pi. No data is routed through Raspberry Pi’s servers.
However, if for any reason a direct connection cannot be established between your browser and Raspberry Pi, Pi Connect will securely relay traffic through Raspberry Pi’s servers, encrypted by DTLS. Currently, Raspberry Pi Connect has a single relay server (TURN) located in the UK. This means that if rpi-connect opts to relay traffic, latency can be significant. Hovering over the lock icon in your browser while connected will indicate if your connection is being relayed, so you can understand if network changes might improve the connection.
Raspberry Pi Connect will remain free for personal users with non-relayed connections, with no limit on the number of devices. The company is monitoring bandwidth usage and will decide how to handle these connections in the future.
Advantages and Disadvantages of Raspberry Pi Connect
Advantages:
- No need to install any software on your computer; only a web browser is required. This means you can access your Raspberry Pi via PC or phone.
- If a direct connection is established, there is almost no latency.
- No need for modem configuration or setup.
- Completely free.
- A single Pi ID account can manage an unlimited number of Raspberry Pi devices.
Disadvantages:
- Almost no disadvantages, except if for any reason Pi Connect cannot establish a direct connection between devices, resulting in traffic being routed through Raspberry Pi’s server, causing latency during operations.
By following this guide, you can easily set up and use Raspberry Pi Connect to access and control your Raspberry Pi remotely, providing a seamless and secure remote management experience.