The display features a 6.78-inch AMOLED screen that has 453 PPI density and provides a resolution of 1260 x 2800 pixels. The display is protected by Schott Xensation Alpha. The smartphone is powered by a Mediatek Dimensity 9200+ Octa-core processor while the GPU is Immortalis-G715 MC11. It is packed with 8 GB, 12 GB RAM with 256 GB, 512 GB internal storage.
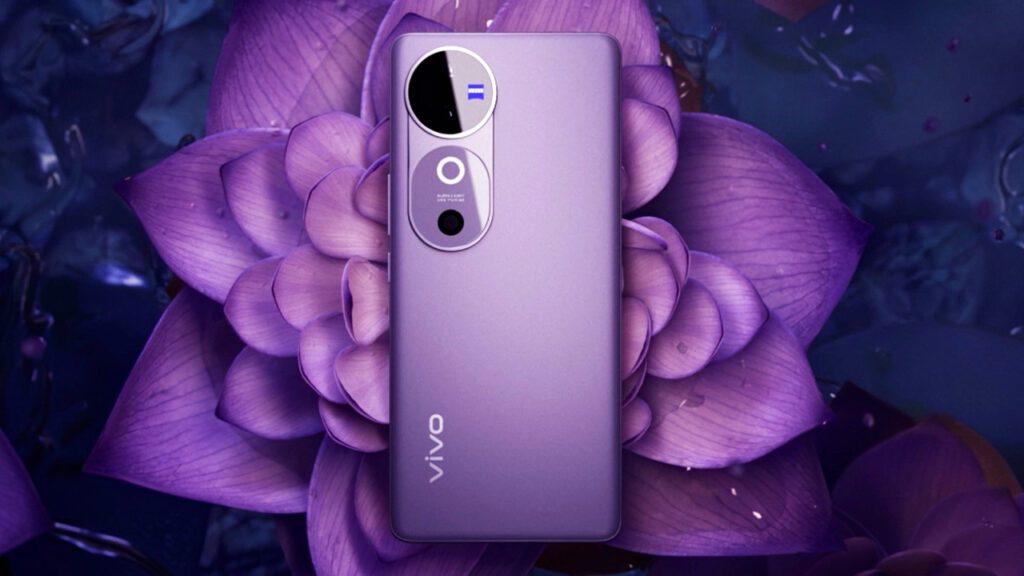
The smartphone features a triple camera on the rear side that consists of 50 MP (wide) + 50 MP (telephoto) + 50 MP (ultrawide) while on the front there is a single camera of 50 MP (wide). The device is fueled with a non-removable Li-Po 5500 mAh battery + 80W wired + Reverse wired. The smartphone is built with a glass front, and glass back.
The dimension of the device is 164.4 x 75.1 x 7.6 mm and it weighs 192 grams. Vivo V40 Pro runs on the Android 14 + Funtouch 14 operating system. The smartphone features Bluetooth 5.3, USB Type-C 2.0, OTG, and GPS, GALILEO, GLONASS, QZSS, BDS, NavIC. It supports Dual SIM (Nano-SIM, dual stand-by) + IP68/IP69 dust/water resistant (up to 1.5m for 30 min).
Stock ROM for Vivo V40 Pro 5G (PD2365 / PD2422)
DOWNLOAD:
PD2422:
PD2365:
HOW TO
- Driver & tools: QPST_2.7.496.1.zip (60.31M) | OneDrive | MediaFire | Backup
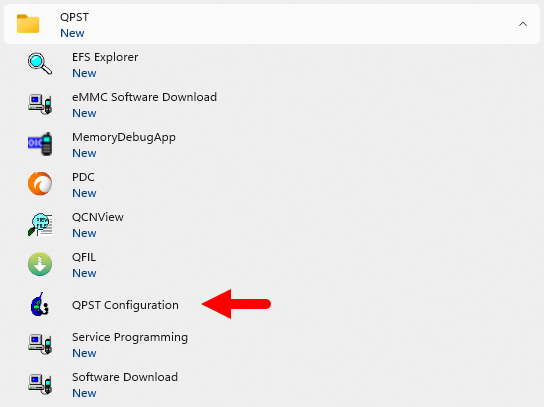
Step 1: Download and install the Driver and Tool above. Then open QPST tool in Start Menu or from the folder C:\Program Files\Qualcomm\QPST\bin

Step 2: Turn off the phone (Remove the battery if possible, then reinsert the battery), hold the VOLUME UP key and plug in the USB cable to connect to the computer (to enter EDL mode).

Step 3 : Open QPST Configuration
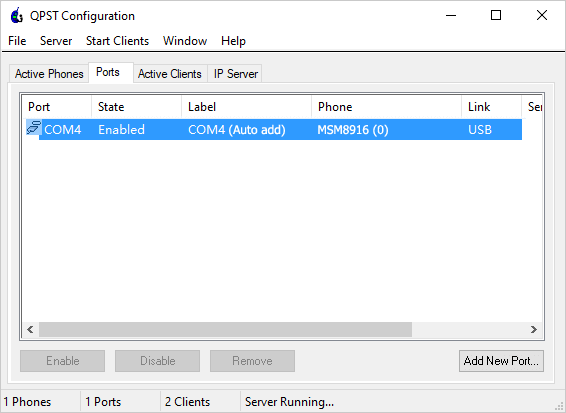
Step 4 : After opening QPST Configuration , select the “ Port ” tab and select the Port the phone is connecting to.

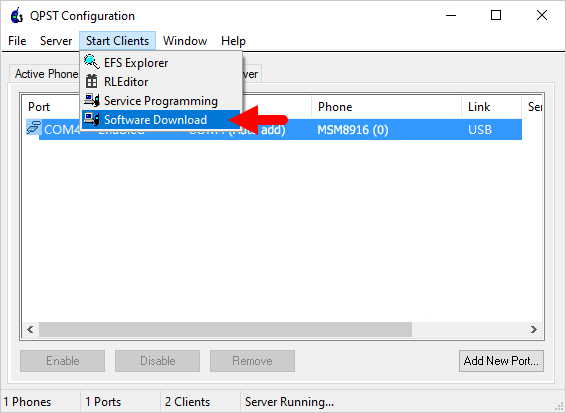
Step 5 : On the menu bar, select Start Clients > Software Download
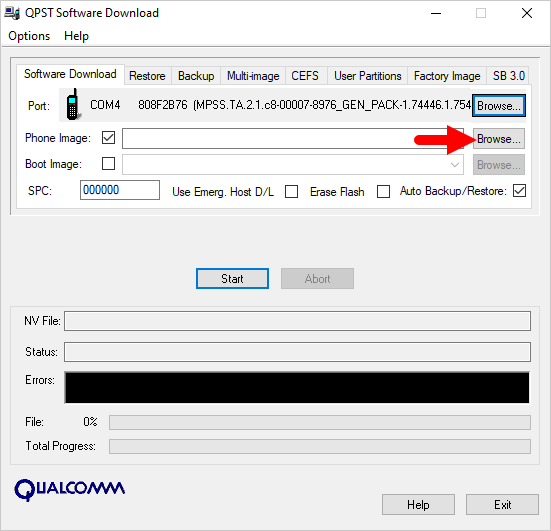
Step 6 : The QPST Software Download window appears.
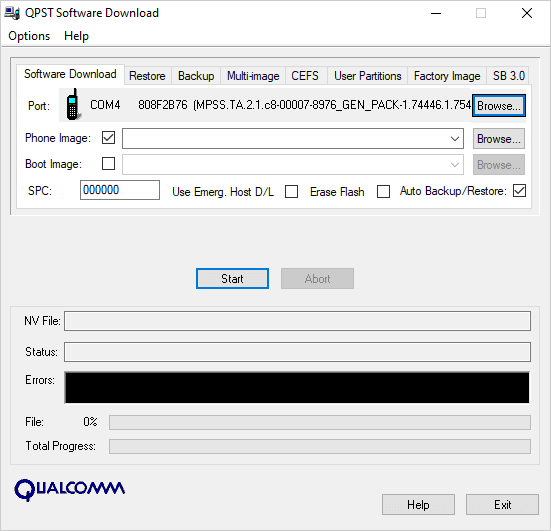
Step 7 : Click on the “ Browse… ” button in the Phone Image section and find the file (.hex) in the ROM folder (unzipped)
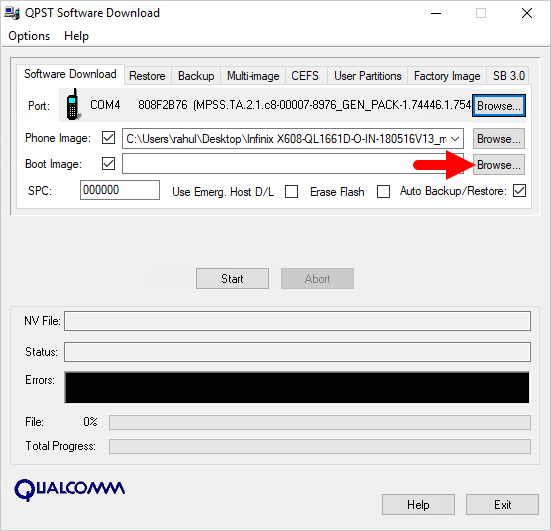
Step 8 : Continue to click the “ Browse… ” button in the Boot Image section and find the “ BOOT_LOADER.HEX ” file (in the ROM folder).
Step 9 : Start the ROM flash process by clicking the “ Start ” button
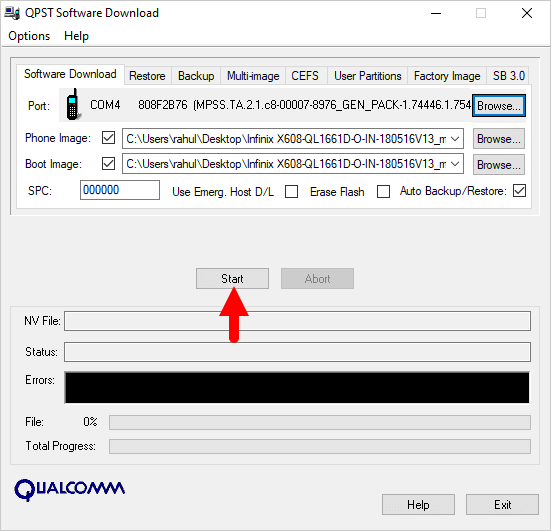
Step 10 : When the “green bar” appears below, the ROM flashing process is complete.

Disconnect your phone from your computer and open it to see the results. Thanks