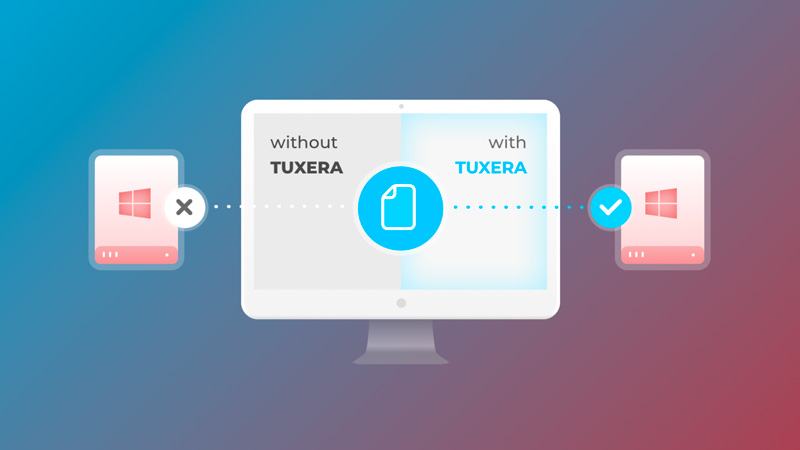
In the world of file systems, NTFS (New Technology File System) is a staple, particularly for Windows users. However, when it comes to macOS, the default capabilities are limited to read-only access for NTFS drives. This limitation can be a significant hurdle for users who frequently exchange files between Windows and Mac systems. Enter Tuxera NTFS 2023, a powerful software solution designed to bridge this gap and enhance file management on macOS.
What is Tuxera NTFS 2023?
Tuxera NTFS 2023 is a commercial-grade NTFS driver developed by Tuxera Inc., which allows Mac users to read and write files on NTFS-formatted drives seamlessly. With Tuxera NTFS, you can easily access, edit, copy, move, and delete files stored on Windows NTFS drives without any hassle. This software not only simplifies file management but also ensures data integrity and speed during file transfers.
Key Features of Tuxera NTFS 2023
- Full Read and Write Support: Unlike macOS’s built-in capabilities, Tuxera NTFS provides complete read and write functionality for NTFS drives. This means you can save files directly to your external USB drives or hard disks formatted in NTFS.
- Smart Caching Technology: Tuxera employs advanced caching technology that significantly enhances file transfer speeds. This feature ensures that your data transfers are quick and efficient, reducing wait times when copying or moving large files.
- Robust Data Protection: One of the standout features of Tuxera NTFS is its commitment to data integrity. The software includes fail-safe mechanisms that protect your files from corruption during unexpected shutdowns or disconnections.
- Easy File Management: The user-friendly interface allows for seamless navigation and management of files on NTFS drives. You can effortlessly format, check, and repair your NTFS volumes using the integrated Tuxera Disk Manager.
- Compatibility with Various macOS Versions: Tuxera NTFS 2023 supports a wide range of macOS versions, including the latest releases like macOS Sonoma. This ensures that users can enjoy full functionality regardless of their system setup.
- Support for Extended Attributes: The software supports NTFS extended attributes, which is crucial for maintaining metadata integrity across different platforms.
- Dual Boot and Virtual Machine Compatibility: If you’re running Windows alongside macOS (dual boot) or using virtual machines, Tuxera NTFS allows for seamless file handling between both operating systems.
Download:
- Tuxera NTFS 2023.1.dmg | Backup | Backup2
- tuxerantfs_2021.1.dmg | OneDrive
- tuxerantfs_2021.dmg | OneDrive (Support macOS Monterey)
- tuxerantfs_2020.2.dmg | OneDrive
- tuxerantfs_2020.1.dmg | OneDrive
- tuxerantfs_2020.dmg | OneDrive
- tuxerantfs_2019.dmg | OneDrive (Works on macOS Catalina 10.15)
- tuxerantfs_2018.dmg | OneDrive (Supports macOS High Sierra 10.13 and Mojave)
- tuxerantfs_2016.1.dmg | OneDrive (Fully supports macOS Sierra 10.12)
- tuxerantfs_2016-RC.dmg | OneDrive (Support macOS Sierra 10.12)
- tuxerantfs_2015.3.dmg | OneDrive
- tuxerantfs_2015.dmg | OneDrive
- tuxerantfs_2012.3.6.dmg | OneDrive
NOTE:
If not Mac Silicon M1 and macOS lower than Big Sur, you should install the 2019 version, if Mac Silicon M1 then install the latest version.
How to install
To install Tuxera NTFS on M1, you need to reduce the security to Reduced:
- On the Apple menu, select [Shut Down] to shut down your Mac.
- After shutting down the system, wait 10 seconds and then press and hold down the power button on your Mac.
- Click “Options“, then click “Continue“.
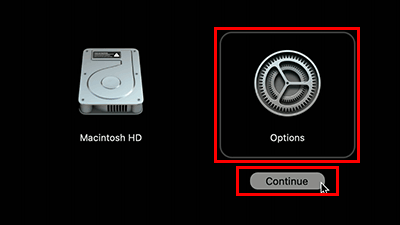
- Click “Utilities“, then select “Startup Security Utility“.

- Select the startup disk you wish to use from those displayed, then click “Security Policy“.
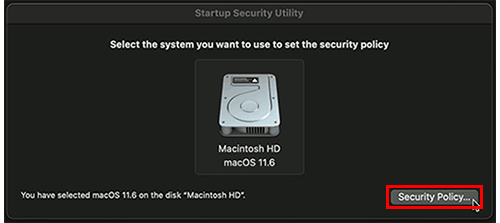
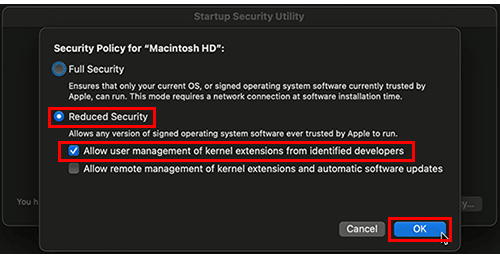
- After selecting “Reduced Security”, select “Allow user management of kernel extensions from identified developers” and click “OK“. (We recommend making a note of the settings before making changes so that you can restore the previous security policy after you finish using the app.)
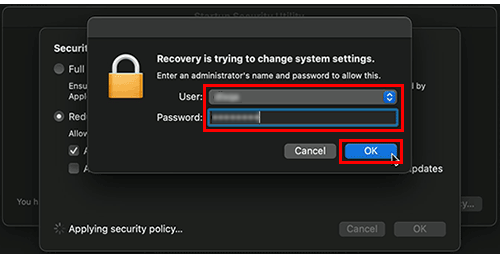
- Enter the administrator name and password, then click “OK“.
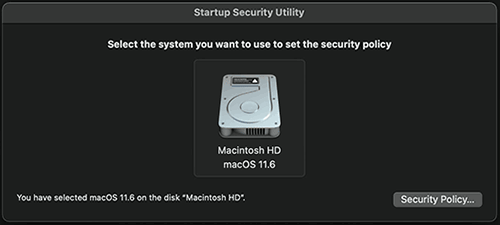
- When setting of the security policy is complete, the following window is displayed.
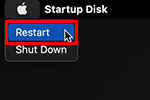
- On the Apple menu, select “Restart” to restart your Mac.
- After restart, return to the original page and continue operation.
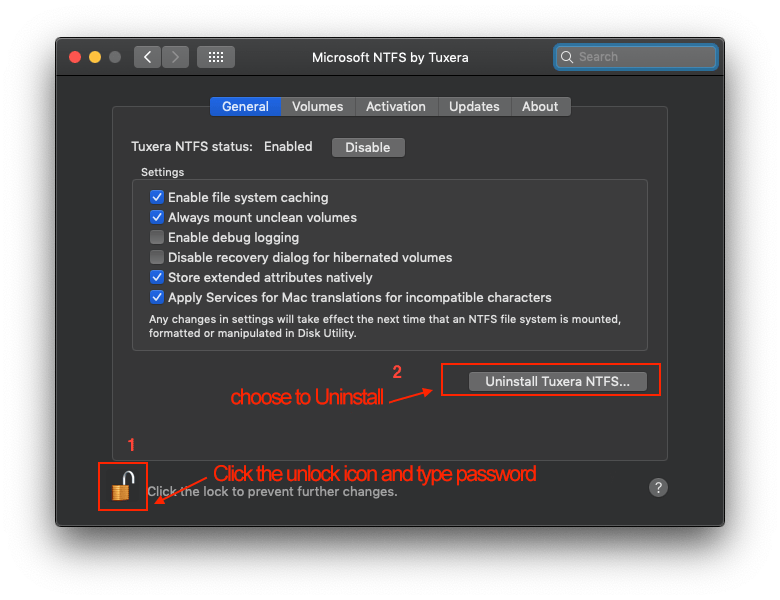
How to uninstall
To remove Tuxera, you cannot use CleanMyMac or similar software to remove applications, but do the following:
Frequently Asked Questions (FAQs)
1. Is Tuxera NTFS 2023 compatible with all versions of macOS?
Yes, Tuxera NTFS supports various macOS versions from OS X 10.4 (Tiger) up to the latest releases like macOS Sonoma.
2. Can I use Tuxera NTFS with external USB drives?
Absolutely! You can use Tuxera NTFS with any external USB drive formatted in NTFS.
3. What if I encounter issues while using Tuxera NTFS?
Tuxera provides comprehensive support resources on their website, including FAQs and troubleshooting guides to help you resolve any issues quickly.
4. Is there a trial version available?
Yes, Tuxera typically offers a trial period during which you can evaluate the software before purchasing a license.


