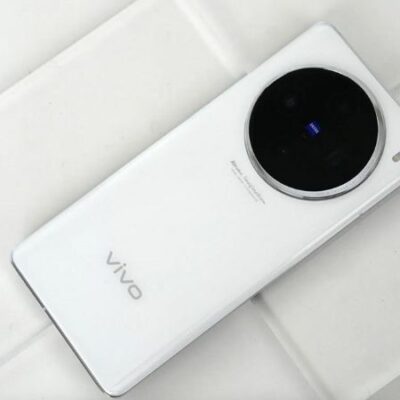
Finding yourself locked out of your Vivo T2x 5G, whether due to a forgotten screen lock PIN/pattern or the Factory Reset Protection (FRP) after a reset, can be a frustrating experience. Many solutions point towards using a computer and specialized software, but what if you need a method that doesn’t require a PC? I’ve delved into numerous device unlocking scenarios, and for the Vivo T2x 5G, there’s a multi-layered approach that can help you regain access using only the device itself and a secondary phone. It’s an advanced procedure, but one that I’ve seen work effectively. This guide is born from practical experience in navigating such complex unlocks.

Before we begin: ethical considerations and preparation
It’s my duty to start with a crucial reminder: this tutorial is for educational purposes, designed to help you unlock your own Vivo T2x 5G. Using these methods on a device you don’t lawfully own is unethical and potentially illegal. Please proceed with integrity.
For this no-PC method, you’ll need:
- Your locked Vivo T2x 5G (ensure it has a reasonable charge, 50% or more is ideal).
- A Wi-Fi network.
- A second Android phone with internet access and the EasyShare app installed.
- A SIM card (its role might be for network access or to trigger certain system behaviors).
- Bluetooth headphones (as observed in the process, this might be needed for specific interactions or audio cues).
- Patience and careful attention to detail – this isn’t a quick fix.
Phase 1: The initial reset via recovery mode
Our first step is to perform a factory reset through the Vivo T2x 5G’s recovery mode. This is often a prerequisite for tackling FRP, and if it’s just a screen lock you’ve forgotten (without FRP being the main issue after a reset), this alone might solve it, though typically FRP will then engage.
- Power off your Vivo T2x 5G completely.
- Enter Fastboot mode: Press and hold the Power button and the Volume Up button simultaneously. Keep them pressed until you see the Fastboot mode screen. This is a common way to access system-level options on many Android devices.
- Navigate to Recovery Mode: In Fastboot mode, use the Volume buttons to scroll and highlight “Recovery Mode,” then press the Power button to select it. Your phone will reboot into the recovery environment.
- Clear all data:
- Once in Recovery Mode, you’ll see a few options. Select “Clear data.”
- Next, choose “Clear all data.” The system will ask for confirmation, as this action will erase everything on your phone’s internal storage. Confirm this step.
- Wait for the data clearing process to complete. It usually takes a minute or two.
- Restart your device: After the data wipe, select the option to “Restart” your phone.
Upon restarting, your Vivo T2x 5G will go through its initial boot sequence and then land on the “Hello” or welcome screen, ready for setup.
Phase 2: Hitting the wall and invoking accessibility tools
As you proceed with the initial setup (selecting language, region, agreeing to terms), you’ll eventually be asked to connect to a Wi-Fi network. Do so. Soon after, you’ll likely encounter the screen asking you to “Copy apps & data” or set up as new. Following this, the device will check for info and then present the security challenge: verify your old PIN, pattern, or Google account. This is the FRP or screen lock wall we need to bypass.
Since we “don’t know” these credentials, we need an alternative route. This is where Android’s accessibility features become our entry point.
- Return to the “Hello” screen: Navigate back carefully to the very first welcome screen.
- Access Accessibility Settings: Look for an option like “Accessibility settings” or an accessibility icon. This is standard on Android setup screens.
- Enable TalkBack:
- Inside Accessibility settings, find and select “TalkBack.”
- Turn the TalkBack feature on. You’ll likely be presented with a TalkBack tutorial. You can usually close this tutorial by drawing an “L” shape gesture on the screen (swipe down then right) and selecting “Close” or “Exit tutorial.”
- Expert Tip: Navigating with TalkBack active changes how you interact with the screen. A single tap selects an item and reads it aloud; a double-tap activates the selected item. Swiping usually requires two fingers.
Phase 3: The emergency call, sim card, and bluetooth headphone interlude
This part of the process, as observed in similar bypasses, often involves a sequence of actions that might seem unrelated but can help trigger specific states or enable certain functionalities.
- Return to the Wi-Fi setup screen or a screen where you can access emergency call: With TalkBack still enabled (or re-enable if you had to disable it temporarily), navigate back to where you can see the “Emergency Call” option. This is often available on the lock screen or initial setup pages.
- Emergency Call sequence: Tap “Emergency Call.” Dial “112” (or another valid local emergency number, though 112 is often used in these procedures as a generic trigger) and tap the call button. You may need to do this two or three times. The idea isn’t necessarily to complete the call but to interact with the dialer interface.
- Insert SIM card: At this stage, insert an active SIM card into your Vivo T2x 5G. This can sometimes change the options available or how the phone interacts with networks.
- Connect Bluetooth headphones: Power on your Bluetooth headphones and pair them with the Vivo T2x 5G. The process often involves using TalkBack to navigate to Bluetooth settings, which can sometimes be accessed through quick settings or by voice command if Google Assistant can be triggered via TalkBack.
The exact purpose of the emergency calls and Bluetooth connection in conjunction with TalkBack can vary; sometimes it’s to open up a notification that can be interacted with, or to enable a voice assistant pathway to other settings.
Phase 4: The two-phone strategy with easyshare and activity launcher
This is where a second Android phone comes into play. We need to transfer a specific app, “Activity Launcher,” to the locked Vivo T2x 5G. EasyShare (Vivo’s file-sharing app, similar to ShareIt or Xender) is the conduit.
- On your second (helper) phone:
- Ensure EasyShare is installed (available on the Google Play Store).
- Download the “Activity_Launcher.apk” from addrom.com/bypass. Do not install it on the helper phone yet, just have the APK file ready.
- On your locked Vivo T2x 5G:
- The goal is to get to a point where you can receive files via EasyShare. This often involves triggering EasyShare through a share menu or a specific TalkBack accessible option if a browser or file manager can be minimally accessed. Sometimes, after connecting to Wi-Fi and enabling TalkBack, specific gestures or sequences can lead to a search bar or an option to share something, which then allows opening EasyShare in receive mode.
- The video’s summary indicates opening EasyShare after the Bluetooth and SIM steps, then using it to receive “Activity Launcher.” This implies that despite the lock, there’s a pathway to launch EasyShare in receive mode on the T2x 5G, likely facilitated by TalkBack navigation or a system prompt.
- Transfer Activity Launcher:
- On the helper phone, open EasyShare and choose “Send.” Select the Activity Launcher APK file.
- On the locked Vivo T2x 5G, open EasyShare (or get it into receive mode) and prepare to receive.
- Initiate the transfer from the helper phone. Once received on the Vivo T2x 5G, the system should allow you to install the APK. You might need to enable “Install from unknown sources” if prompted, again navigating with TalkBack.
Phase 5: Leveraging activity launcher for the final bypass
Activity Launcher is a powerful tool that can open hidden settings and activities within apps. This is what we’ll use to manipulate the Android setup process.
- Open Activity Launcher on your Vivo T2x 5G after installation.
- Search for “Android Setup”: Inside Activity Launcher, there’s usually a search function. Use it to search for “Android Setup” (or
com.google.android.setupwizardor similar package names). - Identify the correct activity: You might see several activities listed under Android Setup. You’re looking for an activity that is not the one currently running (the one asking for PIN/Google). Often, it’s one that sounds like a later stage of setup or one that doesn’t have an icon. The video shows a specific navigation within these results. It might be an unexported activity that, when launched, skips the problematic verification step or allows an alternative verification.
- Launch the chosen Android Setup activity.
- Device verification with the other phone: This is a key step. The video mentions bypassing the PIN/Google account verification “through a device verification process involving the other phone.” This suggests that by launching a specific Android Setup activity, it might trigger a “verify on your other device” or “copy accounts from your old device” type of flow.
- Follow the on-screen prompts on both phones. This usually involves:
- On the locked Vivo T2x 5G: Selecting an option like “Use my Google Account” or “Copy data wirelessly.”
- On the helper phone: Opening Google settings or the Google app, looking for “Set up my device” or “Find my device” options, and following instructions to wirelessly verify and transfer account information (or rather, a token that satisfies the setup wizard) to the Vivo T2x 5G. This step essentially tricks the Vivo T2x 5G into thinking it’s being set up from an “old” device.
- Follow the on-screen prompts on both phones. This usually involves:
- Skipping data copy: During this new setup flow, when asked to copy apps and data, choose to “Skip” or “Don’t copy.” Our goal is just to get past the account lock.
Phase 6: Finalizing the setup and freedom
Once the alternative Android Setup flow initiated by Activity Launcher is complete (often after the device-to-device verification):
- Google Services: Agree to Google services as prompted.
- Screen Lock: You’ll be asked to set up a new screen lock (PIN, pattern, or password). You can choose to set one up now or “Skip” this step and do it later from settings. I recommend setting one up.
- Review additional apps/Funtouch OS setup: Go through any remaining Funtouch OS (Vivo’s Android skin) setup screens.
- Access Home Screen: Finally, you should land on the Vivo T2x 5G’s home screen, fully unlocked and FRP bypassed!
Important notes from my experience
This no-PC method for the Vivo T2x 5G is intricate and relies on several system features working in a specific sequence:
- Data is wiped: The initial factory reset erases all personal data.
- Complexity: This is not a simple process. It requires patience and careful execution of many steps.
- Second phone is crucial: The use of EasyShare and the device-to-device verification step means a second Android phone is non-negotiable for this particular method.
- SIM card and Bluetooth: While their exact roles can be subtle, they were part of the demonstrated process and might be necessary to enable certain communication channels or system prompts.
- Updates can break it: Android security updates from Google or Vivo can patch the vulnerabilities exploited by this method at any time. What works today might not work tomorrow.
Navigating the Vivo T2x 5G unlock with advanced no-pc techniques
Unlocking a Vivo T2x 5G without a computer, especially when dealing with both screen locks and FRP on updated Android versions, is a testament to the persistent ingenuity within the Android community. The method outlined, involving recovery mode, TalkBack, strategic use of a SIM card and Bluetooth, and the clever application of Activity Launcher via a second phone, is undoubtedly advanced. It requires a steady hand and a good understanding of Android’s underlying setup processes.
My hope is that this detailed walkthrough, based on my understanding of such procedures, provides you with the insights needed if you ever face this challenge with your own device. Always remember to act ethically and be aware of the intricacies involved. With diligence, you can navigate these hurdles and restore full access to your Vivo T2x 5G.