Download macOS Mojave DMG file for clean installation (macOS 10.14)
The following steps will walk you through upgrading your Mac’s operating system to the latest version, 10.14 Mojave. It is recommended that you back up your Mac before upgrading. Backing up your Mac will come in hand just in case some of your software is not yet compatible with the new operating system. Once you’ve made a backup of your Mac and are ready, follow the steps below to download and install macOS 10.14 Mojave.
Verify Compatibility for Mojave
In order to upgrade your Mac operating system (macOS), you must have a compatible Mac computer. The following Macs are compatible and can upgrade to macOS Mojave. While the Mac and all Apple software may be compatible, 3rd party software like DAW’s and Virtual Instruments may not.
- MacBook (Early 2015 or newer)
- MacBook Air (Mid-2012 or newer)
- MacBook Pro (Mid-2012 or newer)
- Mac mini (Late 2012 or newer)
- iMac (Late 2012 or newer)
- iMac Pro (2017)
- Mac Pro (Late 2013, plus mid-2010 and mid-2012 models with recommended Metal-capable GPU, including MSI Gaming Radeon RX 560 and Sapphire Radeon PULSE RX 580)
Download macOS 10.14 Mojave
- macOS Mojave 10.14.6.dmg (5,6G) | OneDrive | Backup
- macOS Mojave 10.14.6 (18G103).dmg (5,6G) | OneDrive | Backup
- macOS Mojave 10.14.4 (18E226).dmg (5,6G) | OneDrive | Backup
- macOS Mojave 10.14.3.dmg (5,6G) | OneDrive | Backup
- macOS Mojave 10.14.1.dmg (5,6G) | OneDrive | Backup
- macOS Mojave 10.14.dmg (5,6G) | OneDrive | Backup
DOWNLOAD MORE: Download macOS Catalina DMG file for clean installation (macOS 10.15.x)Create a bootable installer for macOS
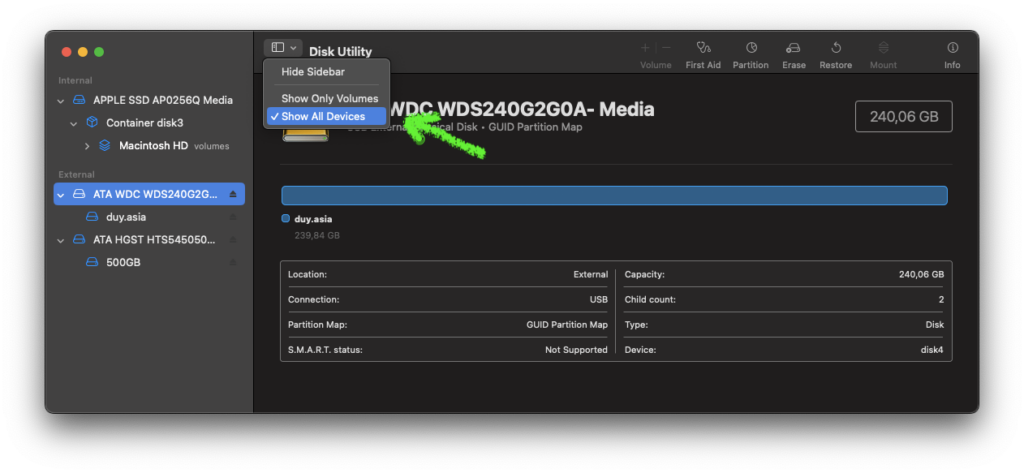
Step 1: Format the USB
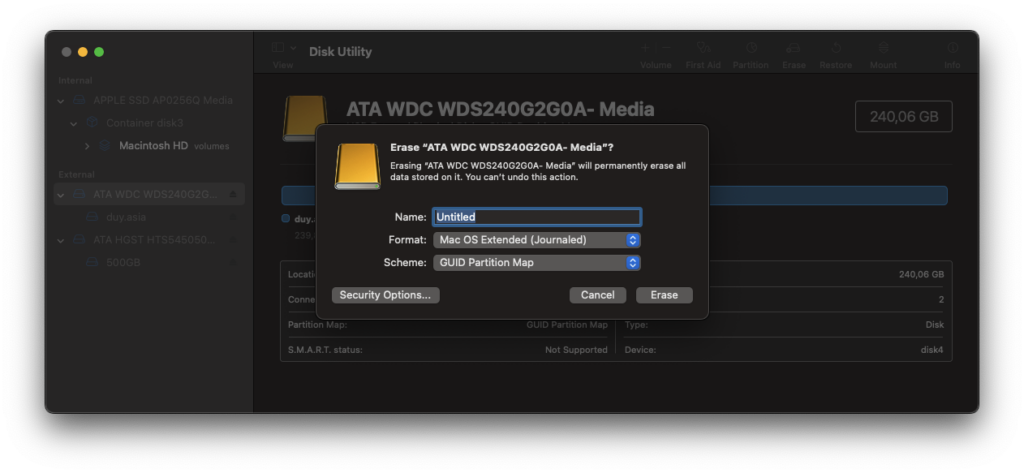
Go to Disk Utility (Click on Launchpad > Other > Disk Utility). Then Format the USB with the following information:
- Name: Untitled (This name is optional, subject to change)
- Format: MacOS Extended (Journaled)
- Scheme: GUID Partion Map
Step 2: Copy the installation file to the Application folder
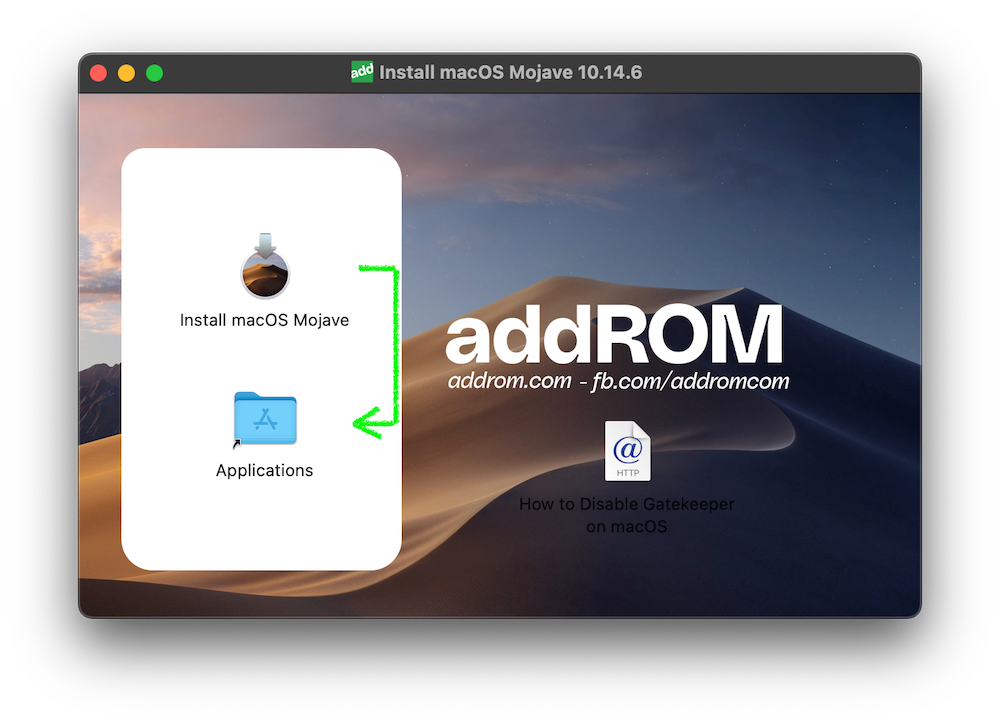
After downloading, if the .DMG, double-click to mount, then drag the installation file to the Application folder
Step 3: Plug in the USB flash drive or other volume that you’re using for the bootable installer.
Step 4: Open Terminal, which is in the Utilities folder of your Applications folder.
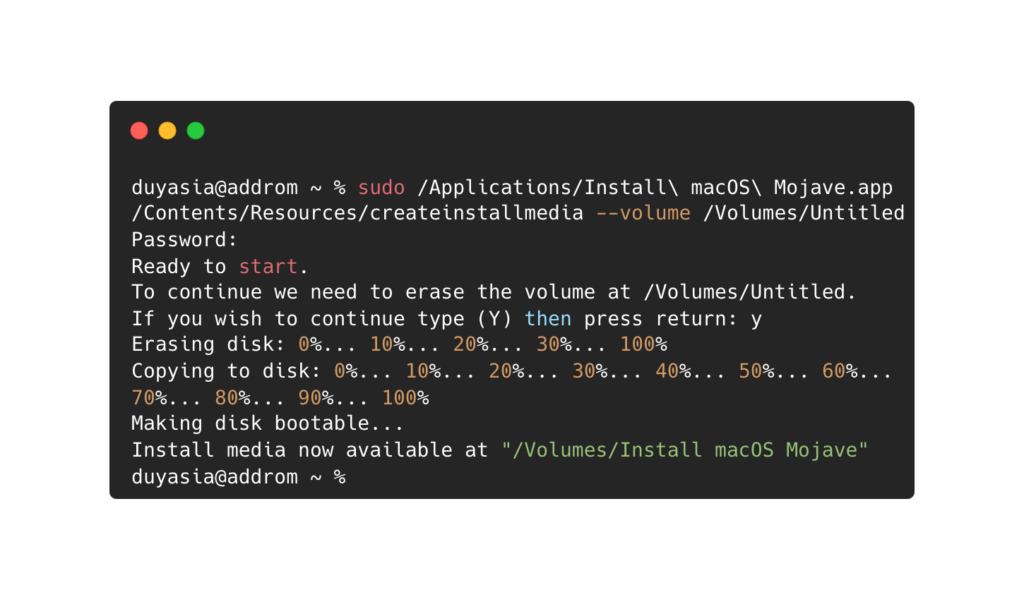
Step 5: Type or paste one of the commands below into Terminal, then press Return to enter the command. Each command assumes that the installer is in your Applications folder, and Untitled is the name of the USB flash drive or other volume you’re using. If the volume has a different name, replace Untitled in the command with the name of your volume.
sudo /Applications/Install\ macOS\ Mojave.app/Contents/Resources/createinstallmedia --volume /Volumes/UntitledStep 6: When prompted, type your administrator password. Terminal doesn’t show any characters as you type. Then press Return.
Step 7:When prompted, type Y to confirm that you want to erase the volume, then press Return. Terminal shows the progress as the volume is erased.
Step 8: After the volume is erased, you may see an alert that Terminal would like to access files on a removable volume. Click OK to allow the copy to proceed.
Step 9:When Terminal says that it’s done, the volume will have the same name as the installer you downloaded, such as Install macOS Catalina. You can now quit Terminal and eject the volume.