How to Add Looping and Bouncing Effects to Live Photos
Apple’s Live Photos, introduced in 2015, are photos that capture 1.5 seconds of video before and after you take a picture, with the aim of adding a little bit of life and movement to still images.
Since introducing Live Photos, Apple has added some effects to its Photos app that let you turn them into fun animated clips, which you can then share with family, friends, or the wider world.
There are three effects in total that you can try on your own Live Photos. Loop repeats the action in a continuous looping video, Bounce rewinds the action backward and forward, and Long Exposure simulates a DSLR-like long exposure effect by blurring motion.
The following steps show how you can apply them to your own Live Photos on iPhone and iPad.
- Open the Photos app and select a Live Photo. (If you look under “Media Types” in the Albums section, you’ll find all of your Live Photos collated in a folder of the same name.)
- With the Live Photo open, tap the LIVE icon in the top-left corner of the interface.
- From the dropdown menu that appears, choose from Live (the default), Loop, Bounce, Long Exposure, and Off.
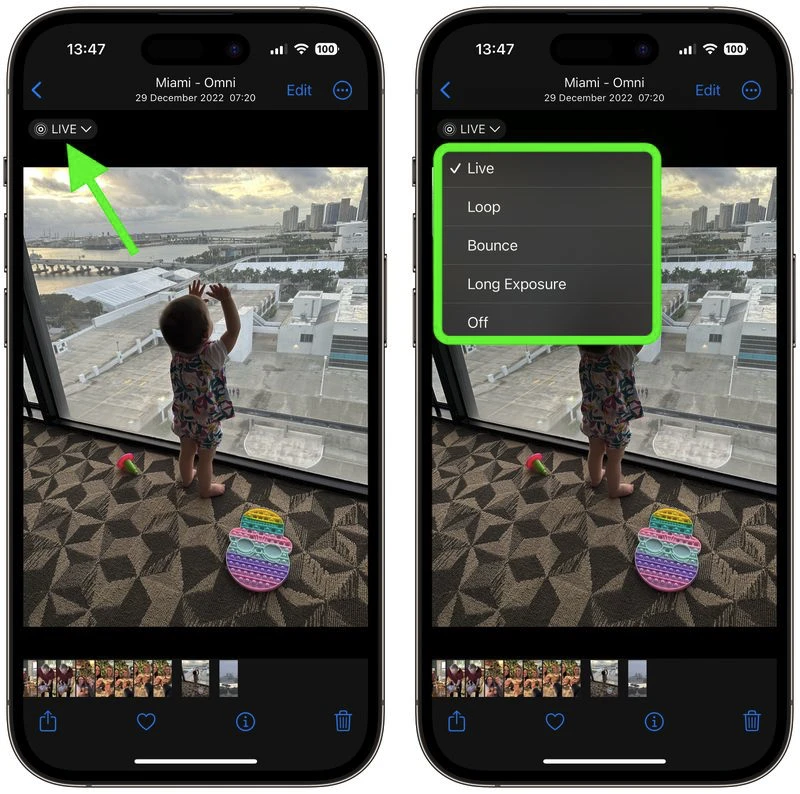
The effect you choose will be applied immediately, ready for you to share your creation using the Share icon in the bottom-left corner of the screen.
With Live Photos, if you get a blurry image, you can open it up and see if other frames you captured are clearer, and then select a replacement “key photo” for it. Click the link to learn how it’s done.