Visual Studio 2022 is one of the most powerful development environments for .NET programming. In order to improve the development process, when working with C#, .NET Core, ASP.NET, or even Xamarin, you will need external libraries. NuGet, which is the official package manager for .NET, can manage these libraries.
In this guide, we will explore the different ways to install NuGet packages in Visual Studio 2022. Installing NuGet helps you manage your project’s dependencies.
Before getting started, make sure that Visual Studio 2022 is installed and activated on your computer. If you haven’t installed it yet, you can download and install it from the official Microsoft website or if you prefer an easier method (without filling out registration forms), visit DownloadDevTools.com and download VS 2022 with just one click.
To download Visual Studio 2022 Enterprise or Professional along with the offline installer and a free Product Key, click here.
What is NuGet?
If you want to easily add, remove, or update dependencies in projects, you may need NuGet because it is a .NET package manager. When having NuGet, you don’t need to manually download and change project settings. This tool manages your frameworks and third-party libraries.
Prerequisites
Installing a NuGet package in Visual Studio 2022 needs the following prerequisites:
- A Visual Studio 2022, which is installed correctly (you may need a license code to activate it).
- A project that supports NuGet packages (like .NET Core, .NET Framework, ASP.NET, and …)
- An internet connection to download packages from the NuGet repository.
First method: installing NuGet from the GUI
One of the simplest ways to install a NuGet package in Visual Studio 2022 is using NuGet package management in the GUI.
Step 1: Opening a project in Visual Studio 2022
- Run Visual Studio 2022 and open your project in it.
- Make sure your Visual Studio 2022 has been activated (you may need a Visual Studio 2022 activation license code).
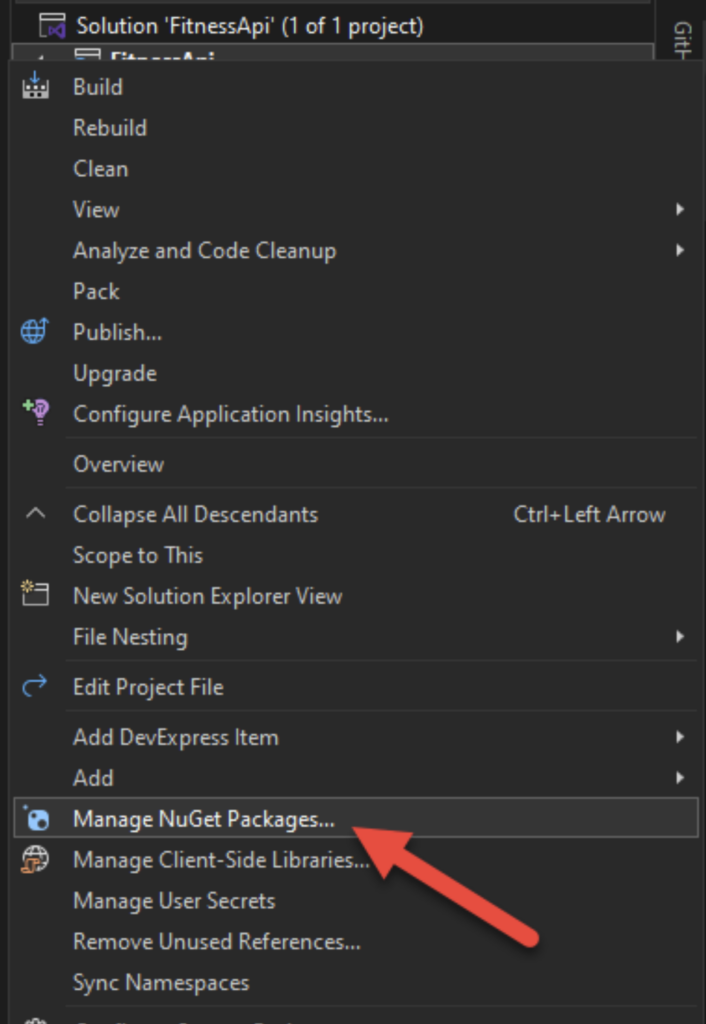
Step 2: Opening NuGet Package Manager
- Right-click on your project in Solution Explorer.
- Choose Manage NuGet Packages.
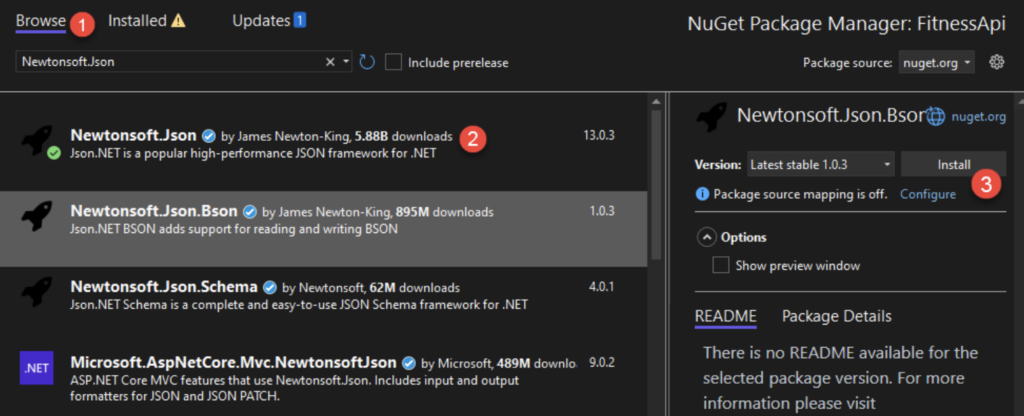
Step 3: Search your package.
- In the Browse section, you should type your desired package. For example, Newtonsoft.Json.
- Then choose that package from the list that is being prepared.
Step 4: Install package
- Click on the install button.
- You may need to confirm the package license.
- Wait until installation is completed.
Step 5: Installation Confirm
- Go to the Installed section and make sure your package is installed successfully.
Second method: install the NuGet package with the use of Package Manager Console.
This method is for those people who like the command prompt! Visual Studio 2022 has prepared the Package Manager Console (PMC) tool to install packages.
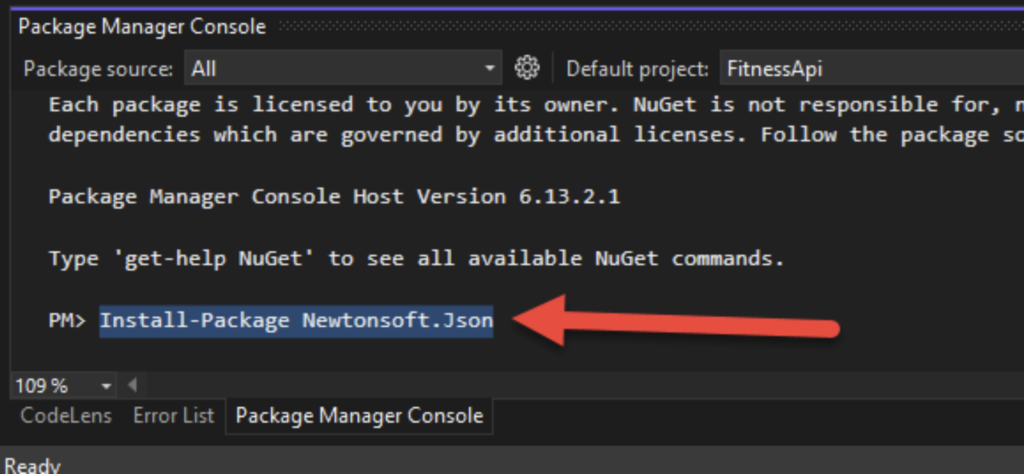
Step 1: Opening Package Manager Console
- Go to the Tools menu and choose NuGet Package Manager > Package Manager Console.

Step 2: Install the package from the console
- You should type the code down below and then press Enter: Install-Package Newtonsoft.Json
- You have to type your desired package name instead of Newtonsoft.JSON.
- Wait until installation is completely finished.
Step 3: Installation Confirm
In the Solution Explorer window, in the References section, search for the new package. You must see it in that section.
Third method: Installing NuGet with .NET CLI
If you are working with .NET Core or .NET 5/6/7+, the best way to install packages is .NET CLI.
Step 1: Open the terminal in Visual Studio 2022
- From the Tools menu, open the Terminal option (Tools > Command Line > Developer Command Prompt) or go to the command prompt (CMD) directly.

Step 2: Run the appropriate command to install the package
- Run this code in CMD:
dotnet add package Newtonsoft.Json - The package will be downloaded and added to the project.
Step 3: Confirm installation
- Open
.csprojfile and check if the package is in ItemGroup or not: \
Updating NuGet packages
In order to update an installed package, choose one of the below methods.
Form GUI:
- In Manage NuGet Packages, go to the Updates section.
- Choose your desired package and click Update.
From Package Manager Console:
Use this code: Update-Package Newtonsoft.Json
From .NET CLI:
Use this code: dotnet add package Newtonsoft.Json --version latest
Deleting NuGet packages
If you don’t need a specific package, you can delete it. There are also some methods from which you can choose your appropriate one.
From GUI:
- In Manage NuGet Packages go to Installed section.
- Click on Uninstall.
From Package Manager Console:
Use this code: Uninstall-Package Newtonsoft.Json
From .NET CLI:
Use this code: dotnet remove package Newtonsoft.Json
Common problems and their solutions
Sometimes it is ordinary that you face some errors in installing or updating NuGet packages. Here we discuss some of the general problems and ways to overcome them.
1- NuGet Package Restore Failed error:
Check your internet connection than run this code: dotnet restore
2- Package Not Found!
Check the package name than run this code: nuget sources update
3- Package version interference:
With the below code, update all dependencies: dotnet restore --force
Conclusion
You can install NuGet easily with one of three methods: GUI, Package Manager Console, and .NET CLI. The most important prerequisite of this work is activating the license code of Visual Studio 2022 in order to use all the capabilities of the professional development environment.