With iOS 16 arriving before macOS Ventura, users got the ability to quickly remove backgrounds from images with a couple of taps on iPhone and iPad. Fortunately, the capability is also available with macOS Ventura and is accessible in two different ways. Here’s how to remove backgrounds from images on Mac.
Previously limited to third-party apps, removing the background from images automatically has often meant mixed results. For a precise cutout, manual work in Photoshop, Pixelmator, or other software has historically delivered the best outcomes.
However, Apple has included impressive image background removal performance that’s almost instant in both iOS 16 and macOS Ventura. In our use, the feature almost always works accurately for people, pets, and inanimate objects.
The one downside is that macOS automatically picks what it sees as the subject, there’s no manual control. But it’s still a really handy tool.
When you use either of the options below, your Mac will create a PNG of the subject that you can use in photo editing apps, quickly message to someone, pop into a note, or use however else you’d like.
Instantly remove backgrounds from images on Mac
- Make sure you’re running macOS Ventura on your Mac
In the Photos app
- Select a photo in the Photos app
- Right-click on the image
- Choose Copy Subject
- As you hover over Copy Subject, you’ll see the background dim with the subject that you’re auto-selecting showing as highlighted – keep your mouse there and the highlighted line will move around everything it’s going to capture
- Now you can paste the subject without the background anywhere you’d like
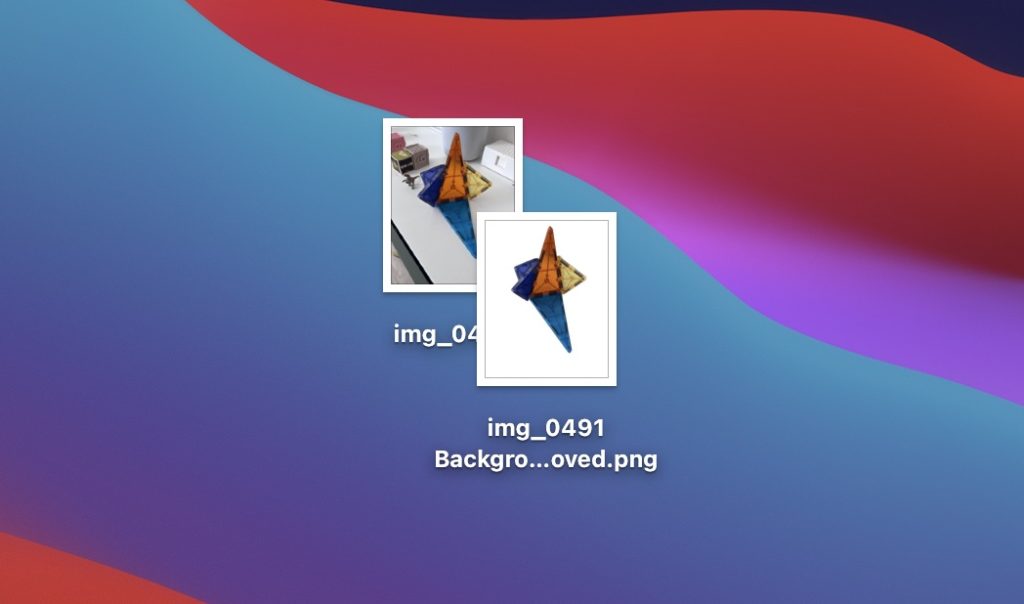
From your Desktop/in Finder
- Find a photo you’d like to remove the background for
- Right-click on the image in Finder, your Desktop, etc.
- Near the bottom, choose Quick Actions then click Remove Background
- The PNG copy of your image with the background will appear in a few seconds right next to the original image