How to install TWRP recovery on OnePlus Nord 2 5G
The TWRP flashing process requires an unlocked bootloader. Doing so will wipe off all the data and could nullify the warranty as well. Likewise, SafetyNet will also be triggered which will result in the inability to use banking apps. Moreover, Netflix WideVine L1 will be degraded to L3, hence Full HD resolution might not be supported. If all this is well and good, then let’s get started with the steps to install TWRP Recovery on your OnePlus Nord 2 5G device.
How to install TWRP recovery on OnePlus Nord 2 5G
Step 1: You will need the platform-tools from the Android SDK on your computer.
This is the official ADB and Fastboot binary provided by Google and is the only recommended one. So download it and then extract it to any convenient location on your PC. Doing so will give you the platform-tools folder, which will be used throughout this guide to install the TWRP Recovery on OnePlus Nord 2 5G.
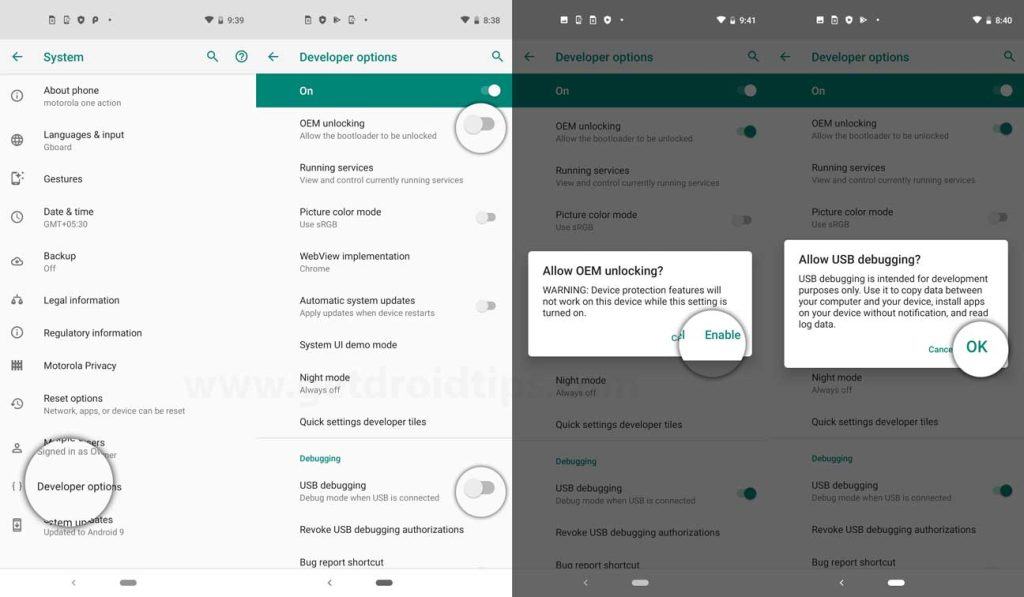
Step 2: Enable USB Debugging and OEM Unlocking
- Head over to the device Settings > System > About Phone > then tap on the Build Number for seven times to enable Developer options mode.
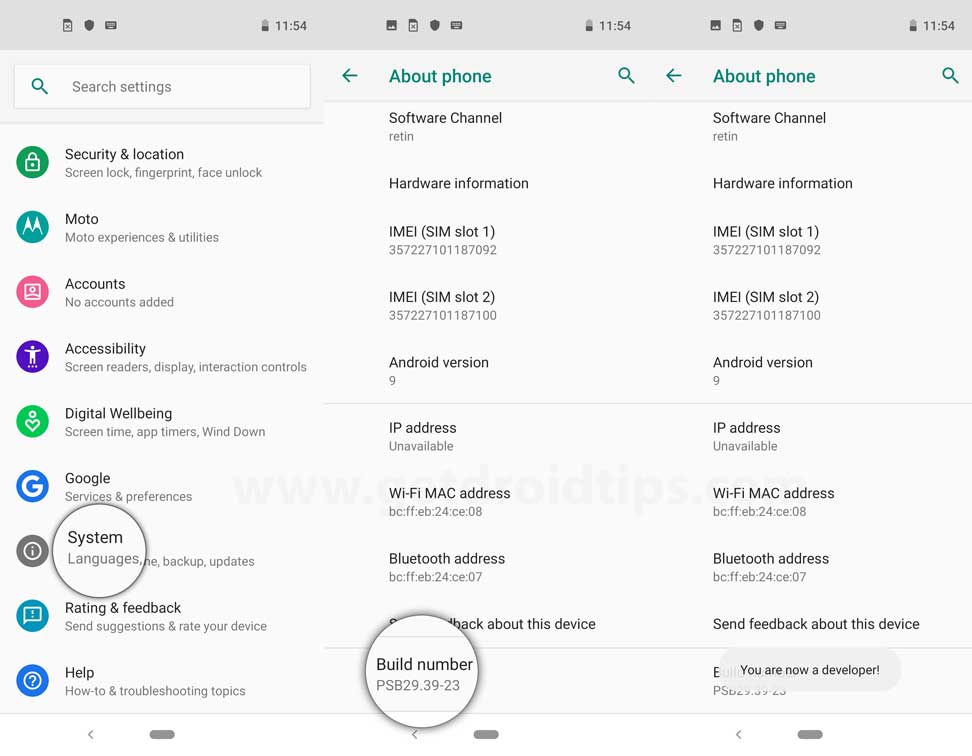
- Now, go to the Developer options in the Settings menu and turn on the toggle to enable USB debugging and OEM unlocking.
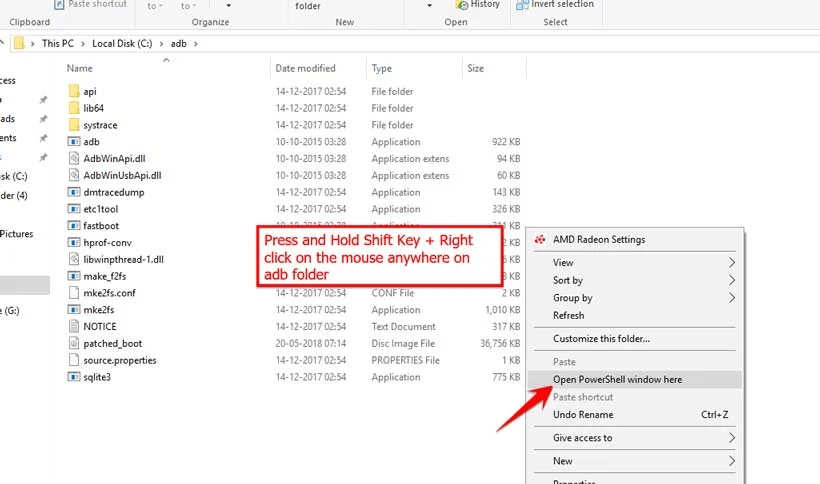
Step 3: Next, open the ADB & Fastboot folder on your computer. Then press and hold the Shift key and right mouse click to open the command window.
- Turn off your device > Press and hold the Volume Up + Power button together for a few seconds to enter into Fastboot mode.
- Connect your device with the PC via a USB cable and type the following code on the command windows and hit enter:
adb reboot bootloader
- Now, your device is connected successfully as a fastboot device.
Step 4: Unlock Bootloader on OnePlus Nord 2 5G
Next up, you will also have to unlock the device’s bootloader. Do keep in mind that doing so will wipe off all the data from your device and could nullify its warranty as well.
- Type the following command and hit enter to check the fastboot device is connected or not:
fastboot devices
- Type in the below command and hit enter to unlock bootloader
fastboot flashing unlock
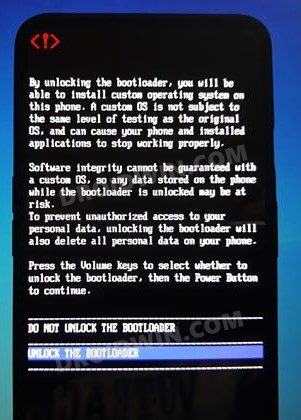
- At this point in time, you will get a confirmation message on your device. Use the Volume keys to select the Unlock the Bootloader option and hit the Power key to confirm it.
- The device will undergo a reset and then the bootloader will be unlocked. Do keep in mind that the first boot might take up to a minute, this is completely normal.
- Furthermore, you will have to log in to Google ID and set up your device from scratch, since a wipe has taken place. That’s it.
Step 5: Download TWRP Recovery for OnePlus Nord 2 5G
You may now grab hold of the TWPR for your device from the below link. Along the same lines, you should also download the vbmeta.img file which will be used to disable verity check. So get them both from the below links
- Current and past versions of TWRP can be found at one of the mirrors below:
- VBMeta.img | GoogleDrive
Once downloaded, rename the recovery file to twrp, so that the complete name becomes twrp.img. Likewise. After that, transfer both (vbmeta.img & twrp.img) these files to the platform-tools folder on your PC.
Step 6: Install TWRP Recovery on OnePlus Nord 2 5G
- Connect your device to the PC via USB cable. Make sure USB Debugging is enabled.
- Then head over to the platform-tools folder, type in CMD in the address bar, and hit Enter. This will launch the Command Prompt.
- Type in the following command in the CMD window to boot your device to Fastboot Mode
adb reboot bootloader
- Now type in the below command to verify the Fastboot Connection
fastboot devices
If you get a device ID followed by the fastboot keyword, then the connection stands successful.
- Then execute the below command to temporary boot your device to TWRP:
fastboot boot twrp.img
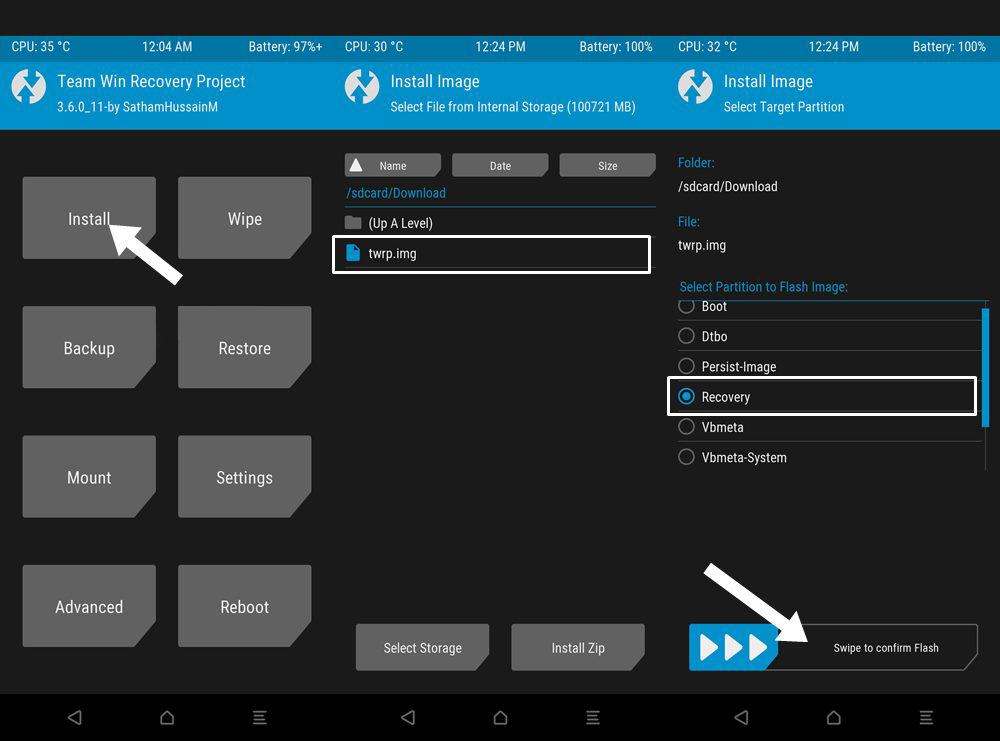
- Now within TWRP, go to the Install section and tap on the Images button.
- After that. navigate to the twrp.img file and select it.
- Then choose Recovery under Partition and perform a right swipe to flash it
- That’s. TWRP has been permanently flashed onto your device. You may now flash the desired mods.
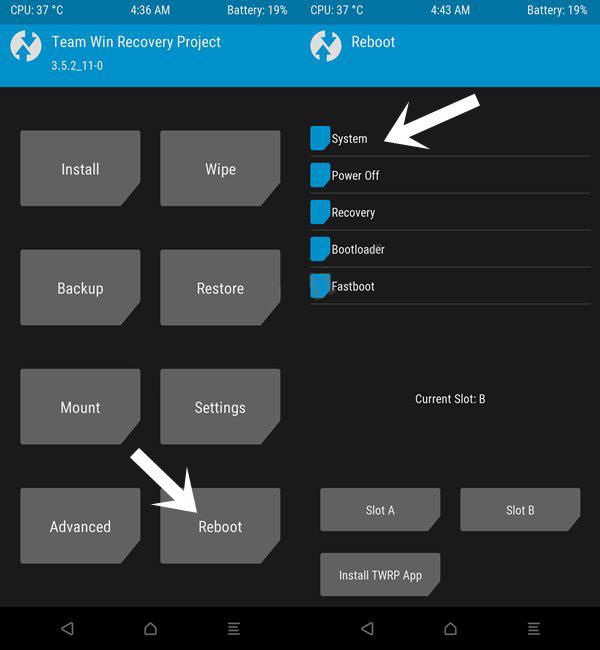
- Once done, go to Reboot and select System to boot your device to the OS.
So these were the steps to install the TWRP Recovery on your OnePlus Nord 2 5G. If you have any queries concerning the aforementioned steps, do let us know in the comments. We will get back to you with a solution at the earliest.