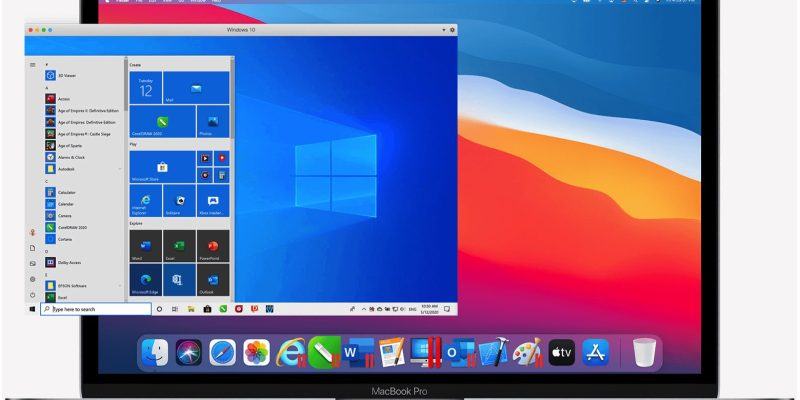
How to install Windows on Mac using Parallels Desktop
There have been a few tutorials to install Windows on Mac (Applies to both M1 and Intel), using Parallels Desktop already, today I wrote a detailed tutorial on hand-held style so that even women can install Windows on Mac M1
Part 1: Preparation: Loading Necessary Tools
Step 1. Download Parallel Desktop 17 here (Version 17 can use the old tool, version 18must use the new Tool PD Runner)
- Parallels Desktop 18
- ParallelsDesktop-17.1.1-51537 | OneDrive
- ParallelsDesktop-17.0.1-51482 | OneDrive
Step 2: Download the Windows installer here
Note: only download 1 installer depending on whether you want to install Windows 10 or Windows 11, new or old, M1 or Intel- M1:
- Intel:
Part 2. Install Parallel Desktop
Step 1: Run the Parallel file downloaded above, click Install to install as usual. When installing, if you encounter a screen asking for Update, close it and choose as shown
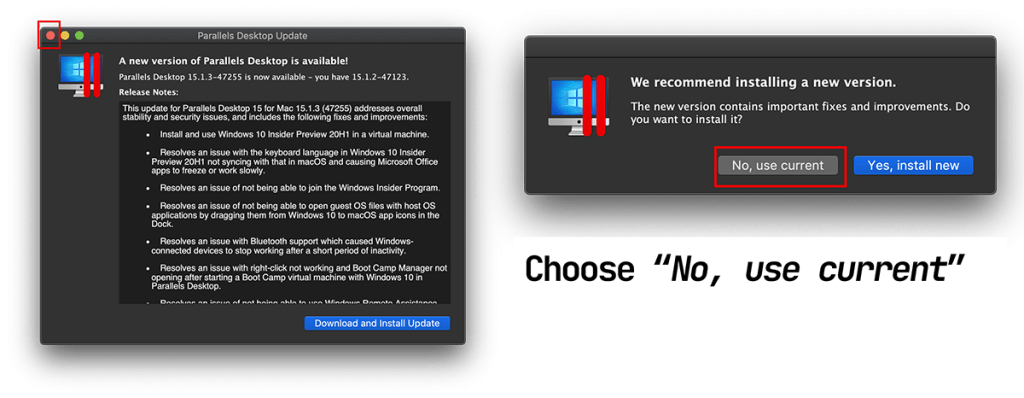
After the installation is complete, you will see the screen below.
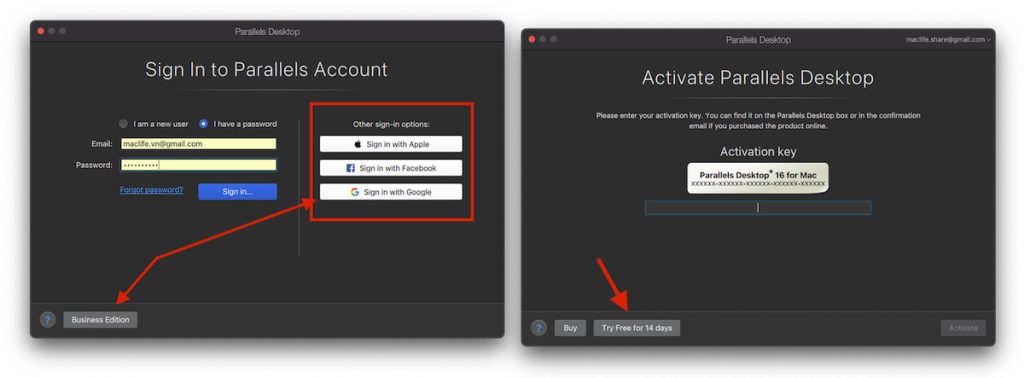
Step 2: Leave that screen as it is, look up the Menubar, click on Parallel’s 2 red parallel tiles icon, select Account & License

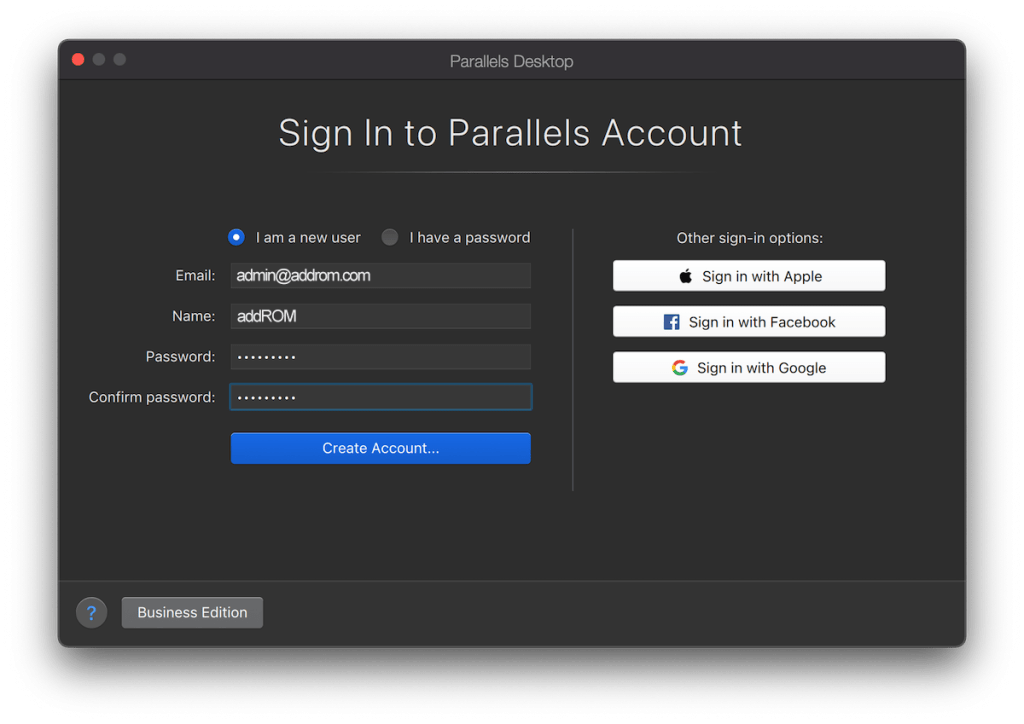
Then use an email that has never been registered with Parallel to login, and select Business Edition . Then choose Try Free 14 days
Note: It takes 14 days of Active Trial Business Edition to use the bypass tool belowStep 3: After the Trial is active, return to the screen in step 1. Usually Parallel will automatically detect the Windows file you downloaded in part 1, you just need to click Create (if you don’t see it, choose Choose Manuel and find it. previously downloaded file.)

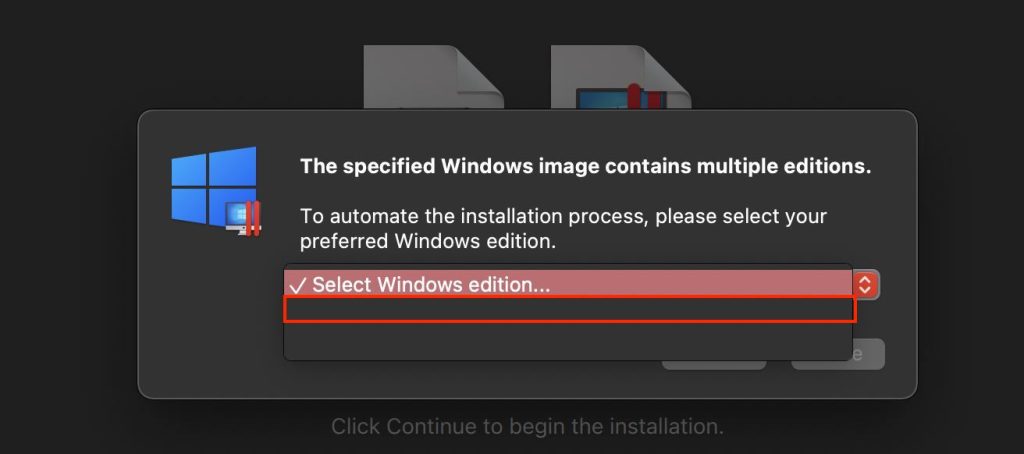
Here, whoever uses the ISO file does not show the Windows version, just select the first white box (red circled below image).
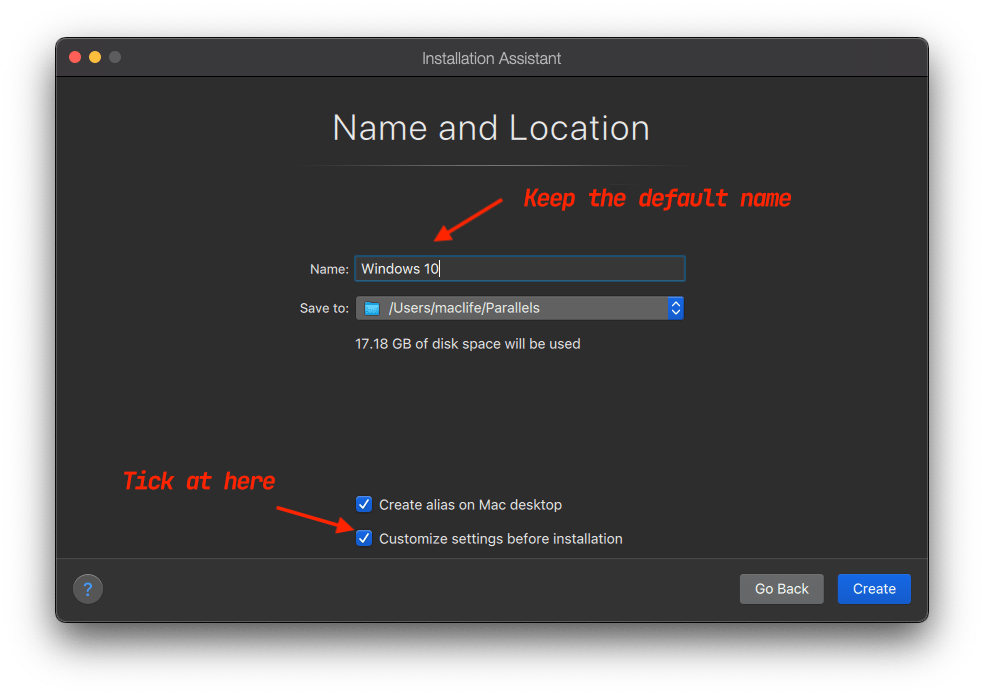
In this step, remember to keep the virtual machine name (Windows 10) and click on Customize Setting as shown.
Wait for the Creating process to run for a while, the Customize screen will appear. By default, the virtual machine has only 3GB of ram and 2 Core, you can increase it to 4GB and 4 Core depending on your needs. The other configuration probably doesn’t need much attention, so leave the default.
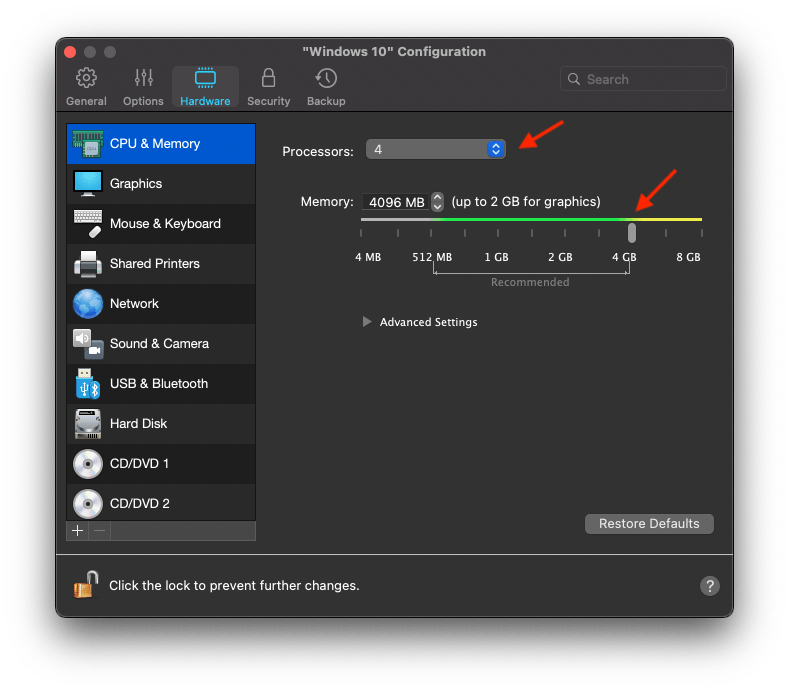
Note: For anyone who installs Windows 11 on Intel in the Customize> Hardware section, click the + sign and select the TPM Chip to avoid errors: “this pc doesn't meet the minimum requirements”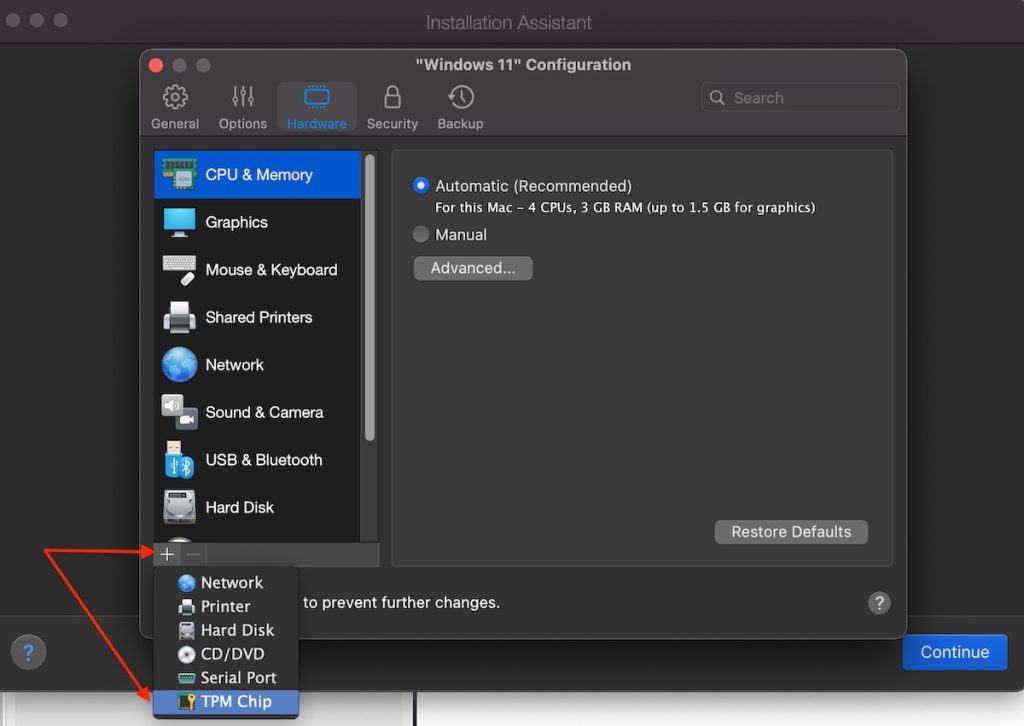
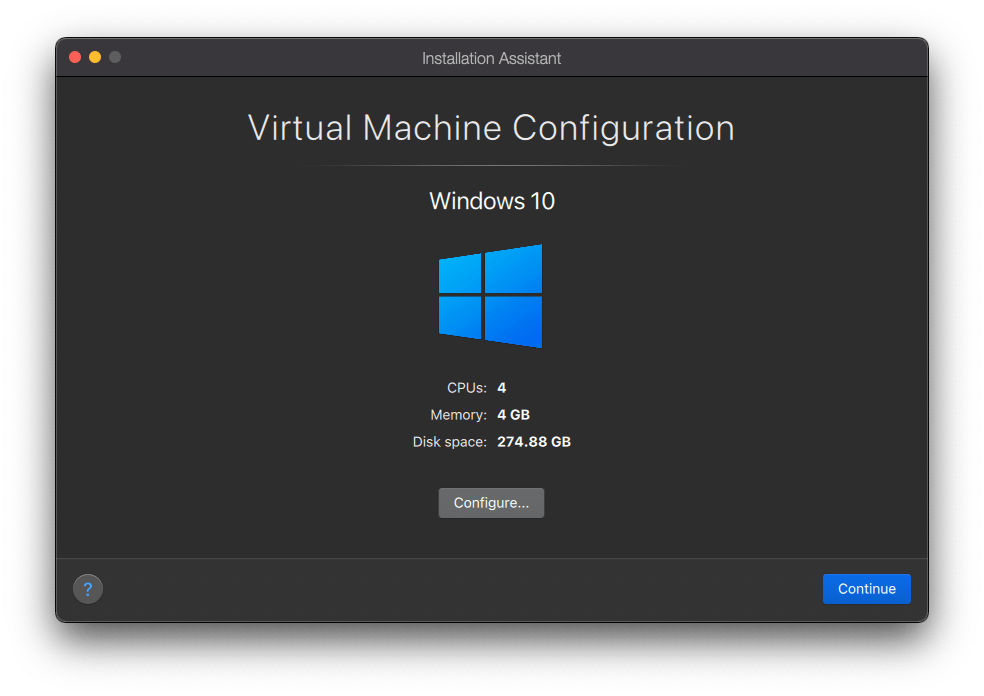
After editing, close, confirm again to be sure, if you don’t like it, you can click Configure to adjust.
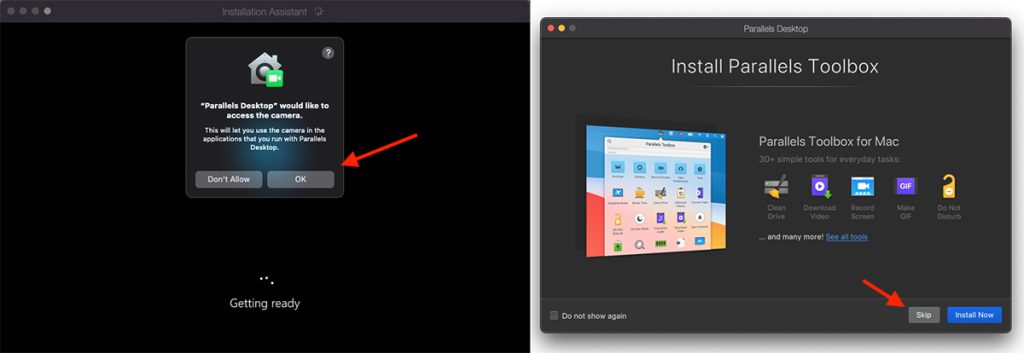
Click Continue to continue. During the installation process, there are popups asking for permission to access folders, cameras, etc., then click OK to allow. If you see a window asking to install Parallel Toolbox, click Skip to skip it.
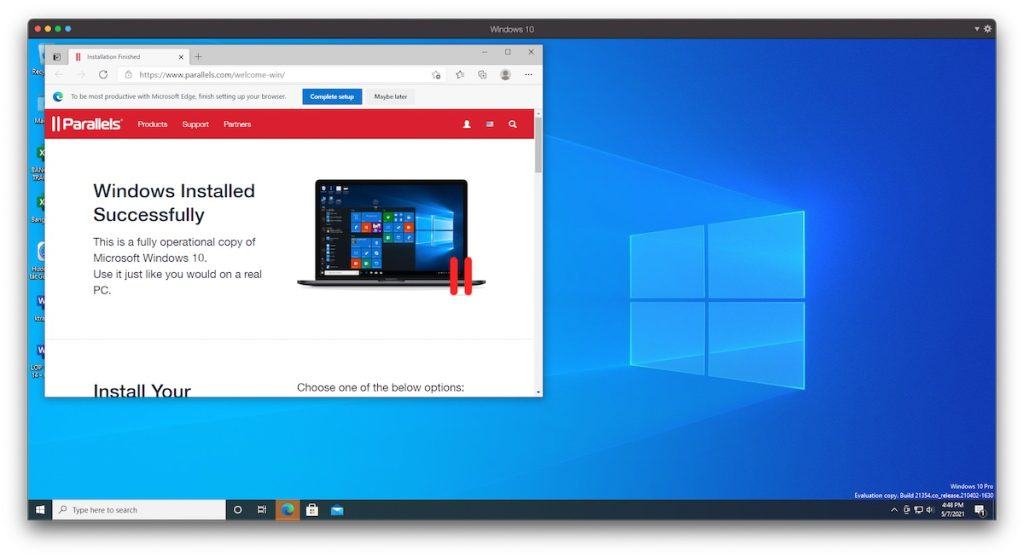
Wait for a while for the installation to complete. That’s it, the installation step is complete.
Part 3: Bypass Trial Paralllel Desktop
If you have followed the instructions above correctly, you just need to download the following additional files:
After downloading, drag to Application and run this command to open it without errors
xattr -cr /Applications/PD\ Partner.appDownload, open the dmg file, then drag the PD Runer file to the Application folder, then run the tool
If you used the old version of PD Runner before, you will get an error as shown below, just click Show in Finder , then delete the file com.lihaoyun6.PD-Runner-Helper and run the tool again

To be sure, run the following command:
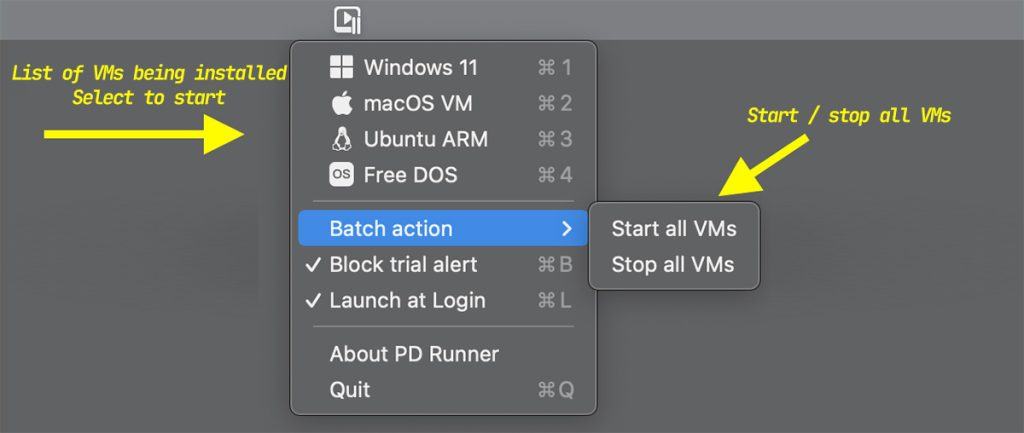
sudo launchctl enable system/com.lihaoyun6.PD-Runner-HelperThen run the PD Runer file in the Application, an icon will appear on the Menubar as shown, just select the virtual machine you want to Start, or Start / Stop all virtual machines depending on…. There is also a Block trial alert option to turn off the trial notification
Some errors and how to fix them:
Some of you do not fully follow the instructions (or have read HD elsewhere before), so the operation process may cause errors, you can check the error below if you see it, you know how to fix it yourself:
1. Error “Unable to connect to Parallels Services” when running the bypass tool

This error is because you have not logged into your Parallel account, you need to log in and activate Trial first before you can run the bypass tool
Note: If you are selecting Block alert trial, you need to remove this checkmark to log in, after logging in and active trial, you can select it again to not show the trial message anymore.
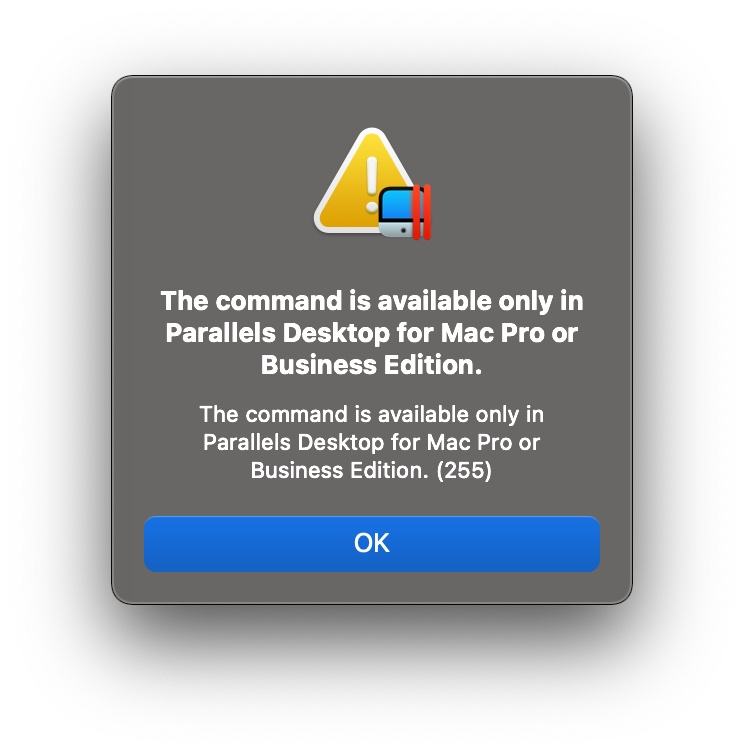
2. Error: “The command is avaiable only in Parallel Desktop for Mac Pro or Business Edition” as shown below: Reread Part 2 – step 2
3. Error Failed to start the VM: The configuration file on you specitied is invalid.
This error is caused by a different virtual machine name from the one configured in Tool Bypass. AE just Shutdown the virtual machine, then click on the 2 parallel red brick icon on the Parallel Menubar > select Control Center > see the virtual machine name, if it’s not correct, then right-click and select Configure > Change the Name section to Windows 10 and run again get the byp4ss tool. Remember that you have to Shutdown the virtual machine to change the name.

4. Error: Trial has Expired right after doing step 2:
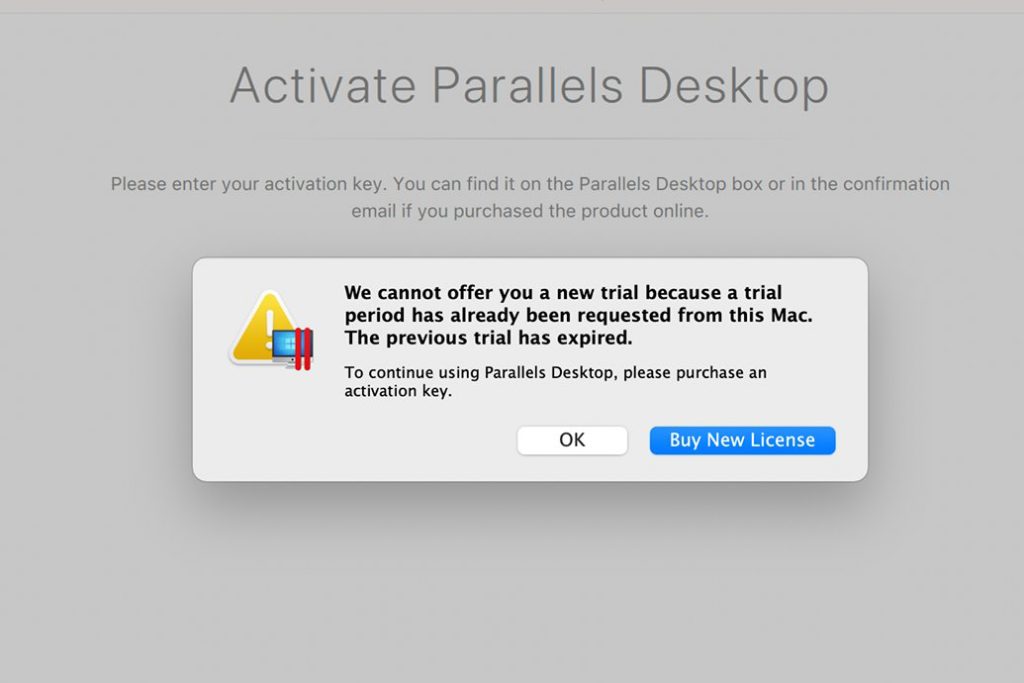
– This case is because your email or device has been registered for a trial with Parallel, you follow the following order:
a. Sign out the account from the previous Parallel.
b. Goto System Preference > Date & time > uncheck: “Set date and time automatically”.
– Set the system time to any amount of time before you signed up for the Parallel Desktop trial last time. If you don’t remember, you can adjust it to February 21, 2021 for sure.
Then use an email that has never been registered in Parallel (you can also enter a random email) to register a new account and log in, then activate Trial as instructed above.
c. You install or run win if win is already available, run the bypass tool once
d. You can then reset the system date and time by ticking the “Set date and time automatically” check mark again. The next time you want to open the virtual machine, just click on the Windows 10 file, even if it’s expired, it can still be opened normally.
e. Error “Unable to perform the operation because “Windows 10″ is not stopped”
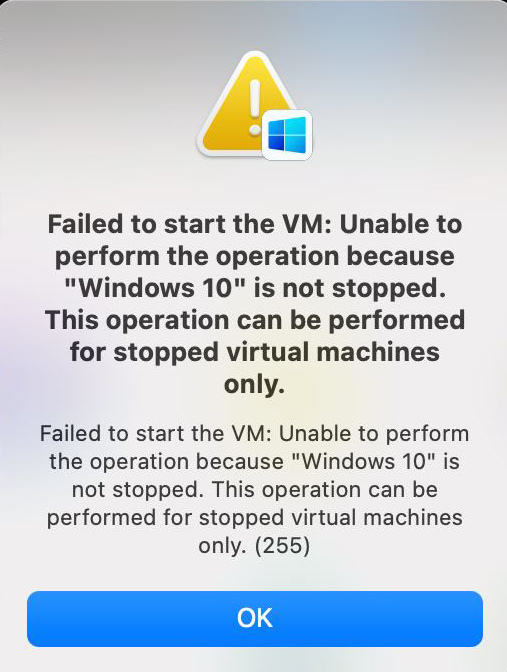
For this error, you just need to return to the Parallel screen, look up and you will see the word Action, go to Action > select Stop (Or you can go to Control Center > Right-click the virtual machine and select Stop ), then run the tool again.
f. Error “This product was actived for a limited period of time has now exprired….”
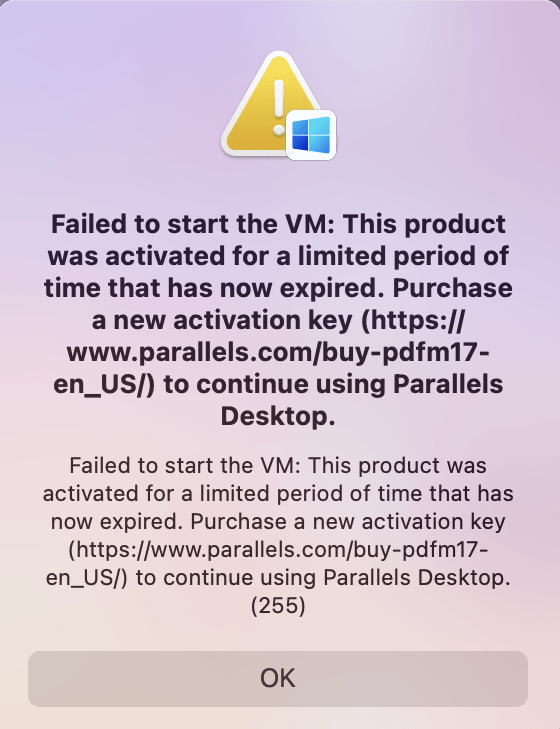
Anyone who encounters this error must have read this article for a long time and was using Parallel Desktop 17.0.1 with the old tool at that time, you just need to download the new Bypass tool to use it.