Key Takeaways: CodeWhale is a fast, open‑source terminal coding agent that turns any LLM-local or cloud-into a safe, approval‑gated pair programmer directly inside your shell.
What is CodeWhale?
CodeWhale is an open‑source “agent harness” that embeds an AI coding agent directly into your terminal, combining a Rust‑based CLI and TUI with a flexible multi‑model runtime. You point it at a project and a model, and it reads your code, edits files, runs shell commands, executes tests, and iterates on failures-while keeping a full audit trail of what happened.
Unlike editor‑bound assistants, CodeWhale is terminal‑native and model‑agnostic: DeepSeek and other open‑weight models are first‑class, but Claude, GPT‑style providers, and self‑hosted engines like vLLM, SGLang, and Ollama all plug in through the same runtime and tools. It’s licensed under MIT and developed publicly on GitHub as a community‑driven project.
You can explore CodeWhale here:
- GitHub repo: https://github.com/Hmbown/CodeWhale
- Website & docs: https://codewhale.net
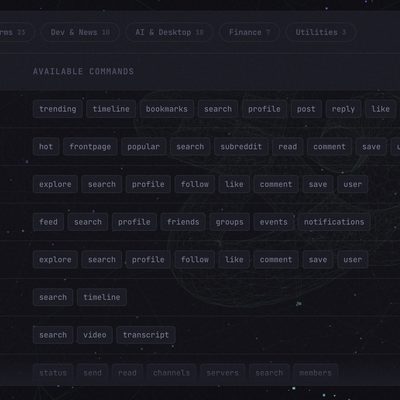
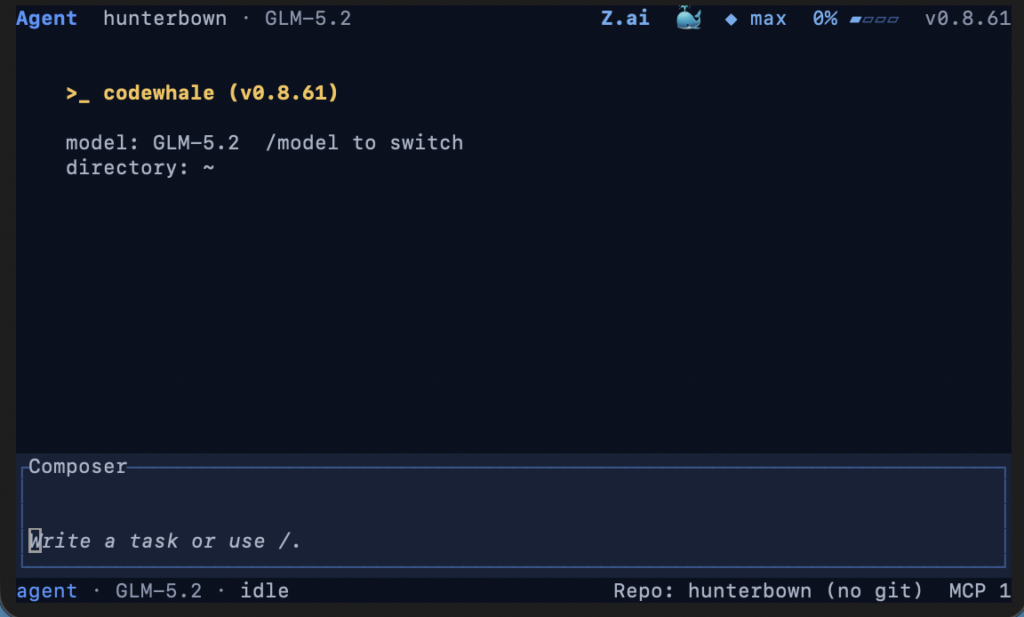
For a sense of the experience, imagine a dark terminal UI that can search your repo, patch files, and run tests while streaming structured reasoning and tool use:
Why CodeWhale is different from other AI coding tools
Most AI coding assistants either live in the browser or bolt onto an IDE, forcing context switches and limiting what they can safely do with your shell and filesystem. CodeWhale is built from the opposite direction: it assumes you live in the terminal and wraps your entire coding session with an agent that understands files, git, and commands as first‑class tools.
Key differentiators:
- Local‑first harness: The agent runs on your machine, with OS‑level sandboxing, side‑git snapshots for rollback, and a workspace boundary so tools only touch the directories you’ve allowed.
- Multi‑provider, model‑aware routing: A single configuration describes 25+ providers; CodeWhale resolves each to a concrete route with real context limits, pricing, and wire protocol instead of guessing.
- Serious safety model: Plan/Agent/YOLO modes, approval‑gated tools, and a nested “constitution” that defines how the agent resolves conflicts between user requests, project rules, and live evidence.
If you already orchestrate self‑hosted models (vLLM, Ollama, etc.) or use multiple cloud LLMs, CodeWhale gives you a unified, auditable way to let them act on your codebase without blind trust.
Core features at a glance
CodeWhale ships with a deep feature set tuned for real‑world development.
- Interactive TUI & CLI: Rich terminal UI built with ratatui, plus a headless
codewhale execCLI for scripts, CI, and batch workflows. - Persistent, resumable sessions: Sessions survive restarts and laptop sleep; you can resume or fork them later for branching explorations.
- Goal‑driven loops:
/goallets you set an objective; the agent keeps iterating (read → patch → test → verify) until the work is done or blocked. - Multi‑agent Fleet: Headless workers coordinated by
codewhale fleetfor running multiple tasks in parallel, each with roles, profiles, and loadouts. - MCP in both directions: CodeWhale can consume external MCP tools and expose itself as an MCP server, so editor agents or other orchestrators can call into it.
Installation options
CodeWhale is distributed as prebuilt binaries and through popular package managers; you can install it via npm, Cargo, Docker, Nix, Scoop, and more.
Quick install with npm (recommended)
If you have Node 18+ available, the npm route is the fastest way to go from zero to a working agent.
npm install -g codewhale
codewhale --version   # e.g. 0.8.65
The npm wrapper downloads platform‑specific, SHA‑256‑verified binaries from GitHub Releases and installs three commands: codewhale (main CLI), codew (alias), and codewhale-tui (explicit TUI entrypoint).
This approach avoids building from source and works well on macOS, Linux, and WSL.
Install with Cargo (Rust toolchain)
If you prefer building from source or want maximum control, use Cargo with Rust 1.88+.
cargo install codewhale-cli --locked
cargo install codewhale-tui --locked
On Linux, you’ll need system build dependencies first, such as:
sudo apt-get install -y build-essential pkg-config libdbus-1-devOnce compiled, binaries land in ~/.cargo/bin (or your Cargo bin path) and can be used the same way as the npm‑installed ones.
Other install paths (Docker, Nix, Windows)
CodeWhale’s README and website document several alternative install methods.
Docker:
docker pull ghcr.io/hmbown/codewhale:latestThis is useful for running CodeWhale in contained environments or attaching it to a devcontainer.
Nix:
nix run github:Hmbown/CodeWhaleNix flakes make it easy to pin exact versions and integrate CodeWhale into reproducible dev setups.
Windows:
On Windows, you can either use the NSIS installer from GitHub Releases or install via Scoop:
scoop install codewhaleLegacy deepseek-tui Homebrew formulae and CN mirrors (e.g., cnb.cool) are documented for users behind restrictive networks or with existing DeepSeek‑TUI setups.
First‑run setup: Connecting a model provider
Once CodeWhale is installed, you need to connect it to at least one provider and verify the environment.
1. Configure provider credentials
Run a few diagnostics from your terminal:
codewhale auth set --provider deepseek
codewhale auth status
codewhale doctor
auth setstores API keys or endpoints in~/.codewhale/config.toml(legacy~/.deepseek/configs are still read).auth statusshows which providers are ready.doctorchecks model routing, tools, sandboxing, and filesystem permissions.
You can swap providers at any time, or rely on environment variables like ANTHROPIC_API_KEY for native Anthropic support.
2. Start the TUI
Once auth is set up, launch the interactive agent:
codewhaleYou’ll see a full‑screen TUI with:
- A header showing workspace, provider, and model.
- A transcript pane for conversation and tool traces.
- A composer at the bottom for prompts and slash commands.
From there, you’re ready to ask CodeWhale to inspect your project, run tests, or implement changes.
Understanding modes: Plan, Agent, and YOLO
CodeWhale’s TUI has three main modes that control how aggressively it uses tools like file edits and shell commands.
- Plan: Design‑first, read‑only. The agent can read files, search, and design plans, but cannot execute shell commands or apply patches. Ideal for audits and high‑level design sessions.
- Agent: Multi‑step execution with approvals. The agent can run shell commands and tools but asks for confirmation on risky actions; file writes are generally allowed.
- YOLO: Full trust mode. Shell execution and tools are auto‑approved; best reserved for trusted repos and throwaway environments.
You can:
- Press
Tabto cycle between Plan → Agent → YOLO. - Run
/modeor/mode agent//mode plan//mode yoloto switch explicitly.
This separation between “how much the agent can do” and “which model it’s using” gives you fine‑grained control over safety vs. speed.
Everyday workflows in the TUI
Once you’re comfortable with modes, the real value is in daily coding workflows.
Reading and explaining code
Ask CodeWhale to map a repo or explain unfamiliar code:
/goal Map the core services in this monorepo and explain how they talk to each other.It will:
- Use read‑only tools to scan the tree.
- Summarize key modules, routes, and data flows.
- Keep that goal visible in the Work sidebar until you clear or change it.
You can then drill down with specific follow‑ups like “Explain the auth middleware” or “Show me where we construct this SQL query.”
Implementing changes
In Agent mode, you can ask for concrete edits:
Refactor the user onboarding flow to use async/await instead of callbacks,
and update any tests that break.
CodeWhale will:
- Search files, propose patches, and run tests via
exec_shell. - Show diffs and command output inline.
- Ask before running potentially dangerous commands, depending on your approval mode.
If the change goes sideways, /restore can roll back a turn using side‑git snapshots stored outside your main .git history.
Headless and CI usage with codewhale exec
Beyond interactive use, CodeWhale’s exec subcommand is designed for scripts and CI pipelines.
Example: automatically fix a failing test run:
codewhale exec \
  --allowed-tools read_file,edit_file,exec_shell \
  --max-turns 10 \
  "Fix the failing tests in this workspace and explain what you changed."
Key flags:
--allowed-tools/--disallowed-tools: White‑/blacklist tools; deny rules win.--max-turns: Cap the number of tool‑using turns.--output-format stream-json: Emit one JSON object per line for backend harnesses.
You can also resume or fork existing sessions:
codewhale exec --resume latest "continue fixing lint errors"
codewhale fork --last
This makes it easy to incorporate CodeWhale into GEO‑style developer workflows, where agents run routine maintenance tasks but humans review diffs.
Safety, rollback, and workspace boundaries
Because CodeWhale can modify files and run commands, it has a strong safety model built into the harness.
- Workspace boundaries: By default, file tools are restricted to the
--workspacedirectory;/trustor YOLO mode can relax this when needed. - Approval system: You can set
approval_modetosuggest,auto, ornevervia/config, controlling how often the agent asks before acting. - OS sandboxing: macOS uses Seatbelt, Linux uses Landlock and seccomp (and bubblewrap where available), and Windows has dedicated guards.
- Rollback:
/restoreuses side‑git snapshots to revert changes without mutating your real git history, so you always have an escape hatch.
For teams, you can add .codewhale/constitution.json to define project‑level invariants, verification policies, and branch rules that outrank ad‑hoc instructions when they conflict.
Multi‑model and self‑hosted setups
If you run local models or juggle multiple providers, CodeWhale’s routing layer is a major selling point.
Supported categories include:
- Hosted open‑weight providers: DeepSeek, OpenRouter, GLM/Z.ai, Kimi/Moonshot, MiniMax, Novita, SiliconFlow, Together, and more.
- Self‑hosted runtimes:
vllm,sglang, andollamaagainst your own LAN boxes-no API keys required. - Closed providers: Native Anthropic Messages API, NVIDIA NIM, and OpenAI‑compatible gateways.
You can switch mid‑session with:
/provider deepseek
/model auto
CodeWhale then resolves the best route for that request, adjusting context budgets and cost displays based on real provider metadata instead of hardcoded guesses.
Tips for integrating CodeWhale into your workflow
Given your terminal‑heavy, self‑hosted style, CodeWhale fits well alongside Docker, n8n, and your existing automation stack.
Practical ideas:
- Per‑repo constitutions: Define branch and verification policies in
.codewhale/constitution.jsonfor critical repos so the agent never pushes risky changes without tests. - Skills library: Capture repeatable workflows as “skills” in
~/.codewhale/skills/and load them with/skillsfor common tasks like “add logging”, “tighten types”, or “prep release notes.” - Fleet for batch tasks: Use
codewhale fleet run tasks.json --max-workers 4to run multiple refactors or SWE‑bench‑style tasks in parallel, with durable logs in.codewhale/fleet.jsonl. - VS Code + terminal combo: Install the CodeWhale VS Code extension for inline hints, while keeping the main agent loop in your terminal pane.
For more details, releases, and deep‑dive docs, start with:
- GitHub: https://github.com/Hmbown/CodeWhale
- Website & docs index: https://codewhale.net