Key Takeaways: Openvid turns any browser into a full-featured demo studio – screen-record, add 3D zooms, device mockups, and custom backgrounds, then export cinematic 4K videos without installing a single binary.
What is Openvid?
Every developer, indie maker, and product manager eventually faces the same problem: how do you turn a flat screen recording into a polished product demo that actually sells your work? Tools like Screen Studio and Tella solve this beautifully but are paid and closed-source. Openvid takes the opposite approach: a fully open-source, browser-based studio that gives you Screen Studio-level polish, end-to-end, without ever leaving your tab.
Openvid is published on GitHub at CristianOlivera1/openvid under an open-source license, with a live hosted demo at openvid.dev. It is built on Next.js, TypeScript, FFmpeg.wasm, Three.js, and Supabase, and it runs your entire video pipeline – capture, edit, render, and export – directly in the browser. There is no Electron binary to download, no server-side render farm, and no watermark on your final cut.
Why Openvid stands out
Most “online video editors” are either thin wrappers around server-side rendering pipelines or hobby projects that fall apart once you need a 4K export. Openvid sits in a sweet spot: it is genuinely free, genuinely open, and genuinely capable of producing the kind of demos you would expect from a paid SaaS.
Real browser-native rendering. The video pipeline runs on FFmpeg.wasm with a Canvas-based preview and a MediaBunny-optimized encoding path. Your footage never leaves your machine during editing.
Cinematic motion out of the box. Smooth zoom-in and zoom-out at any timeline moment, easing curves, and a 3D camera that tilts and rotates around points of interest. Combined with adjustable X/Y perspective, this is the feature that gives demos that polished, professional feel.
Device mockups and backgrounds that look professional. Drop your recording into Safari, Chrome, Arc, or Samsung frames. Pick from 100+ pre-designed backgrounds, your own image, an Unsplash photo, or a solid color or gradient. Add dynamic padding, rounded corners, shadows, and blur – the entire visual language of modern product marketing, available in a sidebar.
Real export formats at real resolutions. Export up to 4K (3840×2160) at 30 fps as MP4 (H.264) or WebM (VP9 with transparent background support). Need a GIF for a README? An AVIF for a hero image? A PNG of a single frame? Openvid handles all of those from the same project.
A real canvas, not just a video filter. You can layer shapes, custom text, SVG vector graphics, and PNG/JPG/WebP overlays above or below the video. Audio is multi-track with per-track volume, master volume, and auto-trim to match video duration.
Installing openvid
You have two clean paths: use the hosted version, or self-host the open-source code. Both are documented in the repository.
Option 1: Use the hosted live demo
The fastest way to try Openvid is to visit openvid.dev directly in Chrome, Edge, or Arc. You can sign in with Google, GitHub, or Twitch via Supabase Auth and start a project immediately. No install, no configuration. This is the right choice if you just want to record a screen and ship a demo today.
Option 2: Self-host from source
If you want full data ownership, custom branding, or to contribute back to the project, self-hosting is straightforward. Openvid is a Next.js application, so all you need is Node.js and pnpm.
# Clone the repository
git clone https://github.com/CristianOlivera1/openvid.git
cd openvid

# Install dependencies
pnpm install

# Configure environment variables
cp .env.example .env
# Open .env and add your Supabase credentials

# Start the development server
pnpm dev
Then open http://localhost:3000 in your browser. For production, build with pnpm build and serve with pnpm start, or deploy to Vercel, Netlify, or any platform that supports Next.js.
The only external service you really need is a Supabase project, which provides authentication (Google, GitHub, Twitch OAuth) and will eventually power cloud backups via Supabase Storage. You can create a free project at supabase.com, copy the URL and anon key into your .env file, and you are ready to go.
System requirements
Because rendering happens in the browser, your local machine does the heavy lifting. For comfortable 4K editing, plan for at least 8 GB of RAM, a modern Chromium-based browser, and hardware-accelerated graphics. Lower resolutions (1080p and 720p) work fine on most laptops from the last five years.
Using Openvid day to day
The editing workflow is intentionally linear and uncluttered. A typical session looks like this.
Step 1 – Capture or import your footage
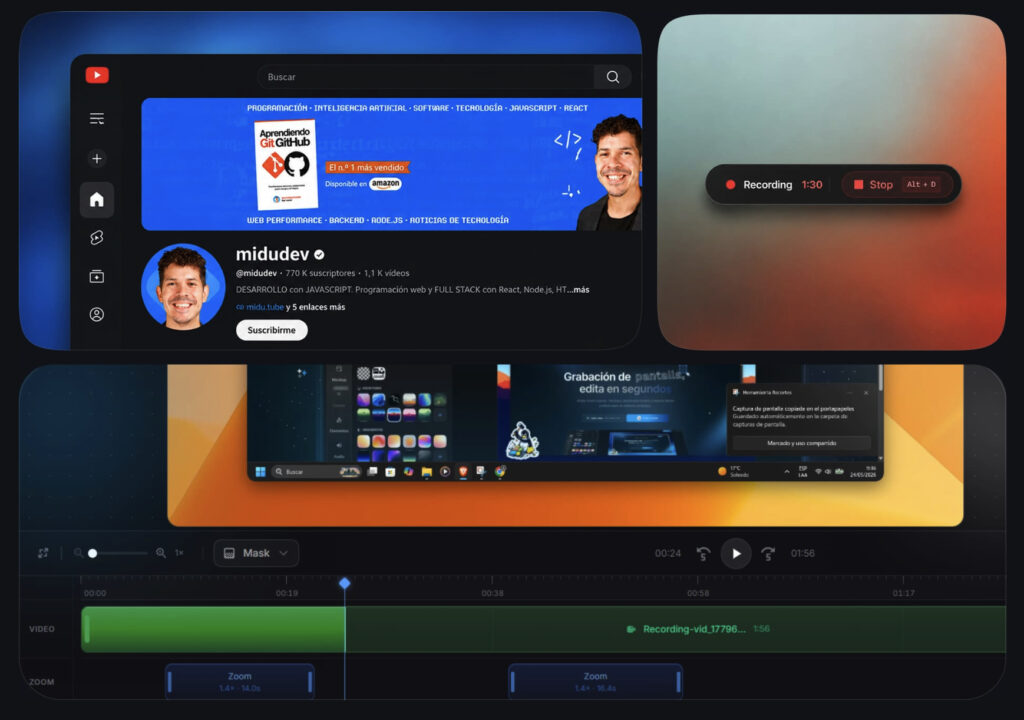
Open a new project and either click “Record screen” to capture directly in the browser, or drag-and-drop an existing MP4, WebM, QuickTime, or MKV file onto the canvas. Recordings are stored locally in IndexedDB, so they remain available even if you close the tab.
Step 2 – Choose a background and frame
Open the Backgrounds panel and pick from the 100+ presets, a custom color, a gradient, or an Unsplash image. Then add a device mockup – Safari, Chrome, Arc, or Samsung – and adjust padding, corner radius, shadow strength, and any blur you want.
Step 3 – Add zooms and 3D camera moves
Scrub to a moment that deserves emphasis, click “Add zoom,” and set the target scale, duration, and easing. For an even more cinematic feel, enable the 3D camera and define points of interest; Openvid will tilt and rotate around them with adjustable perspective. This single step is usually what separates an amateur screen recording from a demo that looks like it was made by a marketing team.
Step 4 – Layer text, shapes, and overlays
Use the canvas panel to add titles, callouts, arrows, SVG logos, or PNG overlays. Each element lives on its own layer that you can place above or below the main video. Combine this with the audio panel to add a voiceover track, background music, or both – with per-track and master volume control.
Step 5 – Apply mockups to still images
Beyond video, Openvid lets you apply 3D mockups to still images with masking, scale, rotation, perspective, and position controls. Great for landing-page hero sections or social media posts that share a visual language with your demo video.
Step 6 – Export
When you are happy with the preview, hit Export and pick your target. The lineup is generous: 4K, 2K, 1080p, 720p, or 480p; MP4, WebM (with optional transparent background), GIF, PNG, WebP, JPG, or AVIF. The render happens in your browser via FFmpeg.wasm, and you keep the final file locally.
Who Openvid is for
Openvid is a particularly strong fit for several audiences. Indie developers and side-project builders who want a Screen Studio-quality demo for their landing page without paying a subscription will love it. Open-source maintainers can record once, generate a 4K MP4 for their README, a transparent WebM for documentation, and a GIF for social – all from one project. SaaS marketers and product managers can self-host a branded version for the entire team. And designers will appreciate the still-image mockup workflow with 3D transforms and masking.
If you need a fully offline desktop app, deep timeline editing with hundreds of clips, or AI auto-captions today, dedicated tools may still serve you better. But for the 80% case – turning a single screen recording into a polished, shareable demo – Openvid is one of the most pragmatic open-source releases of the year.
Final thoughts
Openvid is proof that the line between “open-source side project” and “genuinely usable product” keeps moving in our favor. With a hosted demo you can try in 30 seconds, a self-host path that takes about five minutes, and a feature list that rivals paid competitors, it deserves a serious look from anyone who ships software and needs to show it off.
Star the GitHub repository, try the live editor, and the next demo you ship can look like it came out of a studio – because, in a way, it did.