The first successful boot after flashing a custom ROM feels like the finish line. The boot animation appears, Android loads, and the phone finally reaches the setup screen.
That is a good sign, but it only confirms that the device can start. It does not tell you whether the build came from the expected source, whether debugging features remain enabled, whether restored apps have excessive permissions, or whether important network tools still behave correctly.
Before adding payment cards, signing in to your primary email, or restoring years of personal data, spend some time establishing a clean baseline. The following checks help turn a successful flash into a device you can use with fewer surprises.
Confirm exactly what you installed
Begin with the build itself. Open the Android version or About Phone screen and record the ROM name, version, build number, Android security patch level, kernel version, and baseband version where available.
Compare those details with the release page from which you downloaded the ROM. The device codename matters as much as the commercial model name. Two phones sold under nearly identical names may use different hardware, regional firmware, or radio components.
It is also worth distinguishing among official, community, and unofficial builds. An official build is normally distributed through the ROM project’s recognized channels. A community build may be well maintained but supported by a smaller team. An unofficial port can still work, although its update schedule and review process may depend almost entirely on one maintainer.
Keep the original download page, release notes, and checksum with your records. If the developer publishes a cryptographic hash, compare it with the file you downloaded. A matching hash confirms that the file has not changed since the publisher calculated that value. It does not, by itself, prove that the publisher or the ROM is trustworthy.
Identify where future updates will come from
A newly installed ROM can be current on flashing day and outdated several months later. Before using it as a daily driver, find out how updates are delivered and who is responsible for them.
Some ROMs include a functional over-the-air updater. Others require users to download each new build and install it through recovery. Unofficial builds may stop without much notice when the maintainer changes devices or no longer has time for the project.
Check whether the project publishes release notes and security patch information. Also learn whether an update can be installed over the existing build or requires a clean flash. This affects how often you need to back up data and how much time routine maintenance will take.
Do not assume that a newer Android version automatically includes every relevant firmware update. The ROM, kernel, vendor image, radio firmware, and bootloader can follow different update paths depending on the device.
Review bootloader, root, and debugging status
The settings used during installation are not always the settings you want during ordinary use.
Start by checking whether root access is present and whether you intended to keep it. If root was needed only for a temporary installation step, remove it according to the tool or ROM developer’s documented process. If you keep root, review which apps have been granted access rather than automatically approving every request.
Next, inspect Developer Options. Disable USB debugging and wireless debugging when they are no longer needed. Revoke previously authorized debugging computers if the menu provides that option. Also check whether “Install unknown apps” remains enabled for a browser, file manager, or messaging app used during setup.
An unlocked bootloader may be required for a custom ROM. Do not relock it simply because an unlocked state sounds less secure. Relocking on an unsupported ROM or with an incompatible verification setup can prevent the phone from booting. Follow the documentation for the exact device and ROM, and leave it unlocked when the project does not explicitly support relocking.
Rebuild the network configuration carefully
Flashing a ROM usually removes saved networks and app-level network settings, but restored backups can bring some of them back. Review the Wi-Fi list, mobile access-point settings, proxy configuration, Private DNS selection, and user-installed certificates before reconnecting every account.
This is also the right time to reinstall any VPN for Android you normally use and confirm that the app supports the ROM’s Android version. Install it through Google Play or obtain the APK from the provider’s official website rather than downloading a repackaged copy from an unrelated APK repository.
X‑VPN, for example, supports installation through Google Play and an official Android APK on compatible devices. Providing both routes can be useful for custom-ROM users rebuilding a phone without the standard Google app environment.
A VPN still has a limited role in this checklist. It can encrypt traffic between the phone and a VPN server and change the public IP address seen by online services. It cannot verify the ROM, correct an unsafe kernel, remove root access, or make an untrusted system image safe.
Test what happens when the connection changes
Seeing a VPN icon in the status bar is not enough to confirm that the entire setup behaves as intended.
Connect the phone to Wi-Fi, activate the VPN, and confirm that browsing works. Then switch to mobile data, lock and wake the screen, move between access points, and restart the device. Check whether the VPN reconnects, remains disconnected, or waits for manual input after each event.
Battery optimization and background restrictions deserve attention. Some ROMs apply aggressive power management that suspends VPN or messaging apps after the screen has been off for a while. If the VPN repeatedly disconnects, review the ROM’s background-app settings before assuming the problem is with the network provider.
If continuous VPN use matters, test the VPN kill switch rather than merely enabling it. Interrupt the VPN connection under controlled conditions and check whether internet traffic stops or falls back to the regular connection. System-level and app-level implementations may behave differently, and available options depend on the VPN app and Android build.
Run these tests again after major ROM updates. Changes to battery management, network services, or Android’s VPN implementation can alter behaviour that previously worked.
Restore apps in small groups
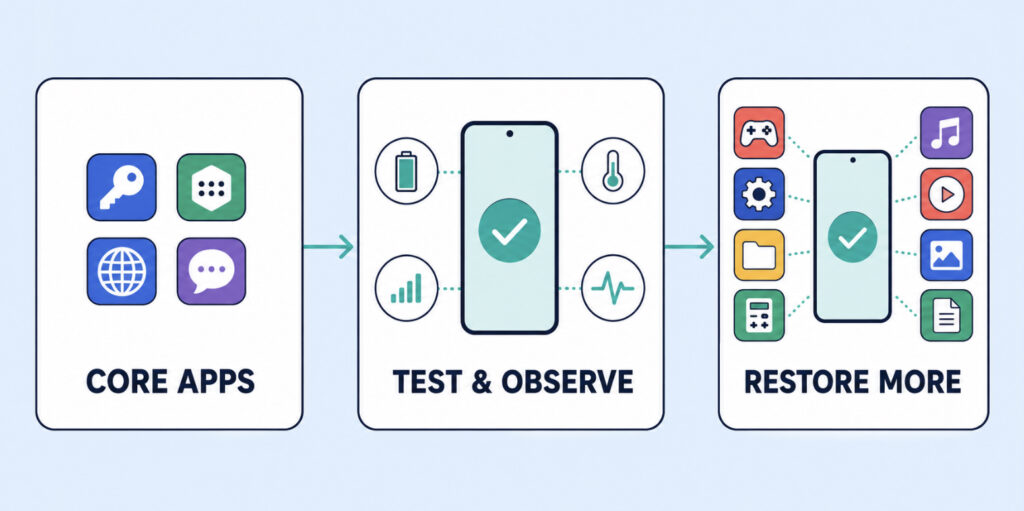
Restoring every app at once saves time initially, but it makes troubleshooting much harder. If the phone begins overheating, draining its battery, displaying ads, or losing network connectivity, there may be dozens of possible causes.
Begin with a small core: a password manager, authenticator, primary browser, communication apps, and any backup tool required to recover your data. Use the phone for a while before adding games, utilities, automation tools, and less frequently used APKs.
Be especially careful with backups created on a different ROM or Android version. Restoring ordinary app data is usually less risky than restoring system settings. Old system configuration files can conflict with the new ROM and create problems that look like defects in the build.
When sideloading is necessary, verify that the APK comes from the developer or another source you deliberately trust. Revoke that app’s permission to install unknown packages once the installation is complete.
Recheck high-impact permissions
A clean flash gives you a rare chance to rebuild permissions deliberately.
Open Android’s privacy or permission manager and review location, camera, microphone, contacts, files, and nearby-device access. Then inspect permissions with broader control over the phone, including Accessibility, notification access, device administrator, display over other apps, usage access, and VPN configuration.
These high-impact permissions are sometimes legitimate. A password manager may need Accessibility support for autofill on certain configurations. A smartwatch app may require notification access. The important question is whether you recognize the app and understand why it needs the permission.
Also inspect the ROM’s preinstalled system apps. Do not disable random components simply because their names are unfamiliar; core services often have technical package names. Look up the component in the ROM’s documentation or community before removing it.
A useful baseline is to take screenshots or record which apps hold sensitive permissions after setup. If something changes later, you have a reference point.
Check services that depend on device integrity
Custom ROMs can affect more than visual customization. An unlocked bootloader, root access, an uncertified build, or altered device-integrity status may change how certain services treat the phone.
Test the apps you genuinely rely on before moving all your daily activity to the new ROM. These may include banking apps, digital wallets, workplace management tools, government identity apps, contactless payment, protected video services, and games with anti-cheat systems.
Streaming quality can also be affected if the device’s DRM level changes. A service may still open but limit playback resolution.
Avoid treating these checks as something to “defeat.” A failed integrity check may represent an intentional security decision by the service provider. Decide whether the ROM’s benefits are worth the compatibility trade-off, or whether a stock device is more practical for sensitive services.
Create a known-good recovery point
Once the phone has remained stable for several days, document the working configuration.
Save the ROM version, recovery version, firmware version, kernel, installed add-ons, and any special installation order. Keep copies of the matching ROM package and recovery instructions somewhere other than the phone itself.
Create a backup using a method supported by the current recovery and ROM. Do not assume that every backup contains everything required for a complete restore. Internal storage, app data, authentication secrets, and eSIM information may follow different backup rules.
Finally, know how to return to the previous working build. Keep the required firmware files, USB drivers, flashing tools, and device-specific recovery steps accessible from another computer. A recovery guide stored only on a phone that no longer boots is not especially helpful.
After major updates, repeat the most important checks: build identity, debugging status, permissions, app compatibility, VPN behaviour, and backup recovery. The process becomes faster once you have a stable baseline.
A custom ROM can extend the useful life of a phone, reduce unwanted software, and provide far more control than the original system. That control also shifts more responsibility to the person installing it. The flash is the exciting part, but careful verification afterward is what makes the device dependable enough for daily use.