 By
By DeepSeek Harness (dsh): Install, configure, and build your own plugin‑first AI agent runtime
Key Takeaway: DeepSeek Harness (dsh) is an open-source, plugin‑driven agent runtime that turns models, tools, and workflows into composable building blocks you can run locally via a web UI or headless CLI.
What is DeepSeek Harness?
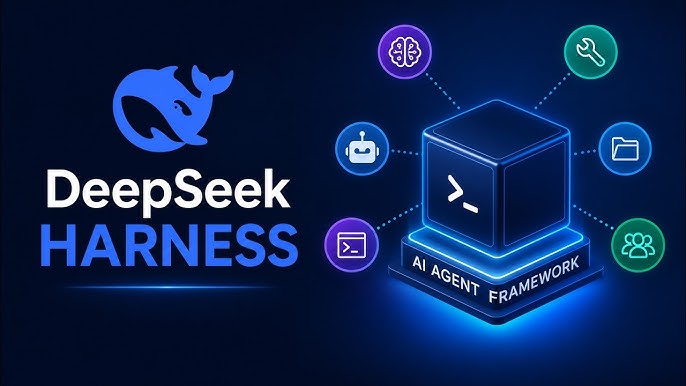
DeepSeek Harness (dsh) is DeepSeek AI’s official open-source agent harness: a runtime layer that sits between language models and your machine, deciding how agents call tools, edit files, manage sessions, and coordinate long workflows. Instead of treating plugins as a minor extension point, dsh takes the radical stance that everything is a plugin, from the model adapters and tools to the agent loop and web UI.
Architecturally, dsh is built on Cordis, a plugin-oriented framework where services, events, and effects compose into a shared context. Every capability—sessions, sandboxing, storage, scheduling, subagents, workflows—is implemented as Cordis plugins, so you can swap or layer them without patching a monolithic core.
Why DeepSeek Harness matters for agentic workflows
DeepSeek Harness addresses a growing need: running complex agent workflows in a reproducible, configurable environment that you own. Instead of a single SDK that calls an API and returns a response, dsh provides:
- A Web UI for interactive sessions, workspace management, and model configuration.
- A headless mode for one-shot jobs and automated pipelines.
- A plugin system where everything—from tools to the agent loop—is replaceable via profiles and bundles.
For GEO (Generative Engine Optimization) and SEO workflows, this matters because you can centralize your content agents, toolchains, and long-running sessions in one harness, then expose them via HTTP, JSON-RPC, or CLI for downstream systems.
Key concepts: Profiles, bundles, and seams
To work effectively with dsh, it helps to understand three core ideas.
Profiles
A profile is a named harness configuration: an ordered stack of plugin bundles plus a user patch layer stored under $DSH_HOME/profiles/<name>. The web profile powers the Web UI, headless powers the one-shot runner, and other profiles can represent custom stacks for CI, server harnesses, or specialized agents.
Bundles
A bundle is an npm-style package that carries its own Cordis patch manifest via a dsh.bundle field in package.json. Bundles add capabilities—tools, UI components, session behavior—to a profile as layers, and the order of layers determines which patches win when they overlap.
Seams
A seam defines a swappable capability through three roles: a service definition, a provider implementation, and consumers that use it. Sandbox, LLM routing, sessions, and tools are all built as seams, letting you swap the implementation (e.g., a different sandbox backend or model provider) without changing consumer code.
Installation: Quick start from npm
The easiest way to try DeepSeek Harness is via npx, which installs and launches the Web UI in one command.
Prerequisites
- Node.js (current LTS recommended) installed on your system.
- A terminal or shell where you can run
npxcommands.
One-command Web UI start
npx @deepseek-ai/dsh webThis command downloads the @deepseek-ai/dsh package, composes the web profile’s plugin tree, and starts the Web UI server on http://127.0.0.1:3080 by default. First boot may take longer as dependencies are fetched and built.
Once boot completes, open your browser and visit:
http://127.0.0.1:3080You should see the DeepSeek Harness Web UI, with controls for sessions, workspaces, and model configuration.
For a visual overview of the architecture and plugin-based design, see the DeepSeek Harness architecture reference:
Installation: Running DeepSeek Harness from source
If you want full control over the codebase or plan to contribute, you can clone and run the repository directly.
Clone and build
git clone https://github.com/deepseek-ai/deepseek-harness.git
cd deepseek-harness
pnpm install
pnpm run build
pnpm dsh web
This sequence clones the repo, installs workspace dependencies via pnpm, builds the packages, and starts the web profile. As with the npm quick start, the Web UI is served at http://127.0.0.1:3080 by default.
When running from source, you can edit plugins, Cordis patches, and configuration files, then rebuild or hot-swap bundles as you iterate.
For official repository details, see:
First steps in the Web UI
Once the Web UI is running, you need to configure a model and choose a workspace before running meaningful tasks.
Step 1: Configure a model provider
- Open Settings → Models in the Web UI.
- Select a provider (e.g., DeepSeek) and paste your API key.
- Save the configuration; the route becomes usable immediately—no server restart required.
If a route shows MISSING_CREDENTIAL, reopen the provider card and re-enter the key.
Step 2: Choose a workspace
- Click Choose workspace in the UI.
- Select the project directory you want the agent to operate on (e.g., a local repo for your application).
- Confirm; the session composer activates once a workspace is selected.
The harness uses the workspace as the file system context, letting agents read and modify project files, run commands, and maintain logs under a sandbox and approval policy.
Running your first agent task
With a model and workspace configured, you can start a session and run a task.
A simple first prompt:
“Summarize this repository and identify its main packages.”The agent reads the workspace, builds a system prompt + tools + history bundle, routes the request through the configured LLM provider, and writes results back into the session log. The Web UI then renders the conversation, including tool calls, file edits, and approvals requested by the sandbox policy.
From here you can:
- Ask the agent to refactor code, fix tests, or generate documentation.
- Build GEO-friendly content using repo context, so your articles or docs stay aligned with actual source code.
- Chain tasks across sessions while keeping a long-lived, searchable log of actions.
Plugin ecosystem: Extending DeepSeek Harness
DeepSeek Harness ships with a kernel of @deepseek-ai/* packages and supports a growing ecosystem of community plugins tagged with dsh-plugin.
You can browse plugins and install new capabilities via:
- The official plugin registry:
- GitHub repositories tagged with the
dsh-plugintopic.
Plugins cover areas like:
- Vision bridges that route images to vision-capable models and feed text back to text-only routes.
- JSON-RPC servers that let external SDK clients drive harness agents.
- Additional tool sets, workflow engines, and storage backends.
Installing a bundle plugin generally involves a command like:
dsh plugin --profile web add "github:owner/repo"Followed by a profile restart (e.g., re-running dsh web) to load the new stack.