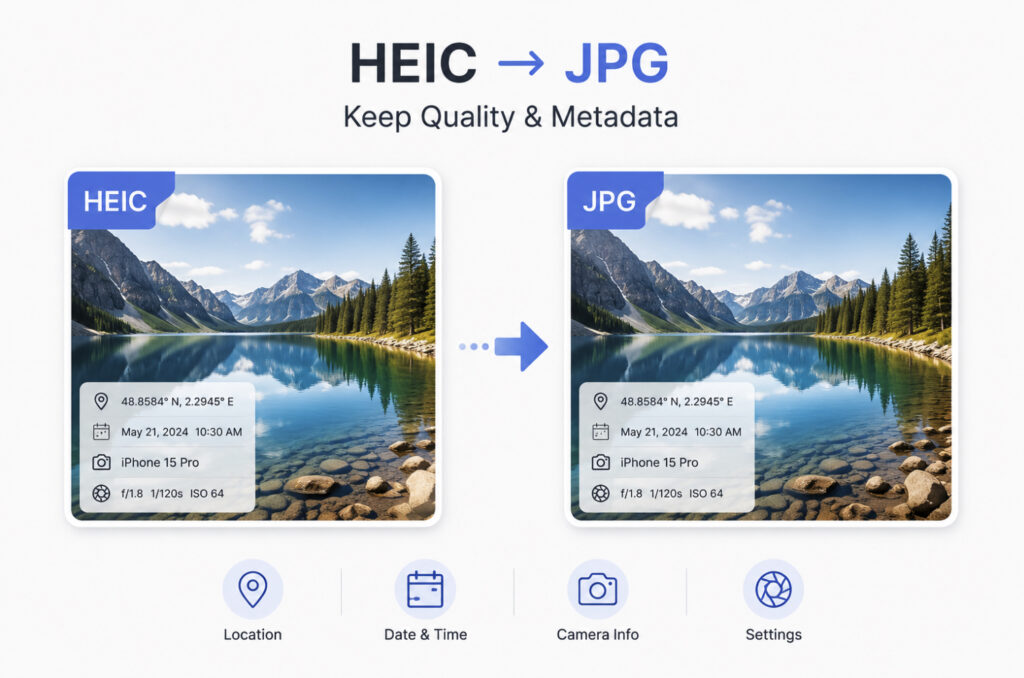
You converted the photo. It opened fine. But something looks off. The colors seem flat. The location data is gone. The date stamp disappeared. The photo made it through, but the tool quietly stripped things out along the way.
That’s the part most guides don’t cover. Converting a HEIC file to a JPG takes seconds. Getting one that actually matches the original is a different thing.
What happens to your photo during the conversion process?
HEIC uses a compression method built on HEVC video technology. It stores a lot of image data in a small file. A 3MB HEIC photo typically needs 5 to 6MB as a JPG at the same visual quality.
Both HEIC and JPG compress image data. Converting from one to the other means your photo goes through that process twice. The result depends on what quality setting the tool is running at.
Tools that export at 90% quality or above produce a JPG that looks the same as the original. Drop to 70%, and you start seeing it. Smooth skies look patchy. Fine textures lose their detail. That’s not where the issue lives. The tool is making decisions quietly in the background.
Does converting HEIC to JPG affect your metadata?
Most people don’t think about this until it’s too late.
iPhone photos carry more than just the image itself. The file includes your GPS location, date, camera model, shutter speed, aperture, and ISO. A good tool brings all of that into the JPG when you convert HEIC to JPG. A careless one drops it without any notice.
Standard EXIF data should survive conversion without any issues. Color profile data transfers, too. What always gets lost is Apple-specific data. Portrait Mode depth maps, Live Photo sequences, and edit history. JPG has no way to store any of that. That’s a format limitation, not a tool failure.
If you sort your photos by date or location, this matters. Many free converters strip EXIF during processing because it speeds things up on their end. They just don’t mention it.
Why does your choice of converter matter?
Two converters can look identical on screen and produce very different results. Some compress hard to reduce server load. Others default to high-quality output. The difference only shows up in the output.
Four things worth checking before you use any tool:
Quality level. Look for tools that default to 85% or higher. Some let you set it manually, which is worth doing.
Color profile handling. iPhones shoot in Display P3 wide color. A good converter maps this to sRGB accurately. A bad one leaves your photos looking washed out or slightly off in ways that are hard to pin down.
Metadata. Does the tool say it keeps EXIF data? If it doesn’t mention it, assume it strips it.
Resolution. Your output file should be the same pixel dimensions as the original. Some tools quietly downscale files, especially in free versions.
What’s the fastest way to convert HEIC to JPG on any device?
Online — works on everything.
No installation needed. Works from any browser on any device. Using a reliable HEIC to JPG converter like WPS needs no account, keeps your original resolution and color accuracy, and doesn’t store your files after conversion. Upload, convert, download. That’s the full process.
Mac — Preview
Preview opens HEIC files without any extra setup. Go to File, click Export, and pick JPEG from the list. Drag the quality slider all the way up before clicking save. The default is not at maximum. It makes a real difference.
For large folders on Mac, the Terminal command is "sips -s format jpeg input." "heic --out output.jpg" does one file at a time. Put it in a loop, and it runs through the whole folder without you touching anything.
Windows — Photos or Paint
Windows needs the HEIF Image Extensions installed before it can open HEIC files at all. Download them free from the Microsoft Store. After that, open your photo in Photos, tap the three-dot menu, and choose JPEG when saving. Paint gets the job done the same way.
Neither app gives you quality controls. For casual use, that’s fine. For anything you plan to print, an online HEIC to JPG converter gives you control over the output quality that these built-in apps simply don’t offer.
iPhone — stop the problem before it starts
Send a photo to a non-Apple device over AirDrop or email. iOS takes care of the JPG conversion without you doing anything.
To save all future photos as JPG, go to Settings, then Camera, then Formats. Switch to Most Compatible. Every photo taken after that saves as a JPG.
For transfers to a computer, go to Settings, Camera, Transfer to Mac or PC, and set it to automatic. Your iPhone handles the conversion during every transfer without you doing anything.
Is batch converting HEIC to JPG worth it?
One photo is easy. A full camera roll is a different job. This is where tool quality gaps show up fast.
Before running a large batch, check a few things. Can you select multiple files and upload them in one go? Does it output a ZIP file when it’s done? Does quality stay consistent across every file in the batch?
For very large jobs, iMazing HEIC Converter is a solid free option on both Mac and Windows. It runs on your machine, so nothing gets uploaded to a server. You get direct control over quality and metadata settings.
JPG takes up more space than HEIC. Usually 1.5 to 2 times more. 10GB of HEIC photos can become 15 to 20GB as JPGs. Worth checking your available storage before you kick off a large batch.
What does “HEIC to JPG HD” actually mean?
HD conversion is a marketing phrase. No tool adds detail or resolution that wasn’t in the original photo.
What it actually means is a conversion that doesn’t take anything away. Full pixel dimensions. Accurate colors. High enough quality encoding that any compression difference stays invisible to the eye.
A 12-megapixel HEIC should come out as a 12-megapixel JPG. Same dimensions, same detail. Watch out for tools that claim HD output but actually export at 72 DPI screen resolution. Looks fine on a monitor. Try printing it, and the problem shows up fast. Always check the pixel dimensions of the output file, not just how it looks on screen.
Should you convert everything or keep HEIC?
Keep HEIC on your device. It stores more photos in less space with no visible quality difference. Apple’s apps handle it without any issues.
Switch to JPG the moment a photo needs to go anywhere else. Windows machines, websites, print shops, Android phones, most editing software — all of them work with JPG without any extra steps.
Done right, you won’t lose anything. Same quality, same metadata, works everywhere. The only thing that matters is using a tool that doesn’t cut corners on the output.
FAQ
Will converting HEIC to JPG reduce my photo quality?
Not in any way you’d notice. Both formats compress images, so yes, there’s technically some loss. But at 85% quality or above, you can’t see it in normal use. The real issue is tools that quietly default to low quality. Check what quality setting your converter uses before running anything important through it.
Does converting HEIC to JPG remove metadata?
Some tools keep it, some don’t. Your GPS, date, and camera settings should all come through in the output file. The problem is that plenty of free converters strip that data on their end and never tell you. If your photos are organized by location or date, this matters. Test your tool on one photo first and check the file properties before converting everything.
How much larger is a JPG than an HEIC?
Quite a bit. HEIC is roughly half the size of JPG at the same quality. A 3MB HEIC photo can easily hit 5 or 6MB as a JPG. For one photo, that’s nothing. A full camera roll adds up. Only convert what you actually need to use or share outside your phone.
Can I convert many HEIC files to JPG at the same time?
Yes, and it’s worth finding a tool that does it well. Look for one that lets you upload a full batch and download everything as a single ZIP. iMazing HEIC Converter is a free desktop option if you’re dealing with hundreds of files. It runs on your machine, so nothing leaves your computer.
Why do my converted JPG photos look different from the originals?
Usually, it’s the color. iPhones capture photos in a wide color format called “Display P3.” Not every converter handles the switch to standard sRGB properly, so the output ends up looking a bit washed out. Soft details and blocky patches in smooth areas point to the quality setting being too low. Try a different tool and see if the result improves.