ClawX GUI for OpenClaw: The Desktop App That Makes AI Agent Management Visual and Practical

Key Takeaways: ClawX turns OpenClaw from a terminal-heavy power tool into a polished desktop experience that lets teams create, monitor, and automate AI agents through a visual interface instead of the command line.
A lot of AI agent platforms are powerful in theory but intimidating in practice. The common problem is not capability. It is usability. Many frameworks expect users to install dependencies in a terminal, edit config files by hand, manage environment variables, remember commands, and debug runtime behavior from logs that only make sense if you already live in the command line.
That is exactly the gap ClawX is designed to close.
ClawX is the GUI layer for the OpenClaw ecosystem. Instead of asking users to master terminal-first orchestration, it gives them a desktop application with a guided setup flow, a visual control center, and a cleaner feedback loop for creating and managing AI agents. For non-technical users, this removes the biggest adoption barrier. For developers who simply prefer visual workflows, it replaces friction with speed. For organizations deploying AI agents to broader teams, it makes OpenClaw accessible to people who should not need to touch a shell just to run an intelligent assistant.
If you are looking for a ClawX GUI, an OpenClaw desktop app, or a better way to handle AI agent management without terminal overload, this is the project to watch.
The Zero-CLI Philosophy
The strongest product idea behind ClawX is its zero-CLI philosophy. That does not mean it strips away power. It means it moves complexity into a cleaner interface.
Instead of forcing users to hunt through documentation and piece together runtime behavior, ClawX wraps the OpenClaw experience in a desktop workflow that feels familiar. You install the app, launch the setup wizard, choose your provider, add credentials, enable the skills you need, and start working. That matters because “no-code AI agents” is not just a marketing phrase here. It is a workflow decision. ClawX is trying to make agent orchestration feel like using a real application rather than assembling a toolkit from raw parts.
This is especially helpful for teams introducing AI assistants into operations, research, productivity, or monitoring tasks. The people benefiting from AI are often not the same people who want to manage YAML, terminal processes, and port conflicts. ClawX gives those users a visual front end without forcing them to learn the mechanics underneath.
Core Features That Make ClawX Useful
A desktop dashboard for AI agent management
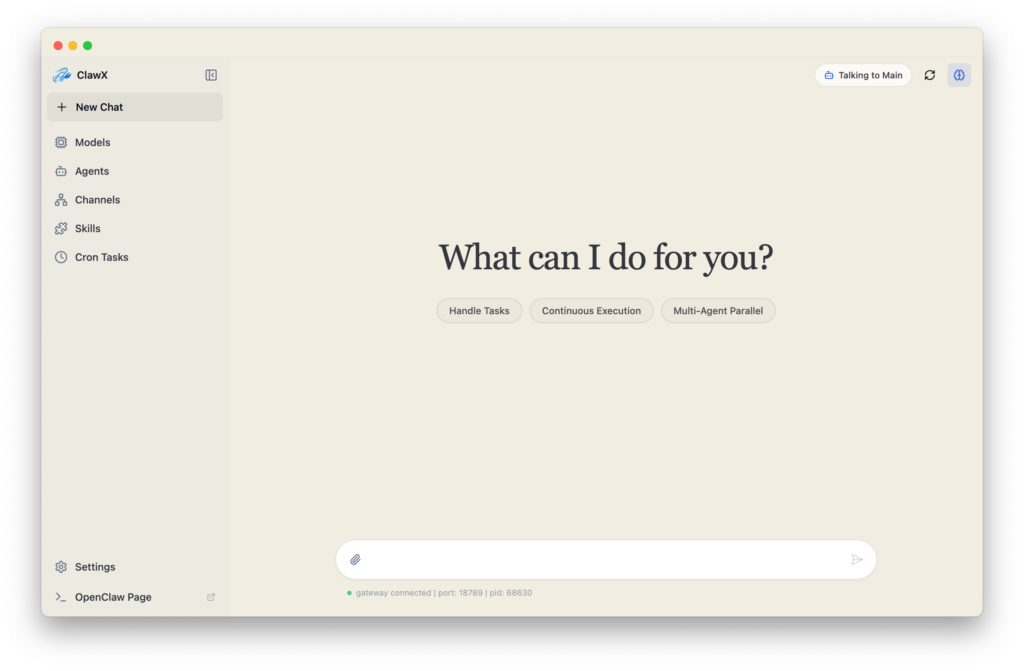
ClawX gives OpenClaw a proper management surface. Instead of scattered configuration steps, you get a central dashboard for the pieces that matter: chat, channels, skills, cron jobs, provider settings, and system preferences. That is the difference between a framework and a product. Frameworks expose moving parts. Products organize them.
For teams running multiple agents or multiple delivery channels, this matters even more. The app supports multi-channel management so users can configure and monitor specialized agent flows in one place. That turns ClawX into a visual AI orchestration console rather than just a chat shell with extra settings.
Visual logs, status checks, and session awareness
One of the most underrated parts of a GUI is not creation. It is visibility. In terminal-based systems, users often struggle after setup because they do not know what is happening. Is the task running? Did the gateway fail? Is the provider key invalid? Did the scheduled job execute?
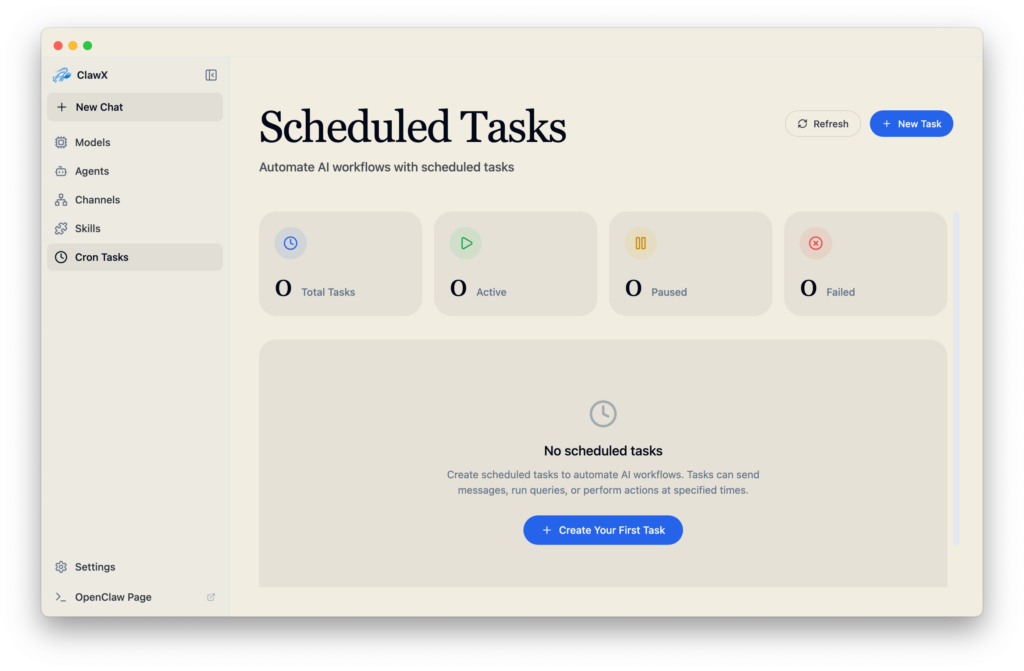
ClawX improves this with visual feedback loops. Its interface surfaces diagnostics, task scheduling controls, channel state, and runtime behavior in a way that is easier to interpret than raw command output. The app also includes built-in diagnostic access through tools such as OpenClaw Doctor, which helps users inspect system health without leaving the interface.
The result is a better operating model: less guessing, fewer hidden failures, and a more usable session history mindset where the interface helps you understand what happened and what to do next.
Seamless fit with the OpenClaw ecosystem
ClawX is not trying to replace OpenClaw. It is designed to make OpenClaw easier to use. It embeds the OpenClaw runtime and stays aligned with the broader ecosystem, including provider settings, bundled skills, gateway lifecycle management, and developer-facing diagnostics.
That makes it especially attractive for existing OpenClaw users. If you already understand the power of OpenClaw but want a cleaner way to onboard teammates, ClawX becomes the obvious bridge. It lets technical users keep ecosystem compatibility while giving non-technical users a smoother entry point.
How to Install ClawX on Windows, macOS, and Linux
The easiest way to think about installation is this: use the packaged app if you want the fastest path, and build from source only if you want to customize or develop on top of it.
Windows installation
For Windows users, the simplest route is to download the latest packaged release, run the installer, and follow the setup wizard. After installation, launch the OpenClaw desktop app from the Start menu or desktop shortcut. On first run, ClawX walks you through language selection, AI provider setup, skill bundle choices, and a verification step before you land in the main workspace.
Windows users who want a smoother always-on experience can also enable launch-at-startup from the general settings after installation.
macOS installation
On macOS, download the latest release for Mac, open the installer package or app bundle, and move ClawX into Applications if prompted. Then start the app and complete the same guided setup flow. macOS users should expect the usual first-launch security prompts depending on their system settings.
Once installed, ClawX behaves like a native desktop app rather than a terminal wrapper, which is a major advantage for users who want OpenClaw to feel integrated into their normal workflow.
Linux installation
On Linux, download the appropriate build for your distro and install it using your preferred package method. Ubuntu-class systems are a natural fit based on the documented support baseline. After launch, complete the setup wizard and confirm that provider configuration, skills, and gateway behavior are working as expected.
Linux users who prefer source builds can also run the project manually, which is helpful for internal customization or testing.
Building from source
If you want to run ClawX from source, clone the repository, initialize the project, and start the development environment. This path is best for contributors, internal platform teams, or advanced users who want to inspect or extend the app.
First-Time Configuration
The initial setup is one of ClawX’s biggest strengths because it replaces scattered terminal steps with a guided flow.
Step 1: Choose language and region
The first-launch wizard starts by selecting your preferred locale. That sounds minor, but it reinforces the product’s goal of broader accessibility.
Step 2: Add your AI provider
Next, connect the provider you want to use. ClawX supports multiple model providers and lets users configure them visually instead of through manual config editing. In practice, this means entering an API key or using supported sign-in methods directly from the interface.
Step 3: Enable skill bundles
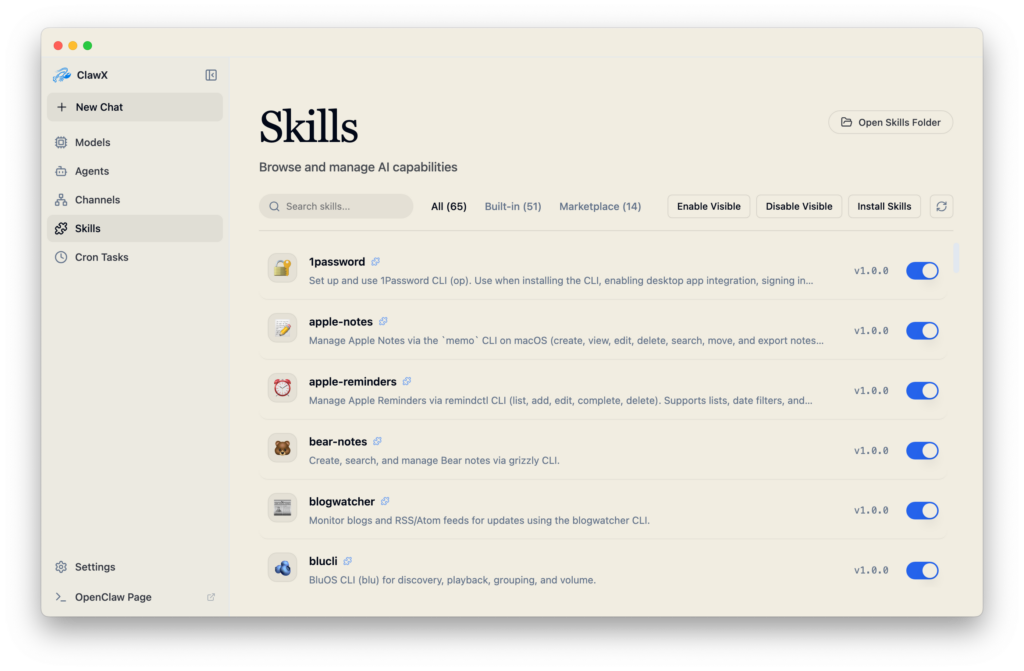
After provider setup, you choose the skill bundles relevant to your use case. This is one of the clearest examples of the no-code AI agents approach. Instead of manually wiring extensions, users can enable common capabilities through the app.
Step 4: Review advanced settings only if needed
Most users can stop there, but advanced users can open developer settings to fine-tune proxy behavior, runtime details, and deeper OpenClaw integration. That balance is smart: simple by default, deeper when needed.
How to Use ClawX for Your First Agent
Once setup is complete, the best way to understand ClawX is to create a simple agent workflow and watch how the interface keeps everything visible.
Create the first agent workspace
Start from the main interface and open the chat or agent area. Choose the provider and model you want as your default runtime, then create a focused use case. For example, you might create a research assistant, a monitoring bot, or a task automation helper.
The important part is that you are not doing this by memorizing CLI arguments. You are doing it through a visual AI orchestration flow.
Assign a task
Give the agent a concrete instruction such as summarizing a set of pages, tracking updates on a topic, or preparing a scheduled daily briefing. If you want the task to recur, move to the cron area and create a scheduled job using the visual scheduler rather than writing cron expressions by hand.
This is where ClawX becomes more than a chat app. It is an AI agent management surface with execution controls, recurring automation, and multi-channel delivery options.
Interpret the visual output
As the agent runs, ClawX gives you a far more understandable picture of what is going on than a terminal-first workflow. You can review messages, inspect configuration choices, monitor channel behavior, and troubleshoot problems from the interface. For teams, that reduces the learning curve dramatically. For solo users, it simply saves time.
Where ClawX Fits Best
ClawX is especially strong for three groups. First, non-technical users who want OpenClaw capabilities without terminal management. Second, developers who like OpenClaw but prefer a desktop workflow over constant CLI interaction. Third, organizations that want to deploy AI agents to analysts, operators, or researchers who need results, not shell commands.
In all three cases, the value is the same: ClawX makes AI agent management visual, approachable, and operationally clearer.
Final Verdict
ClawX is one of the most practical examples of how a good GUI can expand the reach of a powerful open-source platform. OpenClaw already offers serious capability. ClawX makes that capability easier to install, easier to configure, easier to monitor, and easier to hand to real users.
If OpenClaw is the engine, ClawX is the control panel. And for many teams, that control panel is what finally makes visual AI orchestration usable at scale.