CoPaw: Deploying your secure personal AI assistant anywhere

CoPaw is the missing bridge between full data ownership and powerful, agentic AI that can run across all your channels on infrastructure you control.
Understanding CoPaw as a personal AI assistant workstation
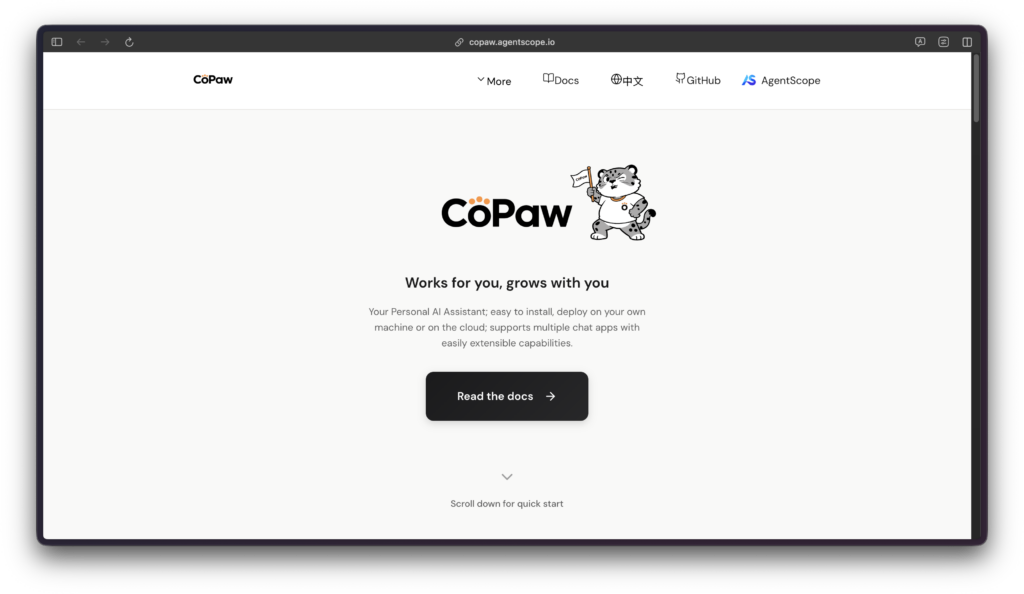
CoPaw, short for “Co Personal Agent Workstation,” is an open‑source personal AI assistant built on the AgentScope framework, designed to run as a persistent, multi‑channel agent rather than a one‑off chatbot. Instead of being tied to a hosted SaaS, you install CoPaw from its official GitHub repository and operate it locally or in your own cloud, keeping prompts, memories, and autom automations under your control.
The project positions itself as a “Personal AI Assistant Workstation” that lives where you work—DingTalk, Feishu, QQ, Discord, iMessage, Telegram, and a web Console—so the same agent can follow you across channels while sharing a unified memory and configuration. This omnichannel stance, combined with local‑first deployment and the ReMe memory engine, makes CoPaw particularly attractive for privacy‑sensitive users, developers, and teams that want a self‑hosted agentic stack.
Core architecture and capabilities
Built on AgentScope and a unified LLM API
CoPaw is built on the AgentScope ecosystem, which provides a production‑ready, developer‑centric framework for defining agents, tools, and multi‑agent communication. AgentScope exposes a unified model abstraction so the same agent logic can target different providers such as OpenAI, DashScope, Anthropic, and OpenAI‑compatible backends like vLLM without rewriting tools or prompts.
This effectively gives CoPaw a “Unified LLM API”: models from cloud providers and self‑hosted inference (including vLLM endpoints or Ollama) can be swapped behind a consistent interface, which is exposed both in the CLI (copaw models) and in the web Console.
ReMe memory for long‑term context
At the heart of CoPaw’s memory strategy is ReMe (“Remember Me, Refine Me”), an AgentScope‑aligned memory management kit that gives agents durable, structured memories instead of ad‑hoc conversation logs. ReMe combines file‑based and vector‑based storage so CoPaw can remember facts, tasks, and prior decisions across sessions, and it includes compaction strategies to keep context windows efficient as histories grow.
Compared to traditional chatbots that lose state after a session or truncate early messages, this architecture lets your personal assistant accumulate experience over time and reuse it for personalization, recurring workflows, and research tasks.
Built‑in cron scheduling and heartbeat
CoPaw includes a heartbeat system and cron‑like scheduler so your agent can run tasks autonomously without being prompted from a chat window. Through the Console, you can define jobs that run on cron expressions, targeting any configured channel for delivery (Console, DingTalk, Discord, etc.), with controls for concurrency, timeout, and misfire grace time.
This turns CoPaw into a real “workstation” for background automations—daily digests, nightly file processing, recurring system checks—rather than just a reactive Q&A interface.
Omnichannel console and multi‑workspace agents
CoPaw ships with a browser‑based Console for chatting, configuring channels, managing jobs, and tuning the agent’s persona and runtime settings. Release notes highlight a multi‑agent, multi‑workspace architecture: you can run multiple agents simultaneously, each with its own isolated config, memory, skills, and tools, and switch between them from the Console.
This layout is ideal if you want a separate “research agent,” “devops agent,” and “personal life admin agent” sharing infrastructure but keeping data and skills scoped appropriately.
Installing CoPaw on a local machine
Local prerequisites
For a standard self‑hosted deployment, plan on the following baseline requirements:
- Python 3.10 or newer for running the CoPaw runtime and AgentScope stack.
uv, the modern Python package and environment manager used by CoPaw’s one‑line installer and many official examples.- Node.js (18+) only if you plan to build the web Console from source or run MCP servers via
npx; it is not required for a typical pip‑ or script‑based install.
CoPaw supports macOS, Linux, and Windows (CMD/PowerShell) with first‑class documentation for each platform.
One‑line installer with uv (recommended)
The quickest way to get CoPaw running locally is the official one‑line installer, which handles uv, the virtual environment, and dependency bootstrapping for you.
On macOS or Linux:
curl -fsSL https://copaw.agentscope.io/install.sh | bashOn Windows PowerShell:
irm https://copaw.agentscope.io/install.ps1 | iexBehind the scenes, the script installs CoPaw into a dedicated directory (typically under ~/.copaw), creates an isolated virtual environment with uv, and pulls all required Python dependencies. After it completes, you can immediately proceed to copaw init and copaw app as described below.
Installing via pip (manual but explicit)
If you prefer to manage environments yourself—or are installing CoPaw on a server or into an existing Python stack—you can install from PyPI.
On any platform:
# Optional but recommended: create a virtual environment
python -m venv .venv
source .venv/bin/activate  # PowerShell: .venv\Scripts\Activate.ps1

# Install CoPaw
pip install copaw
This installs the copaw CLI entry point, which you can verify with copaw --version. For users who standardize on uv, the equivalent pattern is:
uv venv --seed
uv pip install --prerelease=allow copaw
as shown in issue reports and docs.
First‑time init and launching the Console
Once CoPaw is installed (via script or pip), the next steps are initialization and starting the app server.
1. Initialize configuration and workspace:
copaw init          # interactive wizard: models, keys, channels
# or
copaw init --defaults   # non‑interactive, sensible defaults
This generates configuration files (such as config.json and heartbeat state) under the workspace directory (commonly ~/.copaw/).
2. Start the CoPaw app server:
copaw app
# or, to bind on all interfaces:
copaw app --host 0.0.0.0
By default, CoPaw binds to 127.0.0.1:8088, exposing the web Console on that port.
3. Open the Console in your browser at:
http://127.0.0.1:8088/if running locally.http://<server-ip>:8088/if you bound to0.0.0.0and are accessing from another machine.
From here, you can converse with the agent, configure models and channels, and manage skills and jobs without touching configuration files directly.
Deploying CoPaw in the cloud
Running CoPaw on a VPS or home server
On a Linux VPS (or a powerful home server), the installation pattern mirrors local usage but you typically bind to 0.0.0.0 and front CoPaw with a reverse proxy like Nginx or Caddy. A common sequence is:
- Use the one‑line installer or
pip install copawover SSH. - Run
copaw init --defaultsto generate a baseline config you can refine later. - Start the app with
copaw app --host 0.0.0.0 --port 8088and confirm it’s reachable internally. - Configure Nginx or another proxy to expose
https://your-domain→http://127.0.0.1:8088, adding TLS and any IP‑allow rules appropriate for a private assistant.
Because CoPaw is just a web service with an HTTP API and browser Console, this pattern generalizes to most VPS providers.
Using Docker on managed platforms
The project also publishes an agentscope/copaw:latest Docker image, which simplifies deployment on container‑friendly platforms. A minimal local run looks like:
docker pull agentscope/copaw:latest
docker run -p 127.0.0.1:8088:8088 \
  -v copaw-data:/app/working \
  -v copaw-secrets:/app/working.secret \
  agentscope/copaw:latest
This maps the CoPaw workspace and secrets into named Docker volumes and exposes the Console on port 8088. Once validated locally, you can use the same image and volumes‑pattern on cloud container services (Kubernetes, ECS, etc.), including GPU‑backed nodes if you plan to pair CoPaw with high‑end local models via vLLM pods.
Notes for Alibaba Cloud PAI‑EAS and similar services
On platforms like Alibaba Cloud PAI‑EAS, CoPaw fits naturally as a containerized web service:
- Build or pull the
agentscope/copaw:latestimage into your registry. - Create an inference or web service endpoint pointing to the CoPaw container, exposing port 8088 on a public or VPC‑scoped address.
- Mount persistent storage for
/app/working(config, memory, skills) and/app/working.secret(API keys), ensuring your assistant’s state survives restarts.
This model lets you run CoPaw close to Alibaba’s other AI services while still keeping your configuration, ReMe memory files, and channel credentials within your own cloud account.
Configuring models with the unified LLM API
Setting up DashScope and OpenAI
During copaw init, the wizard walks you through choosing an LLM provider and entering the corresponding API key. Supported cloud providers include OpenAI, DashScope (Alibaba Cloud), and other OpenAI‑compatible services exposed via AgentScope’s unified model abstraction.
At any time you can refine this setup from the Console:
- Navigate to Settings → Models to view and switch providers and base models.
- Use
copaw models listandcopaw models set-llmfrom the CLI when you prefer configuration as code or remote automation.
Keys are typically stored as environment variables (for example, OPENAI_API_KEY, DASHSCOPE_API_KEY) in the CoPaw environment, matching AgentScope’s conventions.
Connecting to Ollama and vLLM pods
For local‑first or air‑gapped deployments, CoPaw supports local model runtimes such as Ollama, llama.cpp, and Apple’s MLX through extras flags and local endpoint configuration. The installer can be invoked with --extras ollama, --extras llamacpp, or --extras mlx to pull in the appropriate integrations, after which models can be managed via copaw models local and related subcommands.
If you deploy vLLM pods on GPU‑backed infrastructure (for example, using a toolkit like pi‑pods to expose OpenAI‑compatible endpoints from vLLM servers), you can point CoPaw’s provider configuration at those endpoints just like any other OpenAI‑style API. This allows you to keep the entire inference path—CoPaw, ReMe memory, and model serving—inside your own cluster while still benefiting from AgentScope’s unified LLM API.
Configuring multiple chat channels
Enabling channels from the Console
Once the app is running, the Console becomes your control plane for multi‑channel messaging. Under the channels section, you can enable or disable integrations like Console chat, DingTalk, Feishu, QQ, Discord, iMessage, and others, each with its own credential form.
The documentation lists the required fields per channel—for example, Discord requires a bot token (and optional HTTP proxy settings), Feishu expects App ID, App Secret, and verification tokens, and iMessage needs a database path and polling interval. CoPaw downloads and normalizes incoming media (for many channels) into a local ~/.copaw/media/ directory so that the LLM sees stable file:// URLs rather than brittle CDN links.
Telegram and Discord setup workflow
While Telegram is still evolving, official release notes and community guides describe a straightforward configuration loop:
- Create a bot via BotFather (Telegram) or a bot application in the Discord Developer Portal.
- Copy the token into the relevant channel configuration in the CoPaw Console or follow the interactive
copaw channels addflow. - Optionally configure HTTP proxy and typing indicators when running behind corporate networks or on remote servers.
- Save and test by sending a message from the chat app; the conversation should appear as a new session in the Console.
From this point, your one CoPaw agent can respond from both Telegram and Discord while sharing the same ReMe memory and skillset.
Extending CoPaw with skills
How the skill system works
Skills are CoPaw’s mechanism for giving the agent “hands” in the real world: Python‑based tools that can call APIs, operate on your filesystem, or orchestrate external workflows. The project ships with a growing set of built‑in skills (including a guidance skill that can answer CoPaw configuration questions, search tools like glob_search and grep_search, and heartbeat jobs), and it automatically loads custom skills placed in the agent’s workspace.
In practice, you drop Python modules into the workspace’s skills directory (for example under ~/.copaw/skills/), following CoPaw’s tool/skill conventions from the docs. At startup, CoPaw discovers these scripts, registers them as tools the agent can call, and exposes toggles in the Console so you can enable or disable them per agent or workspace.
Designing safe, cron‑enabled automations
Because skills and cron jobs intersect, you can pair CoPaw’s scheduler with skills that perform concrete actions—sending digests, rotating logs, syncing knowledge bases, or querying internal APIs—on a schedule. For example:
- A “morning briefing” skill that compiles overnight metrics and delivers a summary to a private Discord channel at 08:00 every day.
- A “nightly self‑improvement” skill that reviews the day’s interactions, updates ReMe knowledge files, and optimizes prompts or routing based on outcomes.
Given the power of arbitrary Python execution, CoPaw ships with a security subsystem (including tooling guards and dangerous command lists) and recommends careful scoping of skills and environment variables, especially when exposing the Console over the internet.
Final thoughts for private, omnichannel AI
CoPaw’s combination of AgentScope foundations, ReMe memory, unified LLM API, skills, and built‑in cron scheduling makes it a strong candidate if you want a self‑hosted, omnichannel personal AI assistant that feels more like an operating system for agents than a chat wrapper. With straightforward installation paths (one‑line installer, pip, Docker), a browser Console, and clear abstractions around channels and skills, you can start locally and later scale to cloud deployments or GPU‑backed vLLM pods without rewriting your workflows.